Dinner · Part 2 of 3: Instructions
Crockpot Provolone Pepperoni Sausage Spinach Tortellini: Dump-and-Go Slow Cooker Pasta Step-by-step instructions
- Prep
- Cook
- Total
- Serves
- 6
Before you start
Before starting, remove the Italian sausage from its casings and crumble it into small pieces. Slice the cremini mushrooms if they are not pre-sliced. Measure out the Alfredo sauce, ricotta, and shredded provolone.
Have all the ingredients ready at the counter. No need to pre-cook anything—the slow cooker will handle it all. If using a slow cooker liner, place it in the insert for easy cleanup.
Ingredients at a glance (7)
- 4 oz thick-cut cup-and-char pepperoni
- 1 lb Italian sausage, casings removed
- 20 oz refrigerated spinach-and-cheese tortellini
- 8 oz cremini mushrooms, sliced
- 15 oz Alfredo sauce
- 1 cup whole-milk ricotta cheese
- 2 cups shredded provolone cheese
Instructions
Layer the Base
- Layer the Meat and TortelliniPlace the pepperoni slices and Italian sausage crumbles in the bottom of a 6-quart slow cooker. Break up the sausage with a spoon so it cooks evenly. Add the spinach tortellini and sliced cremini mushrooms on top, spreading them into an even layer.Look for The meat and tortellini should be evenly distributed across the bottom.Safe temperature 160°F (71°C) internal temperature (ground meat)Tip If using sausage links, remove the casings and crumble the meat directly into the slow cooker.
- Pour the Alfredo SaucePour the Alfredo sauce over the meat, tortellini, and mushrooms. Use a spatula to gently press the ingredients down so they are mostly submerged in the sauce. Spread the sauce evenly to coat the top.Look for The sauce should cover most of the dry ingredients.Tip For extra creaminess, stir in a splash of milk or chicken broth if the sauce seems thick.
The bottom of the slow cooker is filled with a savory layer of pepperoni, sausage, tortellini, and mushrooms. The Alfredo sauce is poured over, coating the ingredients evenly.
The ricotta dollops and provolone are added on top, creating a beautiful white and yellow surface. The slow cooker is ready to be turned on, and the layers are distinct and colorful.
Slow Cook to Perfection
- Add Ricotta DollopsSpoon dollops of whole-milk ricotta cheese over the sauce, spacing them evenly around the surface. Do not stir; the ricotta will melt and create creamy pockets during cooking.Look for Evenly spaced ricotta dollops on top of the sauce.Tip Use a cookie scoop for uniform dollops that melt evenly.
- Top with ProvoloneSprinkle the shredded provolone cheese evenly over the entire surface, covering the ricotta dollops and the sauce. The cheese will melt and form a golden, bubbly crust as it cooks.Look for The provolone completely covers the top of the mixture.Tip For a browned top, switch the slow cooker to high for the last 15 minutes if your model allows.
After a few hours, the kitchen fills with the aroma of garlic, herbs, and melting cheese. The sauce is bubbling gently around the edges, and the cheese on top is melted and starting to brown slightly. The sausage is cooked through, and the tortellini are tender. The entire dish looks creamy and inviting, with pockets of ricotta visible in the sauce.
Serve and Savor
- Slow Cook Until BubblingCover the slow cooker and cook on low for 4 to 5 hours, or on high for 2 to 3 hours, until the sausage is fully cooked and the tortellini are tender. The mixture should be bubbling around the edges and the cheese melted and gooey. Do not stir during cooking to keep the layers intact.Look for The sauce is bubbling and the cheese is fully melted and slightly golden at the edges.Safe temperature 160°F (71°C) internal temperature (ground meat)Tip Check the sausage at the thickest part; it should register 160°F (71°C) on an instant-read thermometer.
- Serve and EnjoyTurn off the slow cooker. Let the pasta bake rest for 5 minutes before serving. Spoon the creamy pasta onto plates or bowls, making sure to get some of the melted cheese from the top. Serve hot.Look for The pasta is creamy and the cheese is stretchy.Tip Garnish with fresh parsley or basil if desired, though the video does not show it.
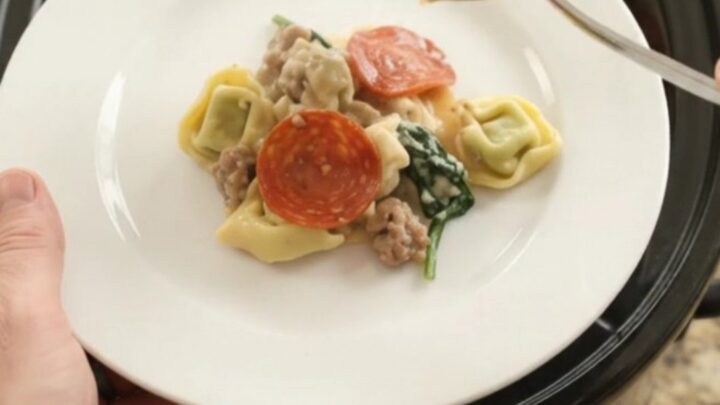
The slow cooker is turned off, and the pasta bake rests for a few minutes. When spooned onto plates, the tortellini are coated in a rich, creamy sauce, with pieces of pepperoni and sausage throughout. The provolone stretches as you lift the spoon, and the ricotta has melted into the sauce, adding a subtle tang. Each bite is warm, cheesy, and satisfying.
Common mistakes
Avoid lifting the lid during cooking, as this releases heat and extends the cooking time. Do not stir the mixture, as this will break up the tortellini and blend the layers, losing the distinct textures.
If the sauce seems too thin at the end, let it cook uncovered for an additional 15–20 minutes to thicken. Overcooking can make the tortellini mushy, so check for doneness at the earliest time.
How to tell it’s done
The dish is done when the sausage is fully cooked and the tortellini are tender. The internal temperature of the sausage should reach at least 160°F (71°C) on an instant-read thermometer.
The sauce should be bubbling around the edges, and the cheese on top should be completely melted and slightly golden in spots. Let the pasta bake rest for 5 minutes before serving to allow the sauce to settle and the cheese to set slightly.
- Ground meat: 160°F (71°C) in the thickest part
Up next · Part 3 of 3
4 variations · storage & make-ahead · 5 answers · printable card
Tips, FAQ & printable recipe (Part 3)← Back to the ingredients (Part 1)