Dinner · Part 2 of 3: Instructions
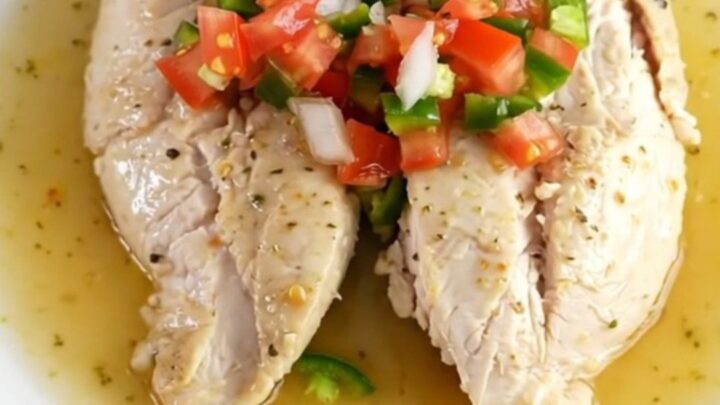
Easy Crockpot Pico de Gallo Chicken for a Simple Dinner Step-by-step instructions
- Prep
- Cook
- Total
- Serves
- 4
Before you start
Before beginning, ensure that all chicken is fully thawed if previously frozen. Have the pico de gallo prepared or purchased, and measure out the spices and liquids to ensure a smooth assembly process.
Clear a space on the counter for the slow cooker and ensure it is plugged into a safe, dry outlet away from water sources. Having all components organized nearby will make the assembly process efficient and straightforward.
Ingredients at a glance (6)
- 4 boneless skinless chicken breasts
- 2 cups pico de gallo
- 1 tsp ground cumin
- 1 tsp garlic powder
- 1/4 cup fresh lime juice
- 1/2 cup chicken broth
Instructions
Assembling the Slow Cooker
- Prepare the ChickenPlace the four boneless skinless chicken breasts into the base of the slow cooker, ensuring they are arranged in a single layer for even cooking throughout the process.Look for Chicken should be arranged flat.Tip Pat the chicken dry with paper towels before placing it in the cooker.
At the end of this phase, the chicken should be neatly arranged in the bottom of the slow cooker. The ingredients should be layered carefully, ensuring the chicken is not overcrowded. Check that the slow cooker is placed on a level, heat-resistant surface and that the lid fits securely, as a tight seal is necessary to maintain the environment for the slow-cooking process.
Adding Aromatics and Liquid
- Add Aromatics and LiquidsTop the chicken with the diced pico de gallo. Sprinkle the ground cumin and garlic powder evenly over the mixture. Pour the fresh lime juice and chicken broth over the top of the ingredients.Look for Liquids should cover the base of the cooker.Tip Ensure the spices are distributed evenly across the chicken breasts.
Once the pico de gallo, spices, and liquids have been added, the slow cooker should look vibrant and well-distributed. Ensure that the chicken is partially submerged in the liquid mixture. The aroma of the cumin and fresh lime juice should be noticeable as you prepare to close the lid. Verify that all ingredients are contained within the crock to prevent any spills during the cooking cycle.
Cooking and Resting
- Slow Cook and ServeCover the slow cooker and cook on low for 4 hours until the chicken is fully cooked through. Check that the internal temperature reaches 165°F (74°C). Allow the chicken to rest for 5 minutes before serving to ensure it remains moist and tender.Look for Chicken is opaque and tender.Safe temperature 165°F (74°C) internal temperature (poultry)Tip Use a meat thermometer to confirm the correct internal temperature.
After four hours, the chicken should be tender, succulent, and infused with the flavors of the pico de gallo. The cooking liquid will have combined with the juices from the chicken to form a light, flavorful broth.
Once the safe internal temperature of 165°F (74°C) is confirmed, allow the meat to rest on a plate for five minutes before serving to ensure the best texture and moisture retention.
Common mistakes
A common mistake is using chicken breasts that are too thin, which can lead to overcooking and a dry texture. Another error is failing to allow the chicken to rest after cooking; resting is essential for the juices to redistribute throughout the meat.
Additionally, ensure the lid remains securely on the slow cooker throughout the cooking cycle; opening the lid repeatedly causes significant heat loss, which can lead to uneven cooking and extended times.
How to tell it’s done
The chicken is perfectly done when it is opaque throughout and pulls apart easily with a fork. Using a digital meat thermometer is the most reliable way to check for doneness; insert the probe into the thickest part of the breast.
The internal temperature must reach 165°F (74°C) to ensure it is safe to eat. Once this temperature is reached, remove the chicken from the heat source and allow it to rest for at least 5 minutes before serving.
- Poultry: 165°F (74°C) in the thickest part
Up next · Part 3 of 3
2 variations · storage & make-ahead · 3 answers · printable card
Tips, FAQ & printable recipe (Part 3)← Back to the ingredients (Part 1)