Dinner · Part 1 of 3: Ingredients
Crockpot Parmesan Kielbasa Baked Ziti: Dump and Forget
- Prep
- Cook
- Total
- Serves
- 6
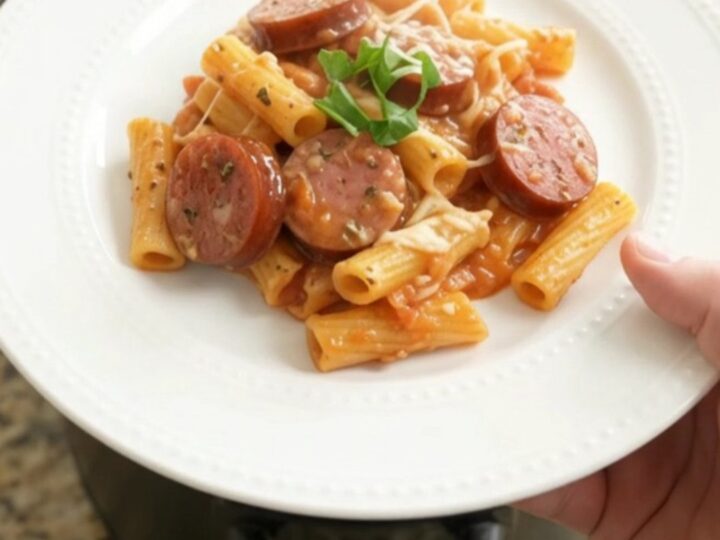
This Crockpot Parmesan Kielbasa Baked Ziti is the definition of a set-it-and-forget-it dinner. Smoked kielbasa, ziti pasta, marinara, and a mountain of Italian cheeses are layered into the slow cooker, then left to bubble into a caramelized, cheesy pasta bake.
The result is a hearty, savory dish that tastes like it simmered all day—because it did. Perfect for busy weeknights when you want a comforting meal without standing over the stove.
A true dump-and-go meal, this slow cooker baked ziti brings together the smoky richness of kielbasa with the classic comfort of baked pasta. The ingredients are simply layered in the Crockpot—no pre-cooking, no stirring—and after a few hours on low, you're rewarded with a bubbling, golden-topped casserole.
The kielbasa caramelizes at the edges, the ziti absorbs the herb-flecked marinara, and the cheeses melt into a stretchy, savory crust. Serve it straight from the pot for an effortless family dinner that feels special.
Ingredients
- 2 lb smoked kielbasa, sliced into 1/2-inch rounds
- 1 lb ziti pasta
- 4 cups sweet basil marinara sauce
- 2 tsp Italian herb seasoning
- 2 cups shredded Italian four-cheese blend
- 1 cup freshly grated Parmigiano-Reggiano
Why this recipe works
The slow cooker does all the work here, transforming simple ingredients into a deeply flavorful pasta bake. The low, steady heat allows the marinara to meld with the smoky kielbasa, while the pasta cooks gently in the sauce, absorbing flavor without turning mushy. The cheese melts slowly, creating a golden, slightly caramelized crust that adds texture and richness.
Because the ingredients are layered and not stirred, each component keeps its identity: the kielbasa develops a slightly crisp edge, the ziti stays al dente, and the cheese forms a satisfying top layer. This method also means minimal cleanup—no extra pots or pans, just one Crockpot and a spoon.
Notes and substitutions
For the best results, use a good-quality marinara sauce with basil—it's the backbone of the dish. The smoked kielbasa is already fully cooked, so it only needs time to warm through and caramelize.
If you prefer a bit more heat, use a spicy marinara or add a pinch of red pepper flakes. You can also swap the ziti for penne or rigatoni, which hold up well in the slow cooker.
The cheese blend is key: a mix of mozzarella, provolone, and Parmesan gives the perfect stretch and flavor. Freshly grated Parmesan is worth the extra effort, as it melts more smoothly.
If you don't have a four-cheese blend, use a combination of shredded mozzarella and provolone. Avoid pre-shredded cheeses with anti-caking agents, as they can make the sauce gritty.
- smoked kielbasa: Use smoked turkey kielbasa or a plant-based smoked sausage for a different flavor, but the cooking time stays the same.
- ziti pasta: Penne, rigatoni, or mostaccioli work well because they hold the sauce and cheese nicely.
- sweet basil marinara sauce: Use any good-quality jarred marinara or crushed tomatoes with a pinch of dried basil.
- Italian four-cheese blend: A mix of shredded mozzarella, provolone, and asiago gives a similar melty, savory result.
Equipment
- 6-quart slow cooker
- Large skillet (optional, for browning)
- Cutting board
- Chef's knife
- Measuring cups and spoons
- Wooden spoon or spatula
- Serving spoon
- White dinner plate
Up next · Part 2 of 3
6 steps · 4 h of cooking · what to look for at each stage
Step-by-step instructions (Part 2)