Dinner · Part 2 of 3: Instructions
Crockpot Kielbasa Vodka Ravioli: Easy Dump Dinner Step-by-step instructions
- Prep
- Cook
- Total
- Serves
- 6
Before you start
Before starting, slice the kielbasa into 1/2-inch rounds. If using frozen ravioli, keep them in the freezer until ready to use—they don't need to thaw. Measure out the vodka sauce and shred the fontina if it isn't already shredded.
Have the Boursin wheel ready to go. This recipe comes together quickly, so having everything prepped and within reach makes the layering process smooth and easy.
Ingredients at a glance (5)
- 2 lb smoked kielbasa sausage, sliced into 1/2-inch rounds
- 20 oz jumbo four-cheese ravioli (fresh or frozen)
- 24 oz tomato-vodka cream sauce
- 1 wheel (5.2 oz) garlic-and-fine-herbs Boursin cheese
- 1 1/2 cups shredded Italian fontina cheese
Instructions
Layer and Load
- Layer the IngredientsPlace the sliced smoked kielbasa in an even layer in the bottom of a 6-quart slow cooker. Arrange the jumbo four-cheese ravioli over the kielbasa, spreading them out so they cover the sausage. Pour the tomato-vodka cream sauce evenly over the ravioli and sausage, making sure the sauce reaches most of the ravioli.Look for The kielbasa is covered by a single layer of ravioli and the sauce is spread over the top.Tip If using frozen ravioli, there is no need to thaw them first; they will cook perfectly in the slow cooker.
- Add the CheesesPlace the wheel of garlic-and-fine-herbs Boursin cheese in the center of the slow cooker, directly on top of the sauce. Sprinkle the shredded fontina cheese evenly over the entire surface, covering the Boursin and the ravioli as much as possible.Look for The Boursin wheel sits in the center, with fontina scattered over the top.Tip Do not stir the ingredients at this stage; layering them helps the ravioli cook evenly and the cheeses melt into a creamy sauce.
At the end of this phase, the slow cooker contains a neat layering of kielbasa, ravioli, and sauce, topped with the Boursin wheel and a shower of fontina. The ingredients are not stirred, and the cheese is piled on top, ready to melt. The scene looks like a colorful, promising start to a hearty dinner.
Slow Cook to Perfection
- Slow Cook on LowCover the slow cooker with the lid and cook on low for 3 to 4 hours, until the ravioli are tender and the sauce is bubbling around the edges. Avoid opening the lid during the first 2 hours to keep the heat steady.Look for The sauce is bubbling gently and the cheese is melted and creamy.Tip Cooking on low yields the best texture for the ravioli; high heat can make them mushy.
- Check for DonenessAfter 3 hours, check the ravioli by cutting one in half with a spoon—it should be tender but not falling apart. The sauce should be hot and bubbly, and the cheeses should be fully melted into a creamy sauce. If the ravioli are still firm, continue cooking for another 30 minutes.Look for A ravioli cut in half shows a tender pasta with no raw floury center.Tip If the sauce looks too thick, stir in a splash of warm water or milk to loosen it.
After 3 to 4 hours on low, the sauce is bubbling gently around the edges, and the cheese has melted into a creamy, golden layer. The aroma of smoked sausage and garlic-herb cheese fills the kitchen. The ravioli are tender when tested, and the sauce is thick and creamy. The slow cooker has transformed the layered ingredients into a unified, comforting dish.
Stir and Serve
- Stir the SauceGently stir the contents of the slow cooker to combine the melted Boursin and fontina with the vodka sauce, creating a creamy pink sauce that coats the ravioli and kielbasa. Be careful not to break the ravioli—use a gentle folding motion with a large spoon.Look for The sauce turns a uniform pink color and is smooth and creamy.Tip Stirring too vigorously can cause the ravioli to split; use a light hand.
- Serve HotSpoon the pasta onto warm plates, making sure each serving gets a good mix of ravioli, kielbasa, and creamy sauce. Serve immediately, while the cheese is still hot and stretchy.Look for The pasta is steaming and the cheese pulls into long strands when lifted.Tip For a pretty presentation, sprinkle with fresh parsley or basil before serving (optional).
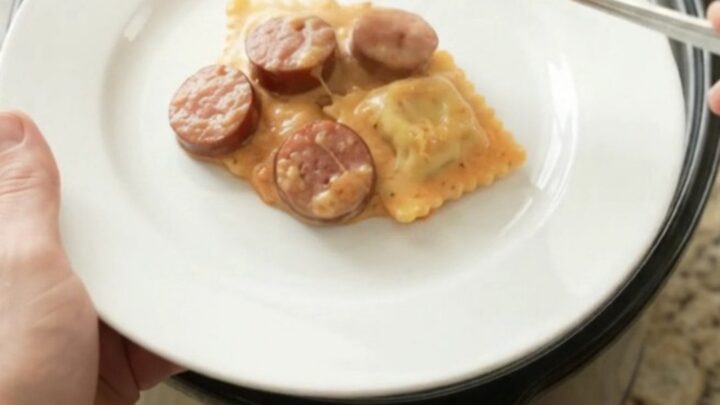
After stirring, the sauce is a uniform pink, velvety and coating each ravioli and piece of kielbasa. The cheese is fully incorporated, and the dish looks rich and indulgent.
When spooned onto plates, the steam rises and the cheese stretches, signaling it's ready to be enjoyed. The final result is a beautiful, creamy pasta bake that lives up to its viral reputation.
Common mistakes
One common mistake is stirring the ingredients before cooking, which can break the ravioli and create a gummy texture. Another is lifting the lid too often, which lets out heat and extends cooking time.
Overcooking the ravioli can make them mushy, so check them at the 3-hour mark. Also, avoid using a slow cooker that is too small, as the ingredients need room to cook evenly. If the sauce seems thin, let it cook uncovered for the last 15 minutes to thicken slightly.
How to tell it’s done
The dish is done when the ravioli are tender but still hold their shape—cut one in half to check that the pasta is cooked through with no raw floury center. The sauce should be hot and bubbling around the edges, and the cheeses should be fully melted into a creamy, pink sauce.
If the ravioli are still firm, cook for another 30 minutes. The internal temperature of the kielbasa is not a concern since it is already fully cooked; the goal is simply to heat everything through.
Up next · Part 3 of 3
4 variations · storage & make-ahead · 5 answers · printable card
Tips, FAQ & printable recipe (Part 3)← Back to the ingredients (Part 1)