Appetizers · Part 1 of 3: Ingredients
Crockpot Hot Chipped Beef Dip: Creamy, Hands-Off, Party-Ready
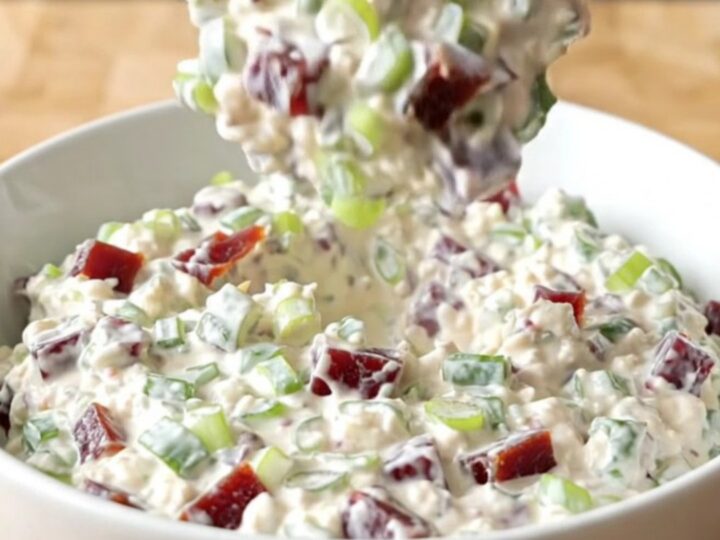
- Prep
- Cook
- Total
- Serves
- 10
Four ingredients go into the slow cooker, and two hours later a thick, steamy, savory dip comes out. Chopped dried beef, a shower of green onions, a dusting of garlic powder and two whole blocks of cream cheese melt together into the kind of hot, scoopable appetizer people hover around until the insert is scraped clean. No stirring, no oven, no watching a pot.
Hot chipped beef dip is one of those retro favorites that never really left the party table, and the slow cooker is its best possible home. Everything is layered cold into the ceramic insert: the salty chopped beef first, then the green onions and garlic powder, then the cream cheese blocks set right on top, unwrapped and untouched.
The lid closes, the heat does the work, and the blocks slump into the layers beneath them until one stir turns the whole thing into a creamy, studded dip. Because the dried beef is already cured and ready to eat, there is nothing to brown, drain or cook through — the recipe is pure assembly and patience. It suits game day, holidays and any evening when the appetizer needs to handle itself while the rest of the cooking happens elsewhere.
Ingredients
- 8 oz chipped dried beef, rinsed if salty and chopped
- 1/2 cup sliced green onions, white and green parts
- 1 tsp garlic powder
- 16 oz cream cheese (two 8-oz blocks), unwrapped
Why this recipe works
The method works because it respects what each ingredient needs. Cream cheese melts smoothly at low, steady heat; pushed hard, it can turn grainy or scorch at the edges, so the gentle warmth of a slow cooker on low is exactly right.
Setting the whole blocks on top of the other ingredients keeps them out of direct contact with the hottest surfaces and lets them soften from the outside in, releasing their moisture evenly into the layers below. By the time the blocks have fully slumped, everything underneath has warmed through and the flavors have mingled without any stirring at all.
Layering instead of mixing also protects the texture. The dried beef stays in distinct, chewy pieces rather than dissolving into the cheese, and the green onions keep their color and gentle bite instead of bruising into a paste.
A single thorough stir at the end is enough to bring everything together, because two hours of sitting in the melting cream cheese has already seasoned it from every side. Garlic powder, rather than fresh garlic, blooms slowly into the fat and gives an even, rounded savoriness with no raw edges.
Notes and substitutions
Chipped dried beef comes in small glass jars or vacuum packs near the canned meats or lunchmeat; the slices are thin, dark red and quite salty, which is exactly what the mild cream cheese needs.
If the beef tastes sharply salty on its own, a quick rinse and thorough pat-dry before chopping keeps the finished dip balanced. Use full-fat block cream cheese here; reduced-fat versions contain more water and can separate slightly over a long warm hold.
A 3 to 4 quart oval slow cooker is the ideal size, giving the dip enough depth to stay thick while still being wide enough to serve from. Green onions do double duty here, softening into the dip during the cook and, if reserved, adding a fresh finish on top. If dried beef is unavailable, chopped deli corned beef makes a close stand-in, and a tablespoon or two of milk loosens the dip if it thickens more than expected on warm.
- chipped dried beef: Use 8 oz of good deli corned beef or pastrami, chopped small, if dried beef is hard to find; both bring the same salty, chewy bite.
- cream cheese blocks: Two 8-oz tubs of whipped cream cheese work too; spread them evenly over the beef and shorten the cooking time by about 15 minutes.
- green onions: Swap in 2 tbsp of finely chopped fresh chives, or fold in the green onions at the end so they stay bright and crisp.
Equipment
- slow cooker (3 to 4 quart)
- cutting board
- sharp knife
- small ramekin
- sturdy serving spoon
Up next · Part 2 of 3
9 steps · 2 h of cooking · what to look for at each stage
Step-by-step instructions (Part 2)