Dinner · Part 2 of 3: Instructions
Crockpot Garlic Butter Tikka Masala Chicken Thighs Step-by-step instructions
- Prep
- Cook
- Total
- Serves
- 6
Before you start
Before you start, make sure your slow cooker is clean and ready. Measure out all the ingredients so you can layer them quickly. You don’t need to chop anything—just open the jars and scoop the yogurt.
If your garlic herb butter is very cold, let it sit at room temperature for a few minutes so it slices easily. Have your serving dishes ready, and if you’re serving with rice, start it when the curry has about 20 minutes left to cook.
Ingredients at a glance (5)
- 6 boneless skinless chicken thighs
- 1 1/2 cups tikka masala sauce
- 2 tsp garam masala
- 4 tbsp garlic herb butter, sliced into medallions
- 1/2 cup plain Greek yogurt
Instructions
Layer Everything
- Layer the IngredientsPlace the chicken thighs in the bottom of the slow cooker in a single layer. Pour the tikka masala sauce over the chicken, then sprinkle with garam masala. Dollop the Greek yogurt over the top, and scatter the garlic herb butter medallions across the surface.Look for The chicken should be mostly covered by the sauce and seasonings.Tip No need to stir—the slow cooker will blend the flavors as it cooks.
At this point, the slow cooker contains raw chicken, sauce, spices, yogurt, and butter. The colors are vibrant—deep red sauce, white yogurt dollops, and yellow butter medallions.
The aroma is already promising, with the scent of garam masala and tomato filling the air. Nothing needs to be stirred; just make sure the chicken is mostly covered by the sauce.
Walk Away and Let It Cook
- Slow Cook to TenderCover the slow cooker and cook on low for 6 hours, or on high for 3-4 hours, until the chicken is cooked through and tender. The sauce should be bubbling gently and the chicken should shred easily with a fork.Look for The sauce will be deep red and bubbling around the edges.Safe temperature 165°F (74°C) internal temperature (poultry)Tip If you’re home, give it a gentle stir halfway through to redistribute the sauce.
After several hours, the kitchen begins to smell incredible—warm spices, garlic, and butter. When you lift the lid, you’ll see the sauce gently bubbling around the edges, and the chicken will look plump and cooked. The yogurt has blended into the sauce, creating a creamy, orange-red curry. The chicken should be tender enough to pull apart with a fork.
Serve It Up
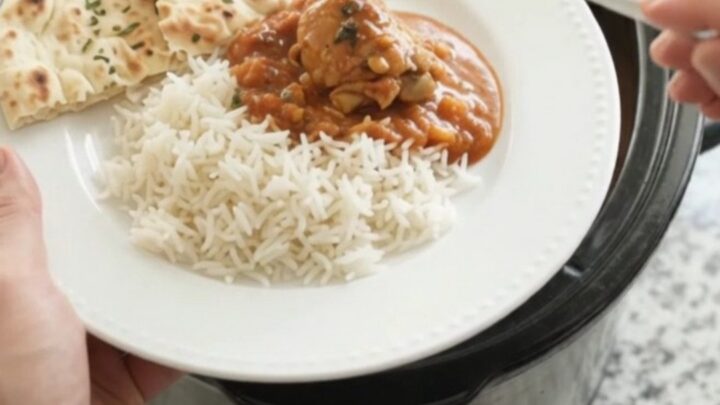
- Serve and EnjoyOnce the chicken reaches 165°F (74°C), turn off the slow cooker. Serve the curry hot over steamed basmati rice with warm naan on the side. Spoon the extra sauce over the top.Look for The chicken should be fork-tender and the sauce rich and creamy.Tip Garnish with fresh cilantro if you like, though the video doesn’t show it.
The final dish is a beautiful, rich curry with tender chicken thighs nestled in a glossy, creamy sauce. The garlic herb butter has fully melted, adding a sheen to the sauce. The aroma is intoxicating—garlic, spices, and butter. Serve it over rice with naan, and watch everyone dig in.
Common mistakes
One common mistake is stirring the yogurt in too early or cooking on high for too long, which can cause the yogurt to curdle. To avoid this, use full-fat Greek yogurt and stir it in gently at the beginning, then leave the mixture alone.
Another mistake is overcooking the chicken, especially if using breasts; check for doneness early. Also, don’t skip the garlic herb butter—it adds a crucial layer of flavor that ties everything together.
How to tell it’s done
The chicken is done when it reaches an internal temperature of 165°F (74°C) and is tender enough to shred with a fork. The sauce should be bubbling gently and have thickened slightly.
If you like a thicker sauce, remove the chicken and simmer the sauce on the stovetop for a few minutes, or stir in a cornstarch slurry. The curry should be rich, creamy, and full of warm spice flavor.
- Poultry: 165°F (74°C) in the thickest part
Up next · Part 3 of 3
4 variations · storage & make-ahead · 5 answers · printable card
Tips, FAQ & printable recipe (Part 3)← Back to the ingredients (Part 1)