Dinner · Part 2 of 3: Instructions
Crockpot Creamy Dijon Turkey Tenderloin Step-by-step instructions
- Prep
- Cook
- Total
- Serves
- 4
Before you start
Before beginning, ensure your slow cooker is clean and positioned on a stable, heat-resistant surface. Have all your ingredients measured and ready, especially the sliced onions, which should be cut into uniform, thin rounds to ensure they cook down completely.
If you are using fresh herbs, wash and pat them dry before adding them to the cooker, as excess moisture can alter the final consistency of the sauce.
Ingredients at a glance (4)
- 1 1/2 lb turkey tenderloins
- 1 large yellow onion, sliced
- 1 tsp dried thyme
- 1 cup creamy Dijon sauce
Instructions
Preparation and layering
- Layering the slow cookerPlace the turkey tenderloins into the base of the slow cooker, arranging them side by side to ensure even cooking. Layer the sliced onions over the top of the turkey to provide a flavor base that will soften during the cooking process.Look for The turkey should be laid out in a single layer to ensure even heat distribution.Tip Pat the turkey dry with paper towels before placing it in the cooker for a cleaner sear if desired.
At this stage, the slow cooker should be filled with the turkey and onion layers. The onions should be spread evenly across the tenderloins, providing a blanket that will soften and release aromatic juices as the temperature rises.
Ensure everything is arranged compactly so that the sauce will cover the meat effectively once added.
Seasoning and saucing
- Seasoning and saucingSprinkle the dried thyme evenly over the onions and turkey. Pour the creamy Dijon sauce over the entire mixture, ensuring that all pieces are well-coated to keep the meat moist during the long cooking time.Look for The sauce should partially submerge the turkey and onion layers.Tip Use a silicone spatula to scrape every bit of the creamy sauce from the measuring cup.
The thyme should be distributed uniformly across the top, and the creamy Dijon sauce should be poured in a steady stream to coat all components. The surface should look well-covered, with the sauce just starting to settle around the turkey pieces, creating a cohesive base for the long braise ahead.
Cooking and resting
- Slow cooking and restingCover the slow cooker and cook on low for 4 hours. Once finished, check that the turkey has reached an internal temperature of 165°F (74°C). Remove the turkey to a carving board and let it rest for at least 5 minutes before slicing and serving with the warm sauce.Look for The turkey is done when the surface looks soft and braised, and the sauce is bubbling and thickened.Safe temperature 165°F (74°C) internal temperature (poultry)Tip Letting the meat rest ensures the juices redistribute, resulting in a much more tender bite.
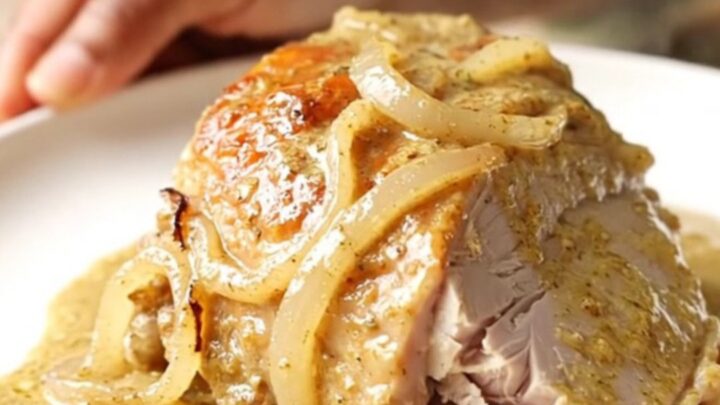
After four hours, the kitchen will be filled with a savory, mustard-scented aroma. The turkey should be fork-tender, and the sauce will have reduced slightly, becoming rich and velvety. Always verify the internal temperature of 165°F (74°C) before removing the meat to rest, which is the final step for optimal texture.
Common mistakes
Avoid overcooking the turkey, as even in a sauce, lean poultry can become dry if left in the slow cooker for too long.
Additionally, resist the urge to open the lid frequently during the cooking process, as this releases essential heat and steam, significantly increasing the cooking time and leading to uneven results. Ensure the sauce is fully integrated before covering to prevent pockets of unseasoned meat.
How to tell it’s done
The turkey is perfectly cooked when it reaches an internal temperature of 165°F (74°C) as measured by a meat thermometer inserted into the thickest part.
Visually, the meat should appear opaque and tender, easily pulling apart with a fork, while the surrounding sauce should have thickened into a creamy, pourable consistency that coats the back of a spoon.
- Poultry: 165°F (74°C) in the thickest part
Up next · Part 3 of 3
2 variations · storage & make-ahead · 3 answers · printable card
Tips, FAQ & printable recipe (Part 3)← Back to the ingredients (Part 1)