Desserts · Part 2 of 3: Instructions
Crockpot Cranberry Apple Maple Crumble Step-by-step instructions
- Prep
- Cook
- Total
- Serves
- 8
Before you start
Before starting, make sure the slow cooker insert is clean and dry. Slice the apples into 1/4-inch thick wedges—no need to peel them, as the skin adds texture. Zest the orange before juicing, and measure out all ingredients.
Have the butter chilled and cut into small cubes. The streusel can be prepared up to a day ahead and stored in the refrigerator; just bring it to room temperature while the fruit is in the cooker.
Ingredients at a glance (11)
- 4 cups Honeycrisp apple slices
- 2 cups fresh cranberries
- 1/2 cup pure maple syrup
- 1 tbsp orange zest
- 1 cup chopped walnuts
- 1 cup old-fashioned rolled oats
- 1/2 cup all-purpose flour
- 1/2 cup packed light brown sugar
- 1 tsp ground cinnamon
- 1/4 tsp kosher salt
- 6 tbsp cold unsalted butter, cut into small pieces
Instructions
Layer and Top
- Layer the fruit fillingPlace the sliced Honeycrisp apples and fresh cranberries in the bottom of a 6-quart slow cooker. Drizzle with pure maple syrup and sprinkle with orange zest. Toss gently with a rubber spatula to coat the fruit evenly.Look for The fruit should be evenly coated with syrup and zest, with no dry spots.Tip For even cooking, spread the fruit in an even layer across the bottom of the Crockpot.
- Make the walnut oat streuselIn a medium mixing bowl, combine the chopped walnuts, old-fashioned rolled oats, all-purpose flour, packed light brown sugar, ground cinnamon, and kosher salt. Stir with a fork until well blended. Add the cold butter pieces and cut in with a pastry blender or your fingertips until the mixture resembles coarse meal with some pea-sized butter bits.Look for The streusel should hold together when squeezed, but still look crumbly.Tip Keep the butter cold for a crumbly, not greasy, topping.
- Top with streuselSprinkle the streusel mixture evenly over the fruit in the slow cooker. Do not stir. Gently press the streusel down with your hands or a spatula to help it adhere to the fruit.Look for The streusel forms a complete, even blanket over the fruit.Tip Press lightly so the topping stays on top rather than sinking into the fruit.
The fruit should be evenly coated with maple syrup and orange zest, and the streusel should form a complete, crumbly layer over the top.
The butter pieces should be visible as small dots throughout the streusel. The slow cooker should be no more than three-quarters full to allow room for bubbling.
Slow-Cook and Transform
- Slow-cook on highCover the slow cooker with the lid and cook on HIGH for 2.5 hours. Do not open the lid during cooking, as this releases heat and extends the cooking time. The cranberries will pop and release their juices, and the apples will become tender.Look for After 2 hours, the filling should be bubbling around the edges and the cranberries beginning to pop.Tip Resist the urge to stir—stirring can break up the streusel and make it mushy.
- Check for donenessAfter 2.5 hours, carefully remove the lid. The apples should be fork-tender and the cranberries soft and bursting. The streusel should be lightly browned and crisp on top. If the fruit is still firm, continue cooking in 15-minute increments until tender.Look for A fork inserted into an apple slice meets little resistance; the juices are thick and syrupy.Tip If the streusel is browning too quickly, lay a piece of foil loosely over the top.
After 2.5 hours, the kitchen will smell of warm apples, maple, and toasted nuts. The cranberries will have burst, turning the filling a deep ruby color. The streusel should be lightly browned and crisp, and the juices should be bubbling around the edges. The apples should be soft but not mushy.
Serve and Enjoy
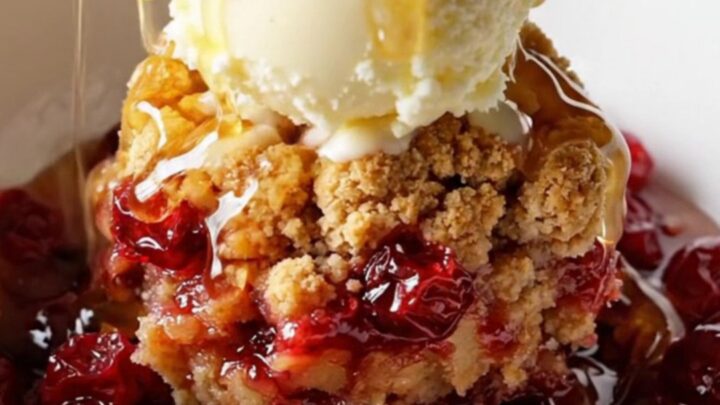
- Serve warmSpoon the warm cranberry apple crumble into serving bowls. Top each with a scoop of vanilla bean ice cream and a drizzle of maple syrup, if desired. Serve immediately.Look for The crumble is warm, fragrant, and bubbling with ruby-red cranberry juices.Tip For a cleaner scoop, let the crumble rest for 5 minutes before serving.
The crumble should be served warm, with the juices still bubbling slightly. A scoop of vanilla ice cream melting over the top is the perfect finish. The texture should be a contrast of tender fruit, jammy cranberries, and crunchy streusel. Any leftover crumble can be stored in the refrigerator.
Common mistakes
One common mistake is stirring the crumble during cooking, which breaks up the streusel and makes it soggy. Another is opening the lid frequently, which lets out heat and extends the cooking time.
Using quick oats instead of old-fashioned will result in a mushy topping. Also, avoid overloading the slow cooker with too much fruit, as the juices may overflow. Finally, do not skip the orange zest—it brightens the flavor and balances the sweetness.
How to tell it’s done
The crumble is done when the apples are fork-tender and the cranberries have popped and released their juices, creating a thick, ruby-red syrup. The streusel should be golden brown and crisp on top, not doughy.
If you are unsure, insert a fork into an apple slice—it should slide in easily. If the fruit is still firm, continue cooking in 15-minute increments. Because there are no raw proteins, there is no minimum safe temperature to check.
Up next · Part 3 of 3
4 variations · storage & make-ahead · 5 answers · printable card
Tips, FAQ & printable recipe (Part 3)← Back to the ingredients (Part 1)