Dinner · Part 2 of 3: Instructions
Crockpot Country-Style Ribs and Stuffing in One Pot Step-by-step instructions
- Prep
- Cook
- Total
- Serves
- 6
Before you start
Set out the slow cooker with the insert in place, and give the ceramic a quick look to confirm it sits level on the counter. Gather the ribs, the bag of stuffing cubes, the poultry seasoning and the condensed soup, plus a medium mixing bowl and a whisk. Blot the ribs dry with paper towels and have a knife and cutting board ready for trimming and halving any overlong strips. Nothing needs to be browned or pre-cooked, so the entire prep is trimming and whisking.
Ingredients at a glance (4)
- 2 1/2 lb boneless country-style pork ribs
- 4 cups dry herb stuffing cubes
- 1 tsp poultry seasoning
- 2 cups condensed cream soup (chicken)
Instructions
Build the rib layer
- Dry and trim the ribsBlot the boneless country-style pork ribs with paper towels until the surfaces feel dry to the touch. Trim any thick, flappy slabs of fat, but leave a thin cap in place, since it renders slowly during the long braise and keeps the meat moist.Look for The meat should feel tacky, not slick, and each strip should hold its thick shape without flexing.Tip Dry surfaces take on seasoning better and keep the finished gravy from picking up a watery note.
- Arrange the rib layerLay the ribs side by side in a single snug layer across the bottom of the slow cooker insert. If a few strips are much longer than the others, cut them in half so everything sits fairly flat and level, which helps the whole layer cook evenly.Look for You should see no tall stacks and no bare gaps; the insert floor should be covered edge to edge.Tip A single even layer means every piece simmers in the same amount of liquid and finishes tender at the same time.
- Check the fitLook down at the rib layer and confirm the strips are not wedged against the walls or riding over one another. Rearrange any that overlap, keeping the meat inside the ceramic with a little breathing room at the rim for the stuffing to come.Look for Each strip should rest flat, with about half an inch of clearance between the meat and the insert wall.Tip Overcrowded crock pots trap steam unevenly, and the pieces pinned under others lag behind in tenderness.
At the end of this phase the insert floor should be covered edge to edge with thick pork strips lying flat, none stacked and none wedged against the walls, with about half an inch of clearance at the rim.
The surfaces should feel dry and tacky from the paper-towel blotting, and any thick flaps of fat should be trimmed away. This even foundation is what lets the whole pot finish at the same moment, so look down at the layer from above and rearrange anything riding on top of another piece before moving on to the stuffing.
Layer the stuffing and sauce
- Scatter the stuffing cubesScatter the dry herb stuffing cubes by the handful over the rib layer, letting them fall loosely so air can circulate between the cubes. Cover the meat completely, building an even blanket that reaches all the way to the edges of the insert.Look for No rib should peek through; the cubes should sit loose and dry, not packed down or pressed into a dense slab.Tip Loose cubes soak up the cooking liquid from all sides and puff into a soft, bread-pudding texture instead of going gummy.
- Season with poultry seasoningSprinkle the poultry seasoning evenly over the stuffing cubes, reaching for the corners as well as the center. The dried herbs need contact with the moisture below to bloom, so spread the seasoning across the whole surface rather than dumping it in one spot.Look for The pale cubes should be flecked all over with green herbs, with no bald patches left in the middle.Tip Poultry seasoning is mostly sage and thyme, so a light, even hand is better than one heavy dump over the center.
- Pour over the thinned soupWhisk the condensed cream soup in a medium bowl until it is smooth and pourable, thinning it as the video shows. Pour it slowly and evenly over the stuffing, letting it drift down through the cubes and pool around the ribs underneath.Look for Every cube should glisten with the soup, and a thin layer of creamy liquid should be visible around the edges.Tip Thinning the condensed soup keeps the gravy from turning gluey as it reduces slowly under the lid.
By the end of the second phase the ribs should have disappeared under a loose, even blanket of pale herb-flecked cubes, with poultry seasoning visible across the entire surface and no bald patches in the center.
The thinned soup should have been poured slowly enough that every cube glistens and a thin ring of creamy liquid shows around the edges of the insert. Nothing should be packed down or flooded; the cubes stay airy so they can drink the braising liquid gradually. Give it one last look from above, then the lid goes on and the pot takes over.
Braise, check and serve
- Cook low and slowCover the slow cooker and cook on low for 6 to 7 hours. Keep the lid closed the whole time; every peek releases heat and can add 20 minutes or more to the clock. The pot does the rest on its own, braising the pork and softening the stuffing together.Look for After a few hours, the lid should fog up and a gentle, steady simmer should be visible at the edges.Tip Low heat renders the fat gradually and keeps the cream-based gravy from breaking or scorching at the edges.
- Check for tenderness and restAfter 6 hours, lift a rib out with tongs and take an instant-read reading in the thickest piece; it should register at least 145°F (63°C). The pork is done when a fork slides in with almost no resistance. Let the ribs rest in the hot gravy for at least 3 minutes so the juices settle back into the meat.Look for The meat should look relaxed and slightly frayed at the edges, with the gravy thick and creamy around it.Safe temperature 145°F (63°C) internal temperature (steaks, chops and roasts)Tip If the pork resists the fork but has passed the safe temperature, give it another 30 to 45 minutes on low.
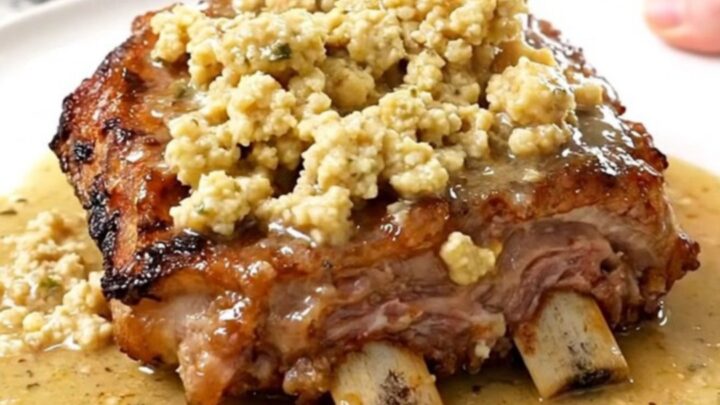
- Serve from the potSpoon the stuffing and a generous ladle of gravy onto plates and set a rib on top. Serve straight from the insert while everything is steaming and the gravy is at its glossiest, with the stuffing holding soft, distinct cubes under the sauce.Look for The gravy should coat the back of the spoon in a thick, creamy sheet and the stuffing should hold soft, distinct cubes.Tip Saucing the plate first keeps the stuffing from sticking and makes every serving look like it came from a diner.
After 6 to 7 hours on low the lid should be fogged, the kitchen should smell of sage and simmering gravy, and the ribs should look relaxed and frayed at the edges. A thermometer in the thickest piece must read at least 145°F (63°C), and a fork should slide in with almost no resistance.
The stuffing should be swollen and moist all the way down, sitting in a thick, creamy gravy that coats a spoon. If the meat resists, continue on low for another 30 to 45 minutes, then rest it in the gravy for at least 3 minutes before serving.
Common mistakes
The most common mistake is stacking the ribs in a heap, which leaves the top pieces steaming above the liquid and the bottom ones braising; always build a single snug layer. Pressing the stuffing cubes down into a packed slab traps them in a dense mass that cooks unevenly — scatter them loose instead.
Pouring unthinned condensed soup straight over the top produces thick streaks that never incorporate, so whisk it smooth first. Lifting the lid to check on things repeatedly costs heat and time; trust the six-hour clock.
How to tell it’s done
The pork is done when an instant-read thermometer reads at least 145°F (63°C) in the thickest rib and a fork slides into the meat with almost no resistance, pulling the fibers apart into soft, glossy strands. Visually, the ribs look relaxed and slightly frayed at the edges, no longer tight and smooth like raw meat. The stuffing should be fully swollen, moist through to the bottom cubes, and sitting in a thick, creamy gravy that coats the back of a spoon.
- Steaks, chops and roasts: 145°F (63°C) in the thickest part, then a 3-minute rest
Up next · Part 3 of 3
4 variations · storage & make-ahead · 5 answers · printable card
Tips, FAQ & printable recipe (Part 3)← Back to the ingredients (Part 1)