Dinner · Part 2 of 3: Instructions
Crockpot Classic Herb Stuffing for Easy Holiday Sides Step-by-step instructions
- Prep
- Cook
- Total
- Serves
- 8
Before you start
Before starting, ensure that the bread is sufficiently dried. If the bread is fresh, cut it into uniform cubes and spread them on a baking sheet to dry overnight or toast them briefly in a low-temperature oven.
Prepare the vegetables by dicing the celery and onions into uniform sizes to ensure they cook evenly. Have all measuring tools ready to maintain the correct ratio of liquid to bread, which is critical for achieving a moist but not soggy consistency.
Ingredients at a glance (5)
- 1 loaf dry white bread cubes
- 2 cups diced raw celery
- 1 cup diced onion
- 2 tbsp poultry seasoning
- 2 cups buttery chicken broth
Instructions
Base Preparation
- Prepare the BasePlace the dry white bread cubes into the slow cooker insert. Distribute the bread evenly to ensure even moisture distribution during the cooking process.Look for Bread should fill the slow cooker insert loosely.Tip Ensure the bread is dried out beforehand to prevent it from turning into mush during the slow cooking.
The slow cooker should be filled with the dry bread cubes. Ensure the cubes are distributed evenly across the bottom of the insert to create a level surface for the vegetables and seasonings.
This foundational step is essential for ensuring that every piece of bread receives an equal amount of flavor and moisture during the cooking process, resulting in a consistent texture throughout the final dish.
Aromatic Layering
- Add Aromatics and SeasoningScatter the diced celery and diced onion over the bread cubes. Sprinkle the poultry seasoning evenly over the top of the vegetables and bread mixture.Look for Vegetables should be distributed across the surface.Tip Use a small ramekin to sprinkle the seasoning to ensure even coverage across the entire surface of the bread.
The celery, onions, and poultry seasoning should be layered uniformly over the bread cubes. This ensures that the savory notes of the herbs and the sweetness of the cooked vegetables permeate the entire dish. Before adding the liquid, verify that the aromatics are spread out sufficiently so that they do not clump together, allowing them to soften evenly as the slow cooker begins to generate heat.
Slow Cooking
- Moisten and CookPour the buttery chicken broth over the entire mixture. Cover the slow cooker with the lid and cook on low for 3 hours until the vegetables are tender and the stuffing is moist.Look for The broth should be fully absorbed into the bread.Tip Avoid stirring the stuffing too much, as this can break down the bread cubes and change the final texture.
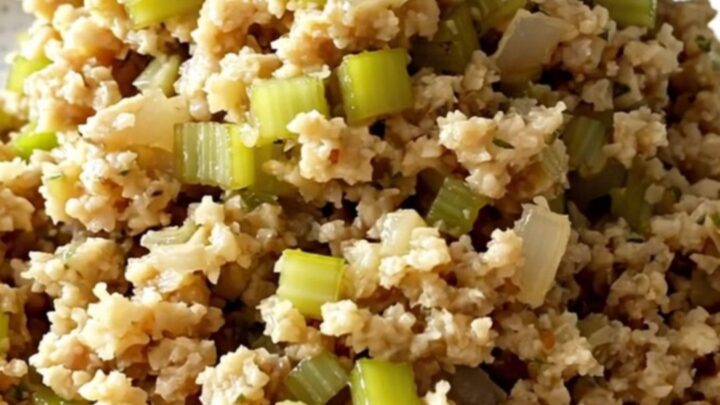
After adding the broth, the stuffing should be covered and allowed to cook undisturbed. The final result should be a warm, fragrant side dish where the bread is soft and moist, and the vegetables are tender. Check that the broth has been fully incorporated and that the mixture has reached a uniform temperature throughout, indicating it is ready to be served as a classic holiday accompaniment.
Common mistakes
A common mistake is using bread that is too fresh, which leads to a dense, soggy texture rather than the desired fluffy, moist stuffing. Another frequent error is overcrowding the slow cooker or stirring the mixture too aggressively, which breaks down the bread cubes.
Additionally, using an incorrect ratio of broth can cause the stuffing to become overly wet; always measure the liquid carefully and adjust only if the bread is exceptionally dry.
How to tell it’s done
The stuffing is done when the vegetables are tender and the bread has absorbed the majority of the liquid. The mixture should be moist and hold together when served, with no visible pools of broth at the bottom of the slow cooker.
The internal temperature should be consistent throughout, and the aroma should be savory and fragrant with the scent of poultry seasoning. Use a spoon to test the softness of the celery to confirm it is fully cooked.
Up next · Part 3 of 3
2 variations · storage & make-ahead · 3 answers · printable card
Tips, FAQ & printable recipe (Part 3)← Back to the ingredients (Part 1)