Desserts · Part 2 of 3: Instructions
Crockpot Churro Dulce de Leche Dump Cake Step-by-step instructions
- Prep
- Cook
- Total
- Serves
- 8
Before you start
Before starting, make sure the slow cooker is clean and dry. Measure out the dulce de leche, cake mix, cinnamon sugar, and butter. Cut the cold butter into about 16 small pats.
Have the vanilla ice cream ready in the freezer. No need to preheat anything—the slow cooker does all the work. If the dulce de leche is very thick, warm it briefly to make spreading easier.
Ingredients at a glance (5)
- 26 oz dulce de leche (about 2 cans, 13 oz each)
- 1 box spiced yellow cake mix (about 15.25 oz)
- 1/3 cup cinnamon sugar
- 16 tbsp cold salted butter, cut into pats
- Cold vanilla ice cream, for serving
Instructions
Layer and Top
- Spread the CaramelSpread the dulce de leche evenly over the bottom of a 6-quart slow cooker. Use a rubber spatula to smooth it into an even layer, reaching all the way to the edges.Look for The caramel covers the bottom in a thick, glossy layer.Tip If the dulce de leche is too thick to spread, warm it in the microwave for 15 seconds first.
- Add the Cake MixSprinkle the spiced yellow cake mix evenly over the dulce de leche. Do not stir; just let the dry mix rest on top of the caramel.Look for The cake mix forms a dry, even blanket over the caramel.Tip Tapping the slow cooker gently on the counter helps the cake mix settle without stirring.
- Top with Cinnamon SugarSprinkle the cinnamon sugar evenly over the cake mix layer.Look for The top is lightly dusted with cinnamon sugar.Tip For extra crunch, add a little more cinnamon sugar just before serving.
- Dot with ButterScatter the cold butter pats evenly over the top of the cinnamon sugar. Do not stir.Look for The butter pats are spaced evenly across the surface.Tip Cold butter melts slowly, creating a crisp, golden crust.
The slow cooker bottom is covered with a thick, glossy layer of dulce de leche, topped with an even blanket of cake mix, a dusting of cinnamon sugar, and pats of cold butter.
The layers are distinct and unstirred, ready for slow cooking.
Slow-Cook to Bubbling
- Slow Cook on HighCover the slow cooker and cook on HIGH for 2 1/2 hours. Do not lift the lid during cooking, as the steam helps create the crust.Look for The edges are bubbling and the top is golden brown.Tip If your slow cooker runs hot, check at 2 hours; if it runs cool, add 15 minutes.
After 2 1/2 hours on high, the top is golden brown and the edges are bubbling with molten caramel. The kitchen smells like churros and caramel. The cake is set but still moist, and a toothpick inserted comes out with tender crumbs.
Scoop and Serve
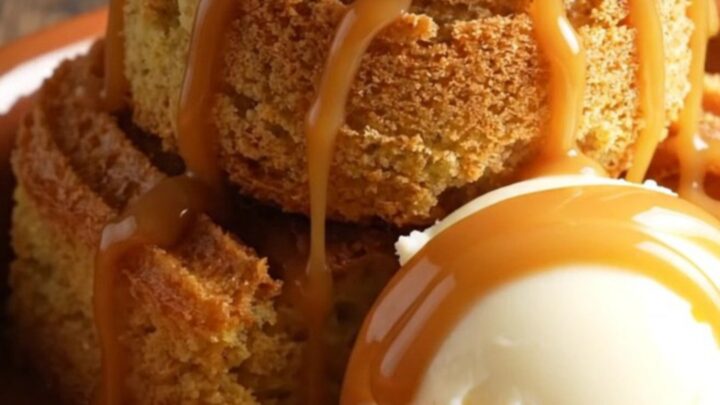
- Scoop and ServeScoop the warm churro cake into bowls. Top each serving with a generous scoop of cold vanilla ice cream and a swirl of warm caramel from the bottom of the slow cooker.Look for The cake is moist and tender, with a crisp cinnamon-sugar top.Tip Spoon some of the molten dulce de leche from the bottom over the ice cream for extra sauce.
The warm cake is scooped into bowls, topped with cold vanilla ice cream and a swirl of caramel from the bottom. The contrast of hot, crunchy cake and cold, creamy ice cream is irresistible.
Common mistakes
Don't lift the lid during cooking—the steam is essential for creating a tender cake and a crisp top. Don't stir the layers; the magic happens when the butter melts and the cake mix absorbs the caramel.
If the top browns too quickly, your slow cooker runs hot; next time use a lower setting or check at 2 hours. If the cake is too saucy, let it sit uncovered for 10 minutes before serving.
How to tell it’s done
The cake is done when the top is golden brown and the edges are bubbling with caramel. A toothpick inserted into the center should come out with moist crumbs, not wet batter.
The internal temperature of the cake should reach at least 200°F (93°C) to ensure the cake mix is fully cooked. If the top is still pale and the center looks wet, cook for another 15 minutes and check again.
Up next · Part 3 of 3
4 variations · storage & make-ahead · 5 answers · printable card
Tips, FAQ & printable recipe (Part 3)← Back to the ingredients (Part 1)