Dinner · Part 2 of 3: Instructions
Crockpot Chuck Roast with Yukon Potatoes and Gravy Step-by-step instructions
- Prep
- Cook
- Total
- Serves
- 6
Before you start
Before starting, measure out the gravy and cut the butter into pats. Halve the baby Yukon Gold potatoes if they are larger than bite-size, and peel and thick-cut the carrots. There's no need to sear the beef or pre-cook anything—just arrange the ingredients in the slow cooker as directed.
Make sure the slow cooker is clean and dry. If using a liner, place it in now. Have the lid ready, and set out a large serving spoon for later. This recipe requires minimal prep, so the focus is on getting everything into the pot quickly and letting the slow cooker work its magic.
Ingredients at a glance (5)
- 3 1/2 lb beef chuck roast
- 1 1/2 lb baby Yukon Gold potatoes, halved
- 4 heirloom carrots, thick-cut
- 2 cups rich brown gravy (store-bought or homemade)
- 4 tbsp unsalted butter, cut into pats
Instructions
Layer and Pour
- Layer the Roast and VegetablesPlace the beef chuck roast in the center of a 6-quart slow cooker. Scatter the halved baby Yukon Gold potatoes and thick-cut heirloom carrots around the roast, tucking them in close so they cook evenly.Look for The roast sits snugly in the pot with vegetables nestled around it.Tip No need to sear the roast first—the slow cooker does all the work.
- Pour the Gravy and Add ButterPour the rich brown gravy evenly over the roast and vegetables. Dot the top of the roast with the pats of unsalted butter. The butter melts into the gravy as it cooks, adding richness and gloss.Look for The gravy covers the roast and pools around the vegetables.Tip Use a good-quality gravy—it's the backbone of the dish.
At the end of this phase, the slow cooker contains the raw roast surrounded by halved potatoes and carrot chunks, with the gravy poured over everything and butter pats melting on top. The gravy should be evenly distributed, and the ingredients should look nestled together.
The pot should not be completely full—there should be some space for the ingredients to cook and release juices. The butter will begin to melt into the gravy as the slow cooker warms up, creating a rich, glossy pool.
Slow-Cook
- Slow-Cook Until Fork-TenderCover the slow cooker and cook on LOW for 8 to 10 hours, or on HIGH for 5 to 6 hours, until the beef is fall-apart tender and the potatoes and carrots are easily pierced with a fork. The internal temperature of the beef should reach at least 145°F (63°C) for safe serving, though it will be much higher after long cooking. Let it rest for 3 minutes before slicing.Look for The meat shreds easily with a fork and the vegetables are tender.Safe temperature 145°F (63°C) internal temperature (steaks, chops and roasts)Tip If time allows, always choose LOW for the most tender results.
After several hours on LOW, the slow cooker will be gently bubbling, and the kitchen will fill with the aroma of beef and gravy. The roast will have shrunk slightly, and the gravy will have deepened in color and thickened. The potatoes and carrots should be tender when pierced with a fork, and the beef should be easy to shred. The internal temperature of the beef should be well above 145°F (63°C). This is the point where the dish is fully cooked and ready to serve.
Shred and Serve
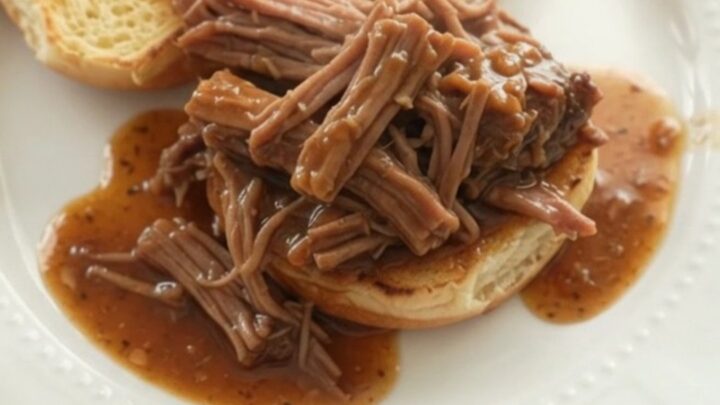
- Shred the Beef and ServeUsing two forks, shred the beef directly in the slow cooker, mixing it into the gravy. Let the meat rest for at least 3 minutes before serving. Serve the shredded beef, potatoes, and carrots with extra gravy spooned over the top.Look for The beef is shredded into tender strands and coated in glossy gravy.Safe temperature 145°F (63°C) internal temperature (steaks, chops and roasts)Tip Letting the meat rest keeps it juicy and allows the gravy to settle.
Once the beef is shredded and mixed into the gravy, the dish is ready. The meat should be in tender, juicy strands, and the gravy should coat everything generously. The potatoes and carrots will be soft and have absorbed some of the gravy, making them extra flavorful. Spoon the mixture onto plates, making sure each serving gets a good amount of gravy. The dish should look glossy and inviting, with steam rising from the pot.
Common mistakes
One common mistake is lifting the lid too often during cooking. Every time the lid is removed, heat escapes and adds to the cooking time. Another is using a lean cut of beef, which can become dry and stringy. Stick with chuck roast or another well-marbled cut.
Overcrowding the slow cooker can cause uneven cooking, so use a 6-quart model and don't fill it more than three-quarters full. Finally, don't skip the resting time for the meat—it helps keep the beef juicy and the gravy well blended.
How to tell it’s done
The beef is done when it shreds easily with a fork and reaches an internal temperature of at least 145°F (63°C) for food safety, though it will typically be much higher after long slow cooking. The potatoes and carrots should be fork-tender—a knife should slide through them with no resistance.
The gravy will have darkened and thickened slightly, and the whole pot will be bubbling gently. Let the meat rest for at least 3 minutes before serving to allow the juices to redistribute, then shred it directly in the pot and stir to coat with gravy.
- Steaks, chops and roasts: 145°F (63°C) in the thickest part, then a 3-minute rest
Up next · Part 3 of 3
4 variations · storage & make-ahead · 5 answers · printable card
Tips, FAQ & printable recipe (Part 3)← Back to the ingredients (Part 1)