Dinner · Part 1 of 3: Ingredients
Crockpot Chicken Vodka Ravioli: Easy Slow Cooker Dinner
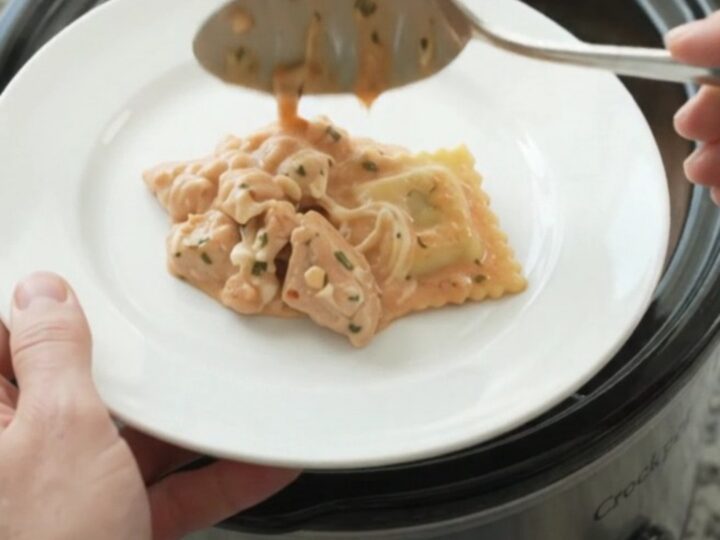
- Prep
- Cook
- Total
- Serves
- 6
This slow cooker chicken vodka ravioli is the definition of a set-it-and-forget-it dinner. You simply layer chicken, ravioli, and a rich tomato-vodka sauce in the Crockpot, top with cream cheese and mozzarella, and walk away.
Hours later, you return to a bubbling pot of tender chicken, pillowy ravioli, and a creamy, cheesy pink sauce that tastes like it simmered all day—because it did. It's the kind of meal that makes busy weeknights feel like a special occasion, with minimal effort and maximum comfort.
Crockpot meals are beloved for their hands-off convenience, and this chicken vodka ravioli delivers on every level. The combination of juicy chicken, jumbo four-cheese ravioli, and a velvety tomato-vodka sauce creates a hearty, satisfying dish that the whole family will love.
The cream cheese and mozzarella melt into the sauce, giving it a luxurious texture and a rich, cheesy flavor. Best of all, there's no need to brown the chicken or pre-cook the pasta—just dump everything in the slow cooker and let it work its magic. This recipe is perfect for busy weeknights, lazy Sundays, or anytime you crave a comforting, no-fuss meal.
Ingredients
- 2 lb boneless skinless chicken breast tenderloins, cut into bite-size pieces
- 20 oz jumbo four-cheese ravioli (fresh or frozen)
- 24 oz tomato-vodka cream sauce
- 8 oz cream cheese, softened and cut into cubes
- 2 cups shredded whole-milk mozzarella cheese
Why this recipe works
The slow cooker does all the work, turning simple ingredients into a deeply flavorful and comforting meal. Cooking the chicken low and slow keeps it tender and juicy, while the ravioli absorb the sauce and become soft and pillowy.
The cream cheese and mozzarella melt into the sauce, creating a rich, creamy texture that clings to every bite. Because the dish cooks in its own moisture, the flavors meld together beautifully, producing a sauce that tastes far more complex than the sum of its parts.
The dump-and-go method is genius because it eliminates multiple pans and extra steps. There's no need to sear the chicken or boil the ravioli—the slow cooker handles everything. The layering of the ingredients ensures that the chicken cooks evenly while the ravioli and sauce steam together.
The result is a cohesive, one-pot meal that's both convenient and delicious. Plus, the hands-off nature means you can go about your day while dinner cooks itself, making it ideal for busy schedules.
Notes and substitutions
For the best flavor, choose a high-quality tomato-vodka sauce, either from the jar or homemade. The sauce is the backbone of the dish, so a good one makes a difference. If you prefer a spicier kick, add a pinch of red pepper flakes when layering the ingredients. The jumbo four-cheese ravioli are a classic choice, but any large stuffed pasta works well. Fresh ravioli will cook faster than frozen, so adjust the cooking time accordingly.
The cream cheese should be softened to room temperature before adding, as this helps it melt smoothly into the sauce. If you forget to soften it, you can cut it into small cubes and let it sit for a few minutes. Whole-milk mozzarella gives the best melt, but part-skim also works. Avoid using pre-shredded cheese with anti-caking agents, as it may not melt as smoothly. You can also add a handful of grated Parmesan cheese on top for extra flavor, but it's not necessary.
- chicken breast tenderloins: boneless skinless chicken thighs (cut into bite-size pieces) for extra juiciness
- tomato-vodka cream sauce: marinara sauce mixed with 1/2 cup heavy cream for a similar pink sauce
- jumbo four-cheese ravioli: any large stuffed pasta, such as cheese tortellini or spinach-ricotta ravioli
- whole-milk mozzarella: part-skim mozzarella or a blend of Italian cheeses for a different melt
Equipment
- 6-quart or larger slow cooker
- Cutting board
- Chef's knife
- Measuring cups and spoons
- Large spoon or spatula
- Serving spoon
Up next · Part 2 of 3
5 steps · 4 h of cooking · what to look for at each stage
Step-by-step instructions (Part 2)