Dinner · Part 1 of 3: Ingredients
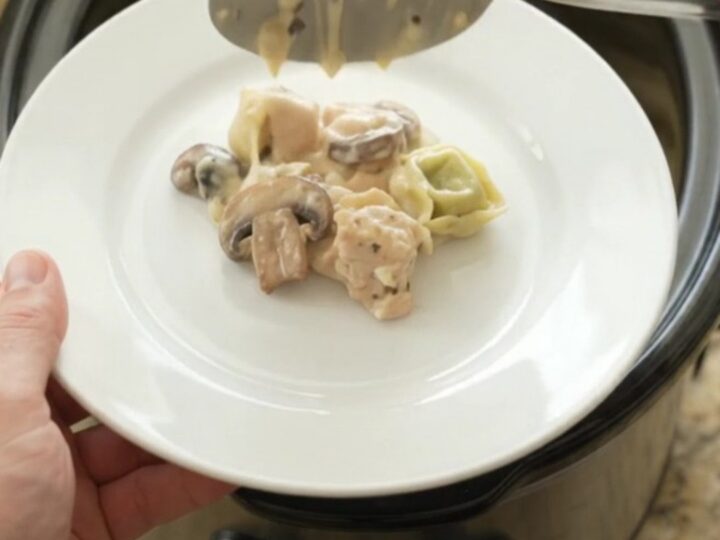
Provolone Garlic Chicken Spinach Tortellini Crockpot
- Prep
- Cook
- Total
- Serves
- 6
This slow cooker chicken tortellini is the kind of dinner that feels like a warm hug on a busy weeknight. Tender chicken, pillowy spinach-and-cheese tortellini, earthy mushrooms, and a rich, garlicky Alfredo sauce all cook together in one pot while you go about your day. The best part? There is no browning, no stirring, and no babysitting—just layer the ingredients, cover, and let the slow cooker work its magic.
This recipe takes the classic comfort of chicken Alfredo and gives it a slow-cooker makeover. Cubed chicken breast tenderloins, spinach-and-cheese tortellini, sliced cremini mushrooms, and a duo of ricotta and provolone cheeses simmer together in a garlicky Alfredo sauce until everything is tender and luscious. The slow cooker does all the work, melding the flavors into a creamy, savory sauce that clings to every piece of pasta and chicken.
With just 10 minutes of prep, this dump-and-go dinner is perfect for busy evenings when you want a hearty meal without the fuss. The result is a one-pot wonder that feels indulgent but comes together with minimal effort. Whether you serve it for a family dinner or a cozy weekend meal, this dish is sure to become a favorite.
Ingredients
- 2 lb boneless skinless chicken breast tenderloins, cut into bite-size pieces
- 20 oz refrigerated spinach-and-cheese tortellini
- 8 oz cremini mushrooms, sliced
- 15 oz jarred Alfredo sauce
- 1 cup whole-milk ricotta cheese
- 8 oz shredded provolone cheese
Why this recipe works
The slow cooker method is a game-changer for this dish because it allows the chicken to cook gently in the sauce, becoming incredibly tender and juicy.
Unlike stovetop cooking, where chicken can easily dry out, the low, moist heat of the slow cooker keeps the meat succulent while infusing it with the flavors of the Alfredo sauce, garlic, and cheese. The tortellini and mushrooms also benefit from this slow simmer, absorbing the creamy sauce and becoming soft and flavorful without turning mushy.
Layering the ingredients in the order the video shows—chicken first, then tortellini, mushrooms, sauce, and cheeses—ensures even cooking and prevents the tortellini from sticking to the bottom. The chicken releases its juices as it cooks, creating a flavorful base for the pasta.
The ricotta and provolone melt into the sauce, adding richness and a subtle tang that balances the creamy Alfredo. This method is foolproof, requiring no stirring or monitoring, and delivers a consistently delicious result every time.
Notes and substitutions
For the best texture, use refrigerated tortellini rather than dried, as they cook more evenly in the slow cooker and stay tender. If you can only find dried tortellini, consider cooking it separately and adding it during the last 30 minutes to avoid overcooking.
The spinach-and-cheese variety adds a lovely green fleck and a mild flavor, but plain cheese tortellini works just as well. Cremini mushrooms bring an earthy depth, but white button mushrooms are a fine substitute.
The Alfredo sauce is the backbone of this dish, so choose a jarred brand you enjoy. Whole-milk ricotta and provolone are essential for the creamy, stretchy texture—reduced-fat versions may not melt as smoothly. If you prefer a stronger garlic flavor, you can add a teaspoon of minced garlic to the sauce, though the video does not include it. This recipe is forgiving, so feel free to adjust the amount of mushrooms or cheese to your taste.
- chicken breast tenderloins: boneless skinless chicken thighs, cut into bite-size pieces
- spinach-and-cheese tortellini: cheese tortellini or ravioli (adjust cooking time if fresh)
- cremini mushrooms: white button mushrooms or baby bella mushrooms
- jarred Alfredo sauce: homemade Alfredo sauce (butter, cream, Parmesan)
Equipment
- 6-quart slow cooker
- Cutting board
- Chef's knife
- Measuring cups and spoons
- Wooden spoon or spatula
- Serving spoon
Up next · Part 2 of 3
4 steps · 4 h of cooking · what to look for at each stage
Step-by-step instructions (Part 2)