Dinner · Part 2 of 3: Instructions
Easy Crockpot Buttermilk Ranch Chicken Drumsticks Step-by-step instructions
- Prep
- Cook
- Total
- Serves
- 4
Before you start
Before beginning, ensure that your slow cooker is clean and positioned on a stable, heat-resistant surface away from any water sources.
Take the chicken out of the refrigerator approximately 15 to 20 minutes before you start to take the chill off, but do not leave it out for longer than 30 minutes.
Have your knife and cutting board ready for the celery, and ensure your measuring cup is clean and dry. Once everything is prepped, the assembly process takes less than five minutes of active work.
Ingredients at a glance (4)
- 8 pieces chicken drumsticks
- 2 stalks celery, diced
- 1 packet dry ranch seasoning mix
- 1 cup buttermilk
Instructions
Initial Assembly
- Prepare the slow cookerArrange the raw chicken drumsticks in the bottom of the slow cooker in a single layer if possible to ensure even cooking. Scatter the diced celery over the chicken pieces.Look for The chicken should be distributed evenly across the base of the slow cooker insert.Tip Pat the chicken dry with paper towels before placing it in the slow cooker to help the seasonings adhere better.
The chicken is arranged in a single layer at the bottom of the slow cooker, topped with the diced celery. The ingredients are ready to receive the seasoning and liquid.
Seasoning and Liquid Integration
- Add seasoning and liquidOpen the ranch seasoning packet and sprinkle the contents evenly over the chicken and celery. Pour the buttermilk over the entire mixture, ensuring it coats the drumsticks.Look for The buttermilk should pool around the base of the chicken pieces without overflowing the slow cooker.Tip Use a spoon to gently nudge the celery into the buttermilk if it stays on top of the chicken.
The ranch seasoning is evenly distributed over the chicken, and the buttermilk has been poured over the top. The slow cooker is covered and ready to begin the cooking process.
Cooking and Final Check
- Cook and serveCover the slow cooker and cook on low for 4 to 6 hours or on high for 2 to 3 hours. The chicken is finished when it reaches an internal temperature of 165°F (74°C). Let the chicken rest for 5 minutes before serving to allow the juices to redistribute.Look for The meat should be tender and pulling slightly away from the bone, with a reach of 165°F (74°C).Safe temperature 165°F (74°C) internal temperature (poultry)Tip Check the temperature by inserting a meat thermometer into the thickest part of the drumstick, avoiding the bone.
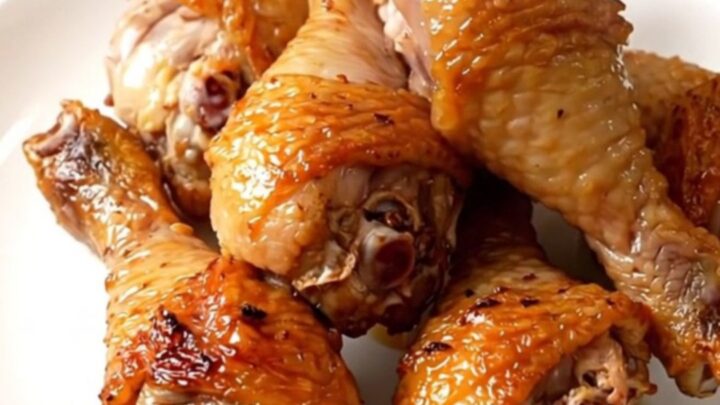
The chicken is fully cooked, tender, and reaches an internal temperature of 165°F (74°C). The sauce has thickened slightly and the celery is soft, aromatic, and ready to be served immediately.
Common mistakes
A common mistake is overcrowding the slow cooker, which can prevent the chicken from cooking evenly and result in a watery, diluted sauce. Another error is lifting the lid too frequently, which allows heat to escape and significantly increases the cooking time.
Avoid using frozen chicken, as it will not reach the necessary safe temperature quickly enough in a slow cooker, posing a significant food safety risk. Finally, do not skip the resting time, as it allows the juices to redistribute for a better texture.
How to tell it’s done
The chicken is perfectly cooked when the internal temperature reaches 165°F (74°C) as measured by a meat thermometer inserted into the thickest part of the meat, away from the bone.
At this point, the meat should be opaque throughout, tender enough to pull away from the bone with minimal effort, and the juices should run clear. Always verify the temperature to ensure safety, especially when cooking with bone-in poultry in a slow cooker environment.
- Poultry: 165°F (74°C) in the thickest part
Up next · Part 3 of 3
2 variations · storage & make-ahead · 3 answers · printable card
Tips, FAQ & printable recipe (Part 3)← Back to the ingredients (Part 1)