Desserts · Part 2 of 3: Instructions
Easy Slow Cooker Apple Blackberry Dump Cake Step-by-step instructions
- Prep
- Cook
- Total
- Serves
- 8
Before you start
Before beginning, ensure the slow cooker basin is clean and dry. Gather all ingredients and prepare the butter by slicing it into thin, uniform pieces, which helps it melt evenly over the cake mix.
No other special preparation is required for this recipe, as the slow cooker handles the entire transformation process. Ensure the kitchen counter is clear so the slow cooker can be placed in a stable, heat-resistant location with easy access to a power outlet for the duration of the cooking time.
Ingredients at a glance (4)
- 2 cans apple pie filling
- 2 cups frozen blackberries
- 1 box white cake mix
- 1/2 cup unsalted butter, sliced
Instructions
Layering the base
- Layer the ingredientsSpread the cans of apple pie filling evenly across the bottom of the slow cooker basin. Distribute the frozen blackberries uniformly over the apple layer, then sprinkle the dry cake mix over the fruit, ensuring it covers the surface completely.Look for The ingredients should be layered evenly without mixing them together.Tip Ensure the apple filling is spread to the edges of the slow cooker.
At this phase, the slow cooker basin should contain distinct layers: the apple filling at the bottom, the blackberries in the middle, and the dry cake mix on top.
Check that the cake mix covers the fruit completely to ensure even moisture absorption during the cooking process. The ingredients should remain separate and unmixed, creating the foundation for the final texture.
Cooking the cake
- Add butter and cookArrange the sliced butter evenly over the top of the dry cake mix. Cover the slow cooker with the lid and cook on high for 3 hours until the fruit is bubbling and the cake topping is golden and set.Look for The cake topping should be golden and the fruit filling bubbling at the edges.Tip Do not lift the lid during the first 2 hours of cooking to maintain heat.
The cake is cooking when the aroma of baked apples and butter fills the kitchen. The fruit juices will begin to bubble up through the cake mix, creating a moist, golden crust. Check that the butter has melted completely and that the cake topping looks consistently hydrated and golden brown, indicating that the starch in the cake mix has fully cooked.
Final rest
- Final rest and servingTurn off the slow cooker and let the dump cake rest for 10 minutes before serving. This allows the juices to thicken slightly and makes it easier to scoop onto plates.Look for The cake should be slightly firm to the touch before serving.Tip Serve warm for the best texture and flavor experience.
Once the cooking time is complete, the cake will appear soft and bubbling. The final rest period is critical for the juices to thicken and the topping to firm up to a spoonable consistency. The cake should no longer look wet or runny on the surface. Allow the dessert to rest until it is warm but stable before attempting to serve it.
Common mistakes
A common mistake is lifting the slow cooker lid too frequently, which releases necessary heat and extends the cooking time significantly. Avoid the urge to stir the ingredients, as the layered structure is essential for the dump cake to form its characteristic topping.
Additionally, using cold butter in large chunks can result in uneven melting; slicing the butter into thin, small pieces ensures it covers the cake mix thoroughly for a uniform texture.
How to tell it’s done
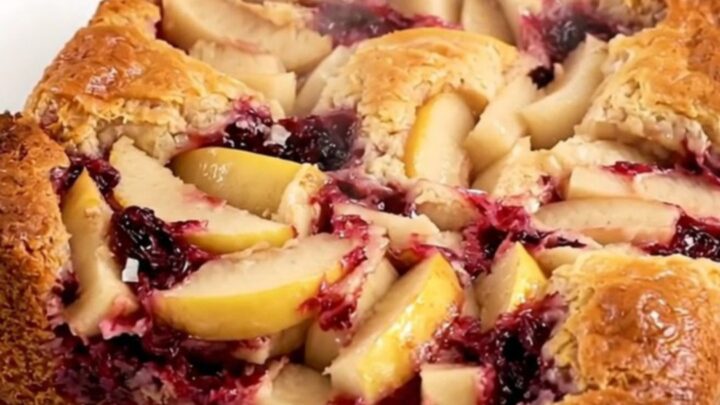
The cake is considered done when the topping is golden brown and appears set, rather than powdery or dry. The edges of the fruit filling should be visibly bubbling with a thick, syrupy consistency.
Because this is a slow cooker recipe, internal temperature is not a primary metric for doneness, but rather the visual cue of the cake topping being fully cooked through and the fruit being tender and warm throughout the entire basin.
Up next · Part 3 of 3
2 variations · storage & make-ahead · 3 answers · printable card
Tips, FAQ & printable recipe (Part 3)← Back to the ingredients (Part 1)