Desserts · Part 2 of 3: Instructions
Crispy Walnut Baklava Rolls with Puff Pastry Step-by-step instructions
- Prep
- Cook
- Total
- Serves
- 24
Before you start
Before starting, ensure the puff pastry is thawed according to the package directions, usually overnight in the refrigerator. Preheat the oven to 375°F (190°C) and line a baking sheet with parchment paper.
Have all the filling ingredients measured and ready. Work on a lightly floured surface to prevent sticking, and keep the pastry chilled until the moment of rolling.
Ingredients at a glance (7)
- 4 sheets thawed puff pastry
- 1 cup finely ground walnuts
- 1/2 cup powdered sugar
- 1/4 cup melted butter
- 1 tsp ground cinnamon
- 1/4 cup melted butter, for brushing
- 2 tbsp powdered sugar, for dusting
Instructions
Make the Filling and Roll the Pastry
- Prepare the Filling and PastryIn a medium bowl, combine the finely ground walnuts, powdered sugar, melted butter, and ground cinnamon. Stir until the mixture forms a crumbly, fragrant filling. On a lightly floured surface, roll out each thawed puff pastry sheet into a thin, elongated rectangle, about 1/8 inch thick.Look for The filling holds together when pinched; the pastry rolls out smoothly without tearing.Tip Keep the pastry chilled if it becomes too soft, and work with one sheet at a time.
- Spread the FillingSpread the walnut-cinnamon mixture evenly over each pastry sheet, leaving a small border at the edges. Press the filling gently so it adheres to the pastry.Look for The filling covers the pastry in an even, thin layer.Tip Use a spatula or the back of a spoon to spread without tearing the pastry.
At the end of this phase, you should have a crumbly, fragrant filling and four rolled-out pastry sheets.
The filling should hold together when pinched, and the pastry should be thin and even. Work quickly to keep the pastry cold; if it becomes too soft, refrigerate for a few minutes.
Shape and Slice the Rolls
- Roll the Pastry LogsStarting from one long edge, roll each pastry sheet tightly into a compact cylinder. Press the seam gently to seal. Repeat with the remaining sheets.Look for The logs are firm and evenly rolled, with no gaps.Tip Roll gently but firmly to avoid squeezing out the filling.
- Slice the RollsUsing a sharp knife, slice each log into two-finger-wide pieces, about 1 1/2 inches each. Arrange the rolls cut-side up on a parchment-lined baking sheet, leaving a little space between them.Look for The slices are uniform and hold their shape.Tip Use a serrated knife for cleaner cuts if the pastry is very flaky.
- Brush with ButterBrush the tops and sides of the rolls generously with the remaining melted butter. This will help them turn golden and crisp during baking.Look for The rolls are fully coated with a shiny layer of butter.Tip Re-brush any spots that look dry before baking.
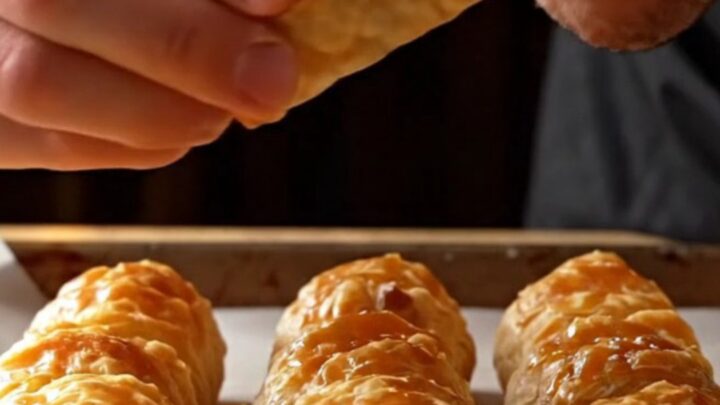
The logs should be tight and uniform, and the slices should be about two fingers wide. The rolls should sit upright on the baking sheet, with the spiral visible on top. They should be evenly brushed with butter, giving them a glossy sheen.
Bake and Finish
- Bake the RollsBake in a preheated oven at 375°F (190°C) for 20 minutes, until the rolls are puffed, deeply golden, and crisp. The filling will be fragrant and the pastry will sound hollow when tapped.Look for The rolls are deeply golden and crisp to the touch.Tip Rotate the baking sheet halfway through for even browning.
- Dust and ServeRemove the rolls from the oven and let them cool for a few minutes on the baking sheet. Dust generously with powdered sugar while still warm, then serve. The rolls should snap open with an audible crunch.Look for The sugar melts slightly on the warm pastry, creating a sweet crust.Tip Dust again just before serving for a snowy finish.
After 20 minutes in the oven, the rolls should be deeply golden and crisp. The kitchen will smell of butter and cinnamon. Let them cool slightly, then dust with powdered sugar. When you break one open, it should snap with an audible crunch.
Common mistakes
A common mistake is overfilling the pastry, which can cause the rolls to burst during baking. Keep the filling layer thin and even. Another pitfall is rolling the pastry too loosely, leading to gaps and uneven baking.
Roll tightly but gently. Also, avoid using a dull knife to slice the logs, as it can crush the pastry; use a sharp serrated knife for clean cuts.
How to tell it’s done
The rolls are done when they are puffed, deeply golden, and crisp to the touch. The filling should be fragrant, and the pastry should sound hollow when tapped.
If you break one open, the interior should be flaky and the filling set. Let them cool for a few minutes before dusting with powdered sugar; they will crisp up further as they cool.
Up next · Part 3 of 3
4 variations · storage & make-ahead · 5 answers · printable card
Tips, FAQ & printable recipe (Part 3)← Back to the ingredients (Part 1)