Appetizers · Part 2 of 3: Instructions
Crispy Turkish Paçanga Börek with Melted Cheese Pull Step-by-step instructions
- Prep
- Cook
- Total
- Serves
- 6
Before you start
Before you start, set out all your ingredients and equipment. Slice the pastırma into thin strips, dice the tomatoes, and slice the peppers. Grate the cheese if you’re using a block. Fill a shallow dish with water and spread the breadcrumbs on a plate.
Have your yufka sheets ready, covered with a damp towel. Heat the oil in a large skillet over medium-high while you assemble the rolls. This mise en place keeps the process smooth and ensures nothing dries out.
Ingredients at a glance (8)
- 12 sheets yufka (or thin phyllo dough), about 12x12 inches each
- 8 oz pastırma (Turkish cured beef), thinly sliced
- 2 medium ripe tomatoes, diced
- 2 green pointed peppers, thinly sliced
- 2 cups kaşar cheese, grated (or substitute with mozzarella)
- 1 cup water, for dipping
- 2 cups fine breadcrumbs
- 1 cup vegetable oil, for frying
Instructions
Prep and Roll
- Prepare the FillingSlice the pastırma into thin strips. Dice the tomatoes and slice the green peppers into thin rounds. Grate the kaşar cheese if not already grated. Combine the pastırma, tomatoes, peppers, and cheese in a bowl; toss gently to mix.Look for The filling should be well combined but not watery; drain excess tomato juice if needed.Tip Pat the tomatoes dry with paper towels to avoid soggy rolls.
- Lay Out the YufkaPlace one sheet of yufka on a clean work surface. Cut it into triangles if using large sheets, or use as is. Keep the remaining sheets covered with a damp cloth to prevent them from drying out.Look for The yufka should be pliable and not cracked.Tip If using phyllo, work quickly and keep it covered.
- Fill and RollPlace a portion of the filling along the wide edge of the triangle. Fold the sides over the filling, then roll tightly into a thick cigar shape, tucking the ends as you go. Repeat with the remaining sheets and filling.Look for Rolls should be snug but not too tight, about 1 inch thick.Tip Seal the final edge with a dab of water to keep the roll closed during frying.
By the end of this phase, you should have a neat pile of filled rolls, each about 1 inch thick and sealed tightly. The filling should be visible at the ends, but the rolls should hold together without leaking. The yufka should be pliable, not cracked, and the rolls should feel firm but not overly tight.
Coat and Fry
- Coat the RollsPour the water into a shallow dish and the breadcrumbs into another. Dip each roll into the water, letting any excess drip off, then roll it in the breadcrumbs until evenly coated. Set the coated rolls on a plate.Look for Each roll should have a thin, even layer of breadcrumbs.Tip Shake off excess breadcrumbs to avoid a thick, bready crust.
- Heat the OilPour the vegetable oil into a large skillet to a depth of about 1/2 inch. Heat over medium-high until a breadcrumb sizzles immediately when dropped in. Adjust the heat to maintain a steady temperature.Look for The oil should shimmer but not smoke.Tip Use a thermometer to keep the oil around 350°F (175°C).
- Fry Until GoldenCarefully place a few rolls into the hot oil without crowding. Fry for about 2 minutes per side, turning once, until deeply golden and blistered all over. Transfer to a paper towel-lined plate to drain.Look for The crust should be deep golden brown and feel crisp to the touch.Tip Fry in batches to keep the oil temperature steady.
The rolls should be evenly coated with breadcrumbs, with no bare spots. When frying, the oil should sizzle immediately upon contact, and the rolls should turn golden brown in about 2 minutes per side.
The kitchen will smell of toasted bread and sizzling cheese. The crust should look blistered and deeply golden.
Serve and Enjoy
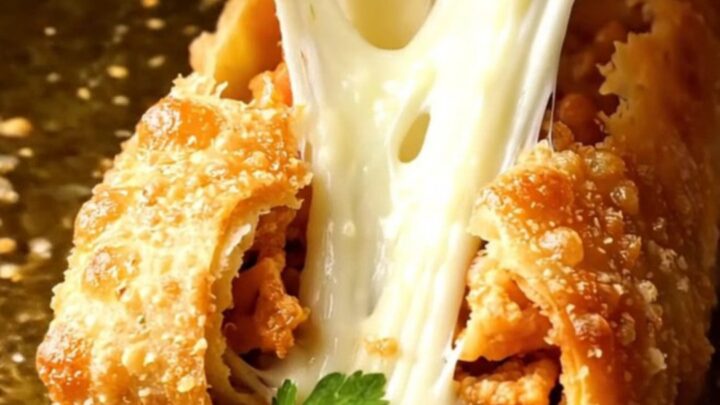
- Drain and ServeLet the fried rolls rest on paper towels for a minute to absorb excess oil. Serve warm, whole or cut in half, with the cheese pulling as you break them open.Look for The rolls should be crisp and the cheese molten inside.Tip Serve immediately for the best cheese pull.
The finished rolls should be crisp to the touch and hold their shape. When you break one open, the cheese should stretch and steam should rise. The filling should be hot and well combined. Serve immediately while the contrast between the crisp shell and molten center is at its peak.
Common mistakes
One common mistake is overfilling the rolls, which can cause them to burst during frying. Use a modest amount of filling and roll snugly. Another pitfall is wetting the rolls too much; shake off excess water before coating in breadcrumbs to avoid a gummy crust.
Also, don’t crowd the skillet — frying in batches keeps the oil temperature steady and ensures even browning. Finally, drain the tomatoes well to avoid soggy rolls.
How to tell it’s done
The rolls are done when they are deeply golden brown and blistered all over, typically after about 2 minutes per side. The crust should feel crisp and sound crunchy when tapped.
To check the inside, cut one open — the cheese should be fully melted and stretchy, and the filling hot throughout. If the rolls brown too quickly, lower the heat to prevent the outside from burning before the cheese melts.
Up next · Part 3 of 3
4 variations · storage & make-ahead · 5 answers · printable card
Tips, FAQ & printable recipe (Part 3)← Back to the ingredients (Part 1)