Dinner · Part 2 of 3: Instructions
Crispy Turkish Lahmacun Pide with Spiced Beef Step-by-step instructions
- Prep
- Cook
- Total
- Serves
- 4
Before you start
Before you start, make sure the baking stone is in the oven and preheating to 450°F (232°C) — it needs at least 30 minutes to get screaming hot. Gather all the dough ingredients and the topping ingredients. Grate the tomatoes and chop the pepper, onion, and parsley.
Measure the spices and have the olive oil ready. Clear a floured surface for rolling. The dough needs to rise for about 1 hour, so plan accordingly. Have a pizza peel or a flat baking sheet ready to transfer the pide to the stone.
Ingredients at a glance (16)
- 1/2 cup warm milk
- 1/2 cup warm water
- 1/4 cup olive oil
- 2 1/4 tsp instant yeast
- 1 tsp salt
- 5 cups all-purpose flour
- 200 g ground beef
- 2 medium tomatoes, grated
- 1/2 cup red bell pepper, finely chopped
- 1/2 cup onion, finely chopped
- 1/4 cup fresh parsley, chopped
- 2 tbsp tomato paste
- 1 tsp paprika
- 2 tbsp olive oil
- 1 lemon, cut into wedges
- Fresh parsley leaves, for serving
Instructions
Dough and Topping
- Make the DoughIn a large bowl, combine the warm milk, warm water, olive oil, instant yeast, and salt. Add the flour and stir until a shaggy dough forms. Turn the dough out onto a floured surface and knead for 8 to 10 minutes, until smooth and elastic. The dough should be soft and pillowy, not stiff. Place the dough in a lightly oiled bowl, cover with a towel, and let rise in a warm spot for about 1 hour, until doubled in size.Look for The dough is smooth, elastic, and springs back when poked.Tip If the dough feels too sticky, add a little more flour, a tablespoon at a time.
- Prepare the Spiced Beef ToppingWhile the dough rises, make the topping. In a bowl, combine the ground beef, grated tomatoes, chopped red bell pepper, onion, parsley, tomato paste, paprika, and olive oil. Mix well with a spoon or your hands until everything is evenly distributed. The mixture should be spreadable, like a thick paste. Cover and refrigerate until ready to use.Look for The topping is a uniform red paste with no large chunks.Tip Chilling the topping makes it easier to spread on the dough.
The dough should be smooth, elastic, and doubled in size. The topping should be a uniform red paste, thick enough to spread without running. The kitchen smells of yeast and fresh herbs. Before moving on, ensure the dough is well-risen and the topping is chilled; this makes shaping easier.
Shaping and Baking
- Shape the Pide BoatsPreheat the oven to 450°F (232°C) with a baking stone on the middle rack. Punch down the risen dough and divide it into 4 equal pieces. On a floured surface, roll one piece into a long oval, about 1/8 inch thick. Spread a quarter of the beef mixture evenly over the dough, leaving a small border. Pinch the two short ends together to form pointed boat tips. Repeat with the remaining dough and topping.Look for The ovals are thin and the ends are pinched into sharp points.Tip Keep the dough pieces covered with a towel while shaping to prevent drying.
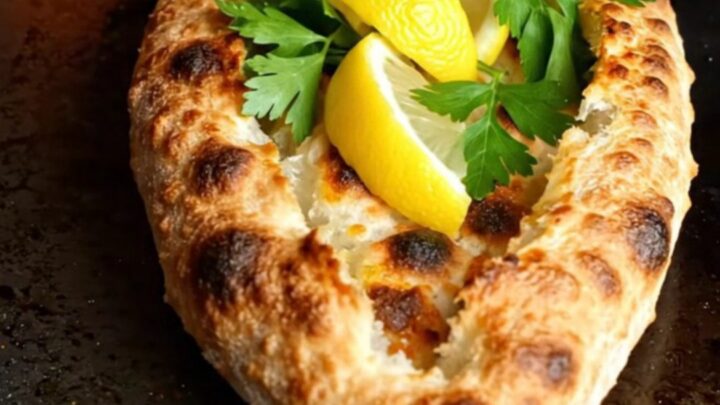
- Bake the PideCarefully transfer the shaped pide onto the preheated baking stone. Bake for 8 minutes, or until the crust is blistered and charred in spots and the beef is cooked through. The edges should be golden and crisp. Remove from the oven and let cool for a minute on a wire rack.Look for The crust is blistered with dark leopard spots and the beef is sizzling.Safe temperature 160°F (71°C) internal temperature (ground meat)Tip Use a pizza peel or a flat baking sheet to slide the pide onto the stone.
The shaped pide are thin ovals with pointed ends, topped with an even layer of beef. As they bake, the kitchen fills with the aroma of toasting bread and spiced meat.
The crust blisters and chars, and the edges turn golden. Check that the bottoms are crisp and the meat is cooked through before removing.
Finishing and Serving
- Garnish and ServeTop the hot pide with fresh parsley leaves and serve with lemon wedges. To eat, squeeze lemon juice over the top, then roll the pide tightly from one end. Enjoy warm, with the crispy crust and bright, spiced filling.Look for The lemon juice sizzles on the hot crust and the parsley adds freshness.Tip Roll the pide while it's still warm for the best crunch.
The pide are topped with fresh parsley and served with lemon wedges. The first bite should be a loud crunch, followed by the savory, tangy filling. The lemon brightens the richness of the beef. Serve warm, rolled up, with extra lemon on the side.
Common mistakes
A common mistake is rolling the dough too thick, which results in a bready crust that doesn't get crispy. Roll it thin, about 1/8 inch, but not so thin that it tears. Another issue is overloading the topping — a thin layer is key; too much makes the dough soggy.
Don't skip preheating the baking stone; it's essential for the blistered char. Also, avoid opening the oven door during baking, as the temperature drop can affect the crust's crispness.
How to tell it’s done
The pide are done when the crust is deeply blistered and charred in spots, and the edges are golden and crisp. The beef topping should be cooked through and no longer pink; an instant-read thermometer inserted into the meat should read 160°F (71°C).
The bottom of the pide should sound hollow when tapped. Let them cool for a minute before serving — the crust will continue to crisp as it sits.
- Ground meat: 160°F (71°C) in the thickest part
Up next · Part 3 of 3
4 variations · storage & make-ahead · 5 answers · printable card
Tips, FAQ & printable recipe (Part 3)← Back to the ingredients (Part 1)