Dinner · Part 2 of 3: Instructions
Crispy Szechuan Bang Bang Shrimp with Toasted Peanuts Step-by-step instructions
- Prep
- Cook
- Total
- Serves
- 4
Before you start
Before starting, pat the shrimp very dry with paper towels—moisture is the enemy of crispiness. Have all ingredients measured and within reach, as the cooking process moves quickly. Set up a wire rack over a baking sheet for draining the fried shrimp.
Prepare the sauce by whisking all sauce ingredients in a bowl. Chop the scallions and crush the peanuts if not already done. Fill a wok or heavy skillet with oil and begin heating it while you coat the shrimp.
Ingredients at a glance (11)
- 1 lb peeled jumbo shrimp (about 400g), tails removed
- 1 large egg white
- 1/2 cup cornstarch
- 2 cups frying oil (such as peanut or vegetable)
- 3 tbsp chili oil with crisp
- 2 tbsp mayonnaise
- 1 tbsp sweet chili sauce
- 1 tbsp black vinegar
- 1 tsp toasted ground Szechuan peppercorns
- 1/3 cup crushed roasted peanuts
- 2 tbsp thinly sliced scallions
Instructions
Prep and Fry
- Prepare and Coat the ShrimpPat the shrimp dry with paper towels. In a bowl, toss the shrimp with the egg white until evenly coated. Add the cornstarch and toss thoroughly, pressing the cornstarch onto the shrimp so they are heavily coated in a thick, powdery dry layer. Shake off any excess.Look for The shrimp should look completely dry and powdery, with no wet spots.Tip Coating in batches helps the cornstarch adhere evenly. Let the coated shrimp sit for 5 minutes to set the crust.
- Heat the Frying OilPour the frying oil into a large wok or heavy skillet to a depth of about 1 inch. Heat over medium-high until a deep-fry thermometer registers 365°F (185°C).Look for The oil should shimmer and a small piece of cornstarch sizzles immediately when dropped in.Tip Use a thermometer for accuracy; oil that is too cool makes soggy shrimp, too hot burns the coating.
- Fry the ShrimpCarefully add the coated shrimp to the hot oil in a single layer, working in batches if needed. Fry for about 2 1/2 minutes, turning occasionally, until golden brown, curled, and intensely crunchy. Transfer to a wire rack to drain.Look for The shrimp will be deep golden and crisp, with a audible crunch when pressed.Safe temperature 145°F (63°C) internal temperature (shellfish)Tip Do not overcrowd the pan; fry in batches to keep the oil temperature steady.
At the end of this phase, the shrimp should be perfectly fried: golden brown, crispy, and cooked through.
The oil should be at a steady 365°F (185°C), and the shrimp should drain on a wire rack, not on paper towels, to keep them crisp. The kitchen will smell of hot oil and toasted cornstarch.
Sauce and Toss
- Make the Bang Bang SauceIn a medium bowl, whisk together the chili oil with crisp, mayonnaise, sweet chili sauce, black vinegar, and ground Szechuan peppercorns until creamy and vibrant.Look for The sauce should be smooth, glossy, and a fiery coral color.Tip Whisk thoroughly to emulsify the oil and mayonnaise; the sauce will thicken slightly.
- Toss Shrimp in SauceAdd the hot fried shrimp to the sauce and toss quickly with tongs or a spatula until every shrimp is evenly coated in the creamy, fiery sauce.Look for The sauce clings to each shrimp, leaving a glossy, spicy coating.Safe temperature 160°F (71°C) internal temperature (egg dishes)Tip Toss while the shrimp are still hot so the sauce adheres better and the coating stays crisp.
The sauce should be smooth, creamy, and vibrant coral in color. When tossed with the hot shrimp, it should coat each piece evenly, clinging to the crispy shell. The aroma is spicy, tangy, and slightly sweet, with a hint of Szechuan peppercorn's citrusy numbing scent.
Garnish and Serve
- Garnish and ServeTransfer the sauced shrimp to a serving platter. Sprinkle with the crushed roasted peanuts and sliced scallions. Serve immediately, with chopsticks or toothpicks for easy grabbing.Look for The peanuts add crunch and the scallions a fresh green contrast.Tip Serve right away to enjoy the crunch; the sauce will soften the coating over time.
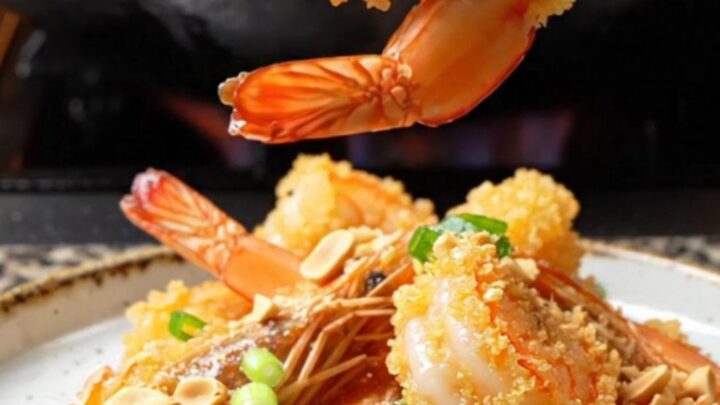
The final dish is a beautiful platter of glossy, saucy shrimp topped with crunchy peanuts and fresh green scallions. The contrast of textures—crunchy, creamy, and crisp—is visually and aromatically appealing. Serve immediately while the shrimp are still hot and the peanuts are crunchy.
Common mistakes
One common mistake is not drying the shrimp thoroughly, which causes the coating to slide off during frying. Another is overcrowding the pan, which lowers the oil temperature and results in soggy shrimp.
Also, be careful not to overmix the sauce—whisk just until combined to keep it creamy. Finally, do not let the sauced shrimp sit too long before serving, as the sauce will soften the crisp coating.
How to tell it’s done
The shrimp are done when they are golden brown and have curled into a C-shape, indicating they are cooked through. The internal temperature should reach 145°F (63°C) when tested with an instant-read thermometer.
The coating should be deeply golden and crisp, making an audible crunch when bitten. The sauce should be thick and clingy, and the shrimp should be glossy and well-coated. Serve immediately for the best texture.
- Shellfish: 145°F (63°C) in the thickest part
- Egg dishes: 160°F (71°C) in the thickest part
Up next · Part 3 of 3
4 variations · storage & make-ahead · 5 answers · printable card
Tips, FAQ & printable recipe (Part 3)← Back to the ingredients (Part 1)