Appetizers · Part 1 of 3: Ingredients
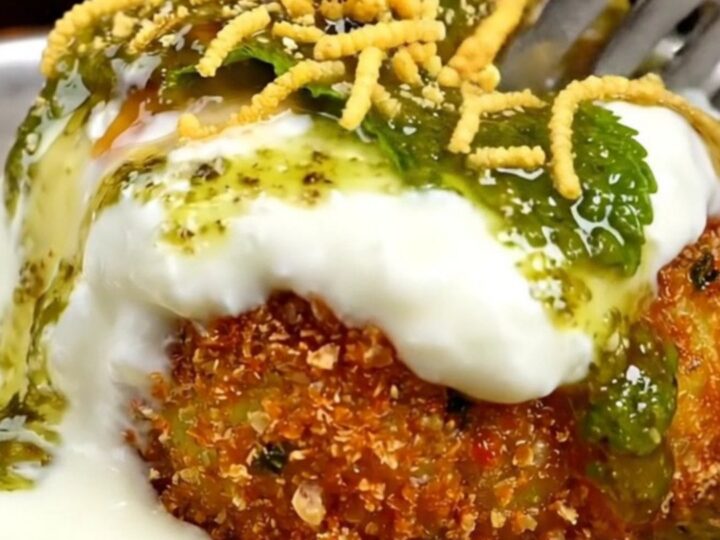
Crispy Stuffed Aloo Tikki with Paneer and Peas
- Prep
- Cook
- Total
- Serves
- 4
Master the art of Indian street food with these crispy, golden stuffed Aloo Tikki. By combining mashed potatoes with rice flour, you achieve a signature crunch that stays crisp long after leaving the tawa.
This recipe brings the authentic flavors of spiced peas and molten paneer right into your home kitchen with simple, accessible ingredients. Perfect as a quick appetizer or a savory snack, these patties deliver a satisfying texture contrast that is truly addictive and visually stunning.
Aloo Tikki is a beloved Indian street snack, prized for its golden, crispy exterior and soft, flavorful potato interior. This version elevates the classic by incorporating a rice flour crust, which provides an exceptionally crunchy finish that contrasts perfectly with the tender, spiced pea and paneer filling.
These patties are pan-seared on a cast-iron tawa, the traditional method that ensures even browning and a deep, complex flavor. Drizzled with a trio of cooling yogurt, vibrant mint chutney, and tangy tamarind, they offer a complete sensory experience that captures the bustling essence of an Indian market stall in every bite.
Ingredients
Potato Base
- 500 g boiled mashed potatoes
- 40 g rice flour
- 1 tsp roasted cumin
- 1 tsp chaat masala
- 1 tbsp fresh cilantro, chopped
Filling
- 80 g spiced green peas
- 80 g grated paneer
Cooking
- 3 tbsp mustard oil
Topping
- 1/2 cup chilled whisked yogurt
- 1/4 cup mint-cilantro chutney
- 1/4 cup sweet tamarind glaze
- 1/4 cup nylon sev
Why this recipe works
The secret to the perfect Aloo Tikki lies in the addition of rice flour to the potato base. Rice flour absorbs moisture and creates a structural integrity that allows the patty to fry into a thick, blistered crust without breaking apart. This method ensures that the outside remains crunchy while the inside stays soft and fluffy, protecting the delicate paneer and pea filling from drying out during the searing process.
Using a heavy cast-iron tawa is crucial for achieving the authentic street-style finish. Cast iron retains heat exceptionally well, providing a consistent temperature that creates a deep, golden-brown sear.
This high-heat cooking method quickly crisps the surface of the potato, sealing in the moisture and flavors. The result is a substantial, blistered crust that provides an audible crunch with every bite, distinguishing these patties from softer, baked variations.
Notes and substitutions
For the best results, use potatoes that have been boiled and thoroughly cooled before mashing. Starchy potatoes like Russets are ideal because they provide a light, airy texture that holds its shape well. Ensure the potatoes are mashed until completely smooth; any large chunks can compromise the structural integrity of the patty during the stuffing and searing process.
The choice of oil significantly impacts the final flavor. While mustard oil is traditional for its pungent, earthy depth, you can substitute it with any neutral high-smoke-point oil if preferred.
Always ensure the tawa is properly heated before adding the patties; a cold pan will result in greasy, soft patties instead of the desired crispness. Monitor the heat carefully throughout the cooking process to ensure the crust develops evenly without burning.
- mustard oil: Any neutral vegetable oil with a high smoke point such as canola or grapeseed oil.
- paneer: Firm tofu, pressed and crumbled, offers a similar texture for a dairy-free alternative.
Equipment
- Large mixing bowl
- Cast-iron tawa
- Potato masher
- Spatula
Up next · Part 2 of 3
4 steps · 8 min of cooking · what to look for at each stage
Step-by-step instructions (Part 2)