Dinner · Part 1 of 3: Ingredients
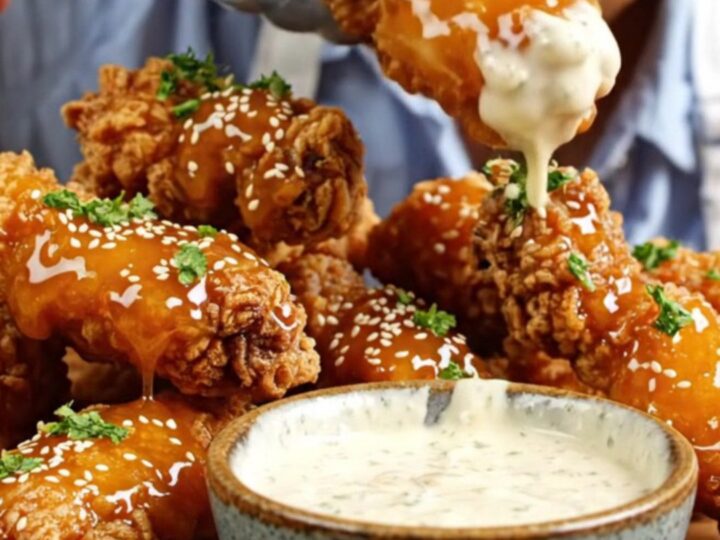
Crispy Sticky Honey BBQ Chicken Tenders
- Prep
- Cook
- Total
- Serves
- 4
These sticky honey BBQ chicken tenders are the ultimate weeknight dinner or game-day snack. Crispy on the outside, juicy on the inside, and coated in a sweet, tangy glaze that clings to every bite.
The buttermilk marinade keeps the chicken tender and flavorful, while the cornstarch in the coating ensures a shatteringly crisp crust. Tossed in a homemade honey BBQ sauce made with pantry staples, these tenders are far better than takeout. Serve them with garlic ranch for the perfect dunk.
Crispy chicken tenders are a family favorite, but this version takes them to the next level. The secret is a buttermilk marinade that tenderizes the chicken and adds a tangy depth, paired with a flour-and-cornstarch coating that fries up extra crispy.
The glaze is a simple combination of barbecue sauce, honey, butter, and brown sugar, simmered until thick and glossy. Each tender is tossed in the glaze until completely lacquered, creating a sticky-sweet finish that's irresistible. Perfect for dinner, parties, or a fun weekend meal.
Ingredients
- 1 lb chicken tenders
Marinade
- 1 1/2 cups buttermilk
- 2 tbsp lemon juice
- 2 tbsp soy sauce
- 1 tbsp hot sauce
- 1 tsp garlic powder
- 1 tsp salt
Coating
- 1 cup all-purpose flour
- 1/2 cup cornstarch
Glaze
- 1/2 cup barbecue sauce
- 3 tbsp honey
- 2 tbsp unsalted butter
- 2 tbsp brown sugar
- 1 tsp Worcestershire sauce
- 4 cups vegetable oil, for frying
For serving
- Garlic ranch dressing, for serving
Why this recipe works
The buttermilk marinade is the key to juicy, flavorful chicken. Buttermilk's acidity gently tenderizes the meat, while the lemon juice, soy sauce, hot sauce, and garlic powder infuse every bite with savory, tangy, and spicy notes.
This step also helps the flour coating adhere better, ensuring a crisp crust that doesn't peel off during frying.
The combination of all-purpose flour and cornstarch in the coating creates an extra-crispy, shatteringly crunchy exterior. Cornstarch absorbs moisture and fries up lighter and crispier than flour alone. Frying at 375°F ensures the chicken cooks through quickly, leaving the crust golden and crunchy without absorbing too much oil.
Notes and substitutions
Use chicken tenders, or cut chicken breasts into strips. Buttermilk can be full-fat or low-fat; if you don't have it, make a quick substitute by adding lemon juice to regular milk.
Hot sauce adds a subtle heat; use your favorite brand or adjust the amount to taste. Soy sauce adds umami, but you can use coconut aminos for a gluten-free version.
For the coating, all-purpose flour and cornstarch are whisked together; make sure there are no lumps. The oil should be a neutral high-smoke-point oil like vegetable or canola. The glaze is made with barbecue sauce, honey, butter, brown sugar, and Worcestershire sauce; use a barbecue sauce you like, as its flavor will shine through.
- buttermilk: 1 1/2 cups whole milk mixed with 1 1/2 tbsp lemon juice or white vinegar; let sit 5 minutes
- soy sauce: coconut aminos or tamari (if not gluten-free, use regular soy sauce)
- hot sauce: 1 tsp cayenne pepper or 1/2 tsp red pepper flakes for heat
- barbecue sauce: 1/2 cup ketchup mixed with 1 tbsp molasses and 1 tsp smoked paprika
Equipment
- Large bowl
- Whisk
- Deep skillet or Dutch oven
- Deep-fry thermometer
- Tongs
- Wire rack
- Small saucepan
- Paper towels
Up next · Part 2 of 3
9 steps · 12 min of cooking · what to look for at each stage
Step-by-step instructions (Part 2)