Dinner · Part 1 of 3: Ingredients
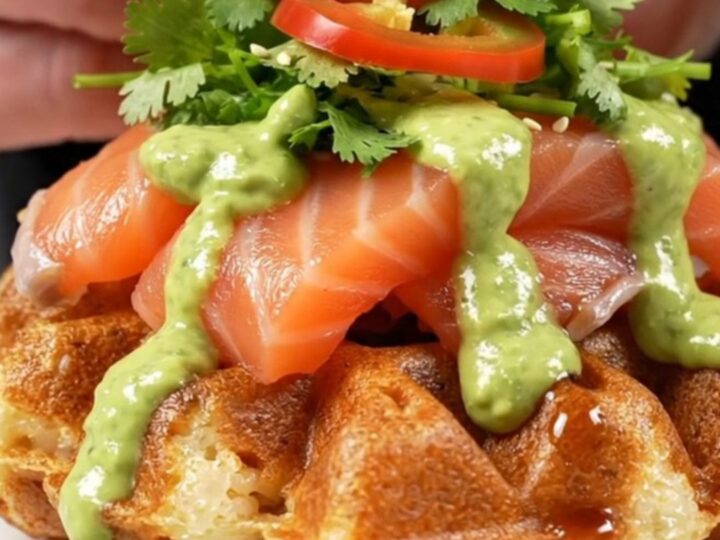
Crispy Salmon Sushi Rice Waffles with Caramelized Glaze
- Prep
- Cook
- Total
- Serves
- 2
Transforming humble sushi rice into a crunchy, golden waffle is a game-changer for home cooks who love bold, Japanese-inspired flavors. This recipe delivers a satisfying crunch that perfectly complements the buttery, rich texture of fresh salmon belly.
It is a quick, impressive dish that brings restaurant-quality techniques right into your own kitchen with just a few simple steps and a standard waffle iron. Discover how the heat of the iron creates an incredible texture you will want to make again and again.
The magic of this recipe lies in the contrast between the hot, crispy rice waffle and the cool, delicate salmon belly. By packing seasoned sushi rice into a hot waffle iron, the grains crisp up into a sturdy base that acts as a canvas for high-quality toppings.
Using a kitchen torch to sear the salmon adds a smoky, caramelized finish that elevates the flavors of the Kewpie mayo and unagi glaze. This preparation is perfect for those who appreciate the artistry of sushi served in a modern, innovative format.
Ingredients
Waffle Base
- 250 g seasoned sushi rice
- 10 ml toasted sesame oil
- 1 tbsp furikake
Topping
- 4 oz salmon belly, thinly sliced
- 1 tbsp Kewpie mayo
- 1 tbsp unagi glaze
Garnish
- micro-cilantro, for serving
- jalapeño slices, for serving
- avocado crema, for serving
Why this recipe works
The waffle iron method works by using high, direct heat to rapidly dehydrate the exterior of the rice grains while the interior remains chewy and tender. This process creates a unique, rigid structure that can hold toppings without becoming soggy.
The addition of toasted sesame oil ensures that the rice does not adhere to the iron plates, allowing for a clean release and a beautiful, golden-brown finish that is both visually appealing and structurally sound for plating.
Using a kitchen torch to finish the salmon provides precise control over the cooking process. Unlike traditional oven or pan-searing methods, the torch allows the chef to caramelize the fats in the salmon belly and the sugars in the unagi glaze while keeping the center of the fish cool and raw. This technique mimics the professional approach found in high-end sushi bars, ensuring that every bite is perfectly balanced with texture and flavor depth.
Notes and substitutions
Selecting the right sushi rice is critical. Use a short-grain variety that has been properly seasoned with rice vinegar, sugar, and salt before starting. If using leftover rice, ensure it is not too dry, as it needs to be pliable enough to pack into the iron. Furikake provides an essential savory depth, so choose a blend that contains seaweed and sesame seeds for the best result. Always ensure the waffle iron is fully preheated to 400°F to get that signature crunch.
The equipment required is minimal but specific. A standard Belgian waffle iron is ideal because its deep pockets create more surface area for crisping.
A kitchen torch is necessary for the final searing step, as it provides the intense, localized heat needed to caramelize the mayo and glaze without overcooking the fish. If an avocado crema is unavailable, a simple mashed avocado seasoned with lime juice and salt serves as a perfect, creamy substitute for the garnish.
- salmon belly: sashimi-grade salmon fillet
- unagi glaze: soy sauce mixed with sugar and mirin, reduced until syrupy
Equipment
- Belgian waffle iron
- Kitchen torch
- Mixing bowl
- Spatula
- Sharp knife
Up next · Part 2 of 3
3 steps · 6 min of cooking · what to look for at each stage
Step-by-step instructions (Part 2)