Dinner · Part 2 of 3: Instructions
Crispy Roasted Garlic Potatoes for a Perfect Side Dish Step-by-step instructions
- Prep
- Cook
- Total
- Serves
- 4
Before you start
Before starting, ensure your potatoes are washed, dried, and cut into uniform halves. Having all ingredients measured and ready to go allows you to focus entirely on managing the heat in your skillet. Prepare your work surface by clearing space for the skillet and having your serving platter nearby.
It is helpful to preheat the skillet over medium-high heat for a few minutes before adding the potatoes, as a hot pan is the secret to achieving that initial sear. Keep your kitchen well-ventilated, as the high heat required for roasting can create smoke during the process.
Ingredients at a glance (3)
- 2 lb potatoes, halved
- 4 cloves garlic, minced
- 2 tbsp fresh parsley, chopped
Instructions
Seasoning and Initial Sear
- Prepare and SeasonHalve the potatoes and toss them thoroughly in a bowl with the minced garlic until evenly coated.Look for Potatoes should look well-coated.Tip Dry the potatoes thoroughly with paper towels before seasoning to ensure maximum crispiness.
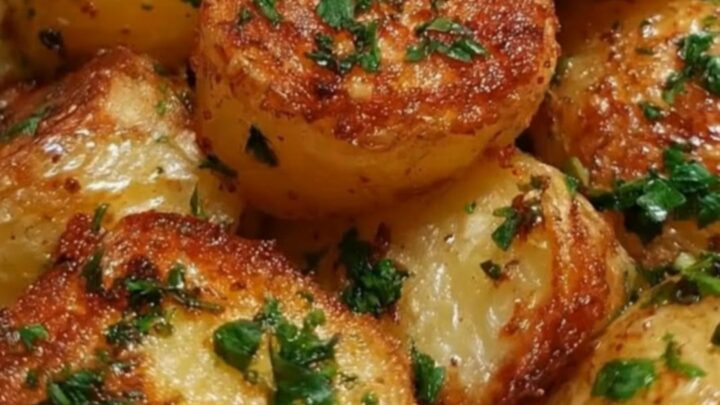
At the end of this phase, the potatoes should be well-coated in garlic. When placed in the skillet, you should hear an immediate, sharp sizzle. The cut sides will begin to darken as the sugars in the potato respond to the heat. Ensure the potatoes are arranged in a single layer to allow for maximum contact with the hot metal, which is the foundational step for achieving a crispy crust.
Roasting and Browning
- Skillet RoastingPlace the potatoes cut-side down into a preheated cast-iron skillet and roast until the undersides are deep golden brown and crispy.Look for Look for a deep, dark golden brown crust on the cut surfaces.Tip Avoid moving the potatoes too early to allow the crust to form properly.
During the roasting phase, the kitchen will fill with the savory aroma of toasted garlic. The potatoes should look visibly browned on their flat sides. Check for a firm, crusty texture by gently nudging a piece with a spoon.
The edges should start to look slightly brittle and golden, indicating that the heat is successfully transforming the exterior while the internal steam continues to cook the potato center.
Final Crisp and Garnish
- Finish and GarnishFlip the potatoes to cook until the skins are tender and crispy throughout. Remove from heat, sprinkle with fresh chopped parsley, and let rest for five minutes before serving.Look for The potatoes should be fork-tender and smell aromatic.Tip Serving immediately helps maintain the texture of the crispy skin.
In the final phase, the potatoes should be crispy all over and tender throughout. The addition of fresh parsley should brighten the dish, adding a pop of color and a fresh, herbal note. Before serving, verify that the skins have achieved a uniform, deep golden color and that the potatoes are fully cooked through. Let them rest briefly to allow the crust to set before transferring them to a serving plate.
Common mistakes
A common mistake is overcrowding the skillet, which causes the potatoes to steam rather than roast. Ensure each piece has enough space to make direct contact with the pan surface. Another error is moving the potatoes too frequently; let them sit undisturbed until the crust has properly formed.
Finally, using too little heat can lead to sticking and uneven browning, so ensure the pan is sufficiently hot before the potatoes hit the skillet surface for the best possible results.
How to tell it’s done
The potatoes are done when they are golden brown and crispy on the outside and offer no resistance when pierced with a fork. The interior should be soft and steaming, indicating the starch has fully cooked through.
Because this recipe does not involve raw proteins, you do not need to worry about internal temperatures, but you should look for that characteristic audible crunch when you press down or cut into a potato. The color should be a rich, uniform bronze rather than a pale yellow.
Up next · Part 3 of 3
2 variations · storage & make-ahead · 3 answers · printable card
Tips, FAQ & printable recipe (Part 3)← Back to the ingredients (Part 1)