Dinner · Part 2 of 3: Instructions
Crispy Rice Paper Dumplings with Chicken and Veggies Step-by-step instructions
- Prep
- Cook
- Total
- Serves
- 4
Before you start
Before you start, gather all ingredients and equipment. Shred the cabbage and carrots finely, slice the scallions, and measure the soy sauce and sesame oil. Fill a shallow dish with warm water.
Have a clean cutting board and a plate for the finished dumplings ready. The filling comes together quickly, so it’s best to have everything prepped before you begin assembly.
Ingredients at a glance (8)
- 12 sheets Vietnamese round rice paper (8-inch)
- 250 g ground chicken
- 1 cup finely shredded green cabbage
- 1/2 cup grated carrots
- 2 sliced scallions
- 1 tbsp soy sauce
- 1 tsp toasted sesame oil
- 2 tbsp neutral oil (such as canola or vegetable)
Instructions
Assembly
- Make the FillingIn a medium bowl, combine the ground chicken, shredded cabbage, grated carrots, sliced scallions, soy sauce, and toasted sesame oil. Mix with your hands or a fork until everything is evenly distributed. The mixture should be cohesive but not pasty.Look for The filling holds together when pressed; it should look colorful and smell fragrant.Tip Do not overmix or the chicken will become dense. Stop as soon as no streaks remain.
- Soften the Rice PaperFill a shallow dish with warm water. Dip one rice paper sheet into the water for about 5 seconds, until it becomes pliable but not overly soft. Lay it flat on a clean cutting board.Look for The sheet should be flexible and slightly tacky, but not so wet that it tears.Tip Work with one sheet at a time. Keep the water warm; if it cools, refresh it with hot water.
- Fill and Fold the DumplingsPlace about 2 tablespoons of filling in the center of the softened rice paper. Fold the bottom edge over the filling, then fold in the sides, and roll tightly into a square parcel. Place a second rice paper sheet dipped in water over the parcel and wrap again, folding in the sides to make a neat square. Repeat with the remaining filling and rice paper.Look for The parcels should be tight, with no filling exposed.Tip Double-wrapping ensures a sturdy wrapper that won't burst during frying. Keep the parcels on a lightly oiled plate to prevent sticking.
You should have a bowl of well-mixed filling that holds together, and a stack of neatly wrapped square parcels. The rice paper should be smooth and translucent, with no cracks or exposed filling. If you press gently, the parcels feel firm but slightly springy.
Frying
- Heat the PanHeat a large non-stick skillet over medium heat and add the neutral oil. Swirl to coat the bottom evenly. The oil should shimmer but not smoke.Look for The oil is ready when it shimmers and a small piece of rice paper sizzles gently.Tip Use medium heat, not high, to get a deep golden crust without burning the wrapper.
- Pan-Fry the DumplingsPlace the dumplings in the skillet in a single layer, leaving space between them. Cook for 4 minutes per side, or until deeply golden brown and blistered. Use tongs to flip carefully. The chicken filling must reach 165°F (74°C) in the center.Look for The bottoms turn golden brown and the wrapper blisters and crisps.Safe temperature 165°F (74°C) internal temperature (poultry)Tip Don't crowd the pan; fry in batches if needed. Adjust heat if browning too quickly.
- Drain and RestTransfer the fried dumplings to a plate lined with paper towels to drain any excess oil. Let them rest for a minute before serving.Look for The dumplings are shiny and crisp, with no greasy residue.Tip Resting keeps the crust crisp and lets the filling settle.
The pan should be sizzling gently. The dumplings will start to turn golden on the bottom after about 2 minutes. As they cook, the wrapper will blister and puff, and you’ll hear a satisfying crackle.
After flipping, the second side should match the first in color—deep golden brown with darker spots from the blisters.
Serving
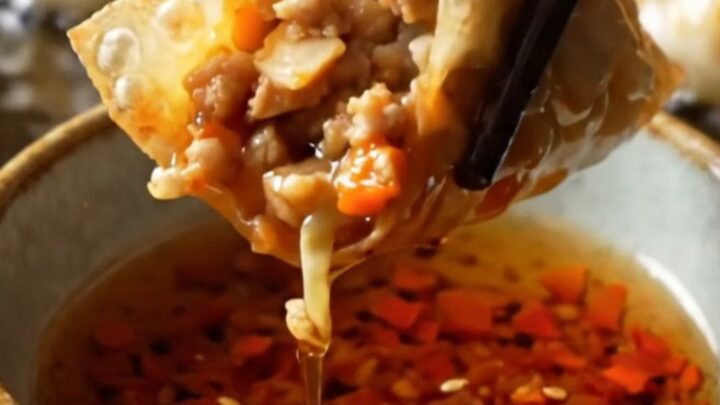
- Serve with Dipping SauceServe the dumplings hot with chili crisp and soy sauce for dipping. To enjoy the full effect, press down with chopsticks to hear the crunch, then dip and pull apart to reveal the juicy filling.Look for Each bite gives a loud crunch followed by a savory, juicy center.Tip For extra flavor, brush the hot dumplings with a little soy sauce before serving.
The dumplings are ready to serve. They should look glossy with oil, crisp to the touch, and the filling should be visibly juicy when you bite into one. The aroma is irresistible—toasted sesame, soy, and caramelized chicken. Serve immediately with chili crisp and soy sauce.
Common mistakes
One common mistake is over-soaking the rice paper, making it too sticky and prone to tearing. Dip for exactly 5 seconds—it should still feel slightly firm but pliable.
Another is using too high heat, which burns the wrapper before the filling cooks. Keep the heat at medium and cook for the full 4 minutes per side. Also, don’t skip the double wrap; it’s essential for a sturdy, crispy crust.
How to tell it’s done
The dumplings are done when the wrapper is deeply golden brown and blistered all over, and the filling reaches 165°F (74°C) in the center. To check, insert an instant-read thermometer into the thickest part of a dumpling.
The crust should be crisp and crackle when pressed, and the filling should be steaming hot and no longer pink. Let them rest for a minute before serving to allow the juices to settle.
- Poultry: 165°F (74°C) in the thickest part
Up next · Part 3 of 3
4 variations · storage & make-ahead · 5 answers · printable card
Tips, FAQ & printable recipe (Part 3)← Back to the ingredients (Part 1)