Dinner · Part 2 of 3: Instructions
Crispy Potato Veggie Patties with Spicy Kewpie Dip Step-by-step instructions
- Prep
- Cook
- Total
- Serves
- 4
Before you start
Before you start, parboil the potatoes: place them in a pot of salted water, bring to a boil, and cook for 10 minutes until just tender. Drain and let cool until easy to handle. Meanwhile, peel and shred the carrots, and thinly slice the scallions.
Grate the cheddar if you’re using a block. Have all your ingredients measured and ready—the cooking goes fast once you start frying. Set up a paper-towel-lined plate for draining the finished patties.
Ingredients at a glance (12)
- 3 medium russet potatoes, parboiled
- 2 medium carrots, peeled
- 3 medium scallions, thinly sliced
- 1 cup shredded cheddar cheese
- 1/4 cup cornstarch
- 1 tsp garlic powder
- 1/2 tsp kosher salt
- 1/4 tsp black pepper
- 1/2 cup vegetable oil, for frying
- 1/2 cup Kewpie mayonnaise
- 1 tbsp sriracha sauce
- 1 tsp lime juice
Instructions
Prep and shape
- Shred the vegetablesUsing a box grater, shred the parboiled russet potatoes and peeled carrots into long, textured ribbons. Place them in a large mixing bowl. Add the sliced scallions, shredded cheddar cheese, cornstarch, garlic powder, kosher salt, and black pepper. Use your hands or a spatula to toss everything together until the cheese and cornstarch are evenly distributed and the mixture holds together when pressed.Look for The mixture should be moist but not wet, with shreds that cling together when squeezed.Tip Parboiling the potatoes keeps them tender inside while the outside crisps up during frying.
- Form the pattiesOn a clean cutting board or work surface, scoop about 1/2 cup of the vegetable mixture and press it firmly into a thin, round patty about 1/2 inch thick. Repeat with the remaining mixture to make 4 patties. Press firmly so the patties hold their shape during frying.Look for The patties should be compact and uniform in thickness.Tip Wet your hands slightly to prevent sticking when shaping the patties.
Your shredded vegetables should be in a large bowl, with the scallions, cheddar, cornstarch, and seasonings evenly distributed. The mixture should look colorful and slightly sticky, with the cheese acting as a binder.
When you press a handful together, it should hold its shape without crumbling. If it feels too dry, add a teaspoon of water; if too wet, add a little more cornstarch.
Fry to golden crisp
- Heat the oilPlace a large skillet over medium-high heat and add the vegetable oil. Heat until the oil shimmers and a small piece of the mixture sizzles immediately when dropped in. The oil should be hot but not smoking.Look for The oil should be about 350°F (175°C) and gently rippling.Tip If the oil is too hot, the outside will burn before the inside cooks through.
- Fry the pattiesCarefully place the patties into the hot oil in a single layer, without crowding. Fry for 4 minutes per side, until deeply golden brown and shatteringly crispy. Use a spatula to flip them gently. The cheese will melt and crisp at the edges, creating a crunchy crust.Look for The patties should be golden brown and crisp on both sides, with melted cheese bubbling at the edges.Tip Do not move the patties too early—let them develop a crust before flipping.
- Drain and restTransfer the fried patties to a plate lined with paper towels to drain any excess oil. Let them rest for 2 minutes before serving. This allows the crust to set and the interior to steam slightly, making the texture perfect.Look for The patties should be crispy on the outside and tender inside.Tip Do not cover them—covering will make the crust soggy.
The oil should be hot enough that a pinch of the mixture sizzles immediately. When the patties go in, they should sizzle vigorously but not splatter violently. After 4 minutes, the first side should be a deep golden brown with crispy, lacy edges. Flip carefully and cook the second side until equally browned. The kitchen will smell richly of toasted cheese and potatoes.
Finish and serve
- Make the spicy Kewpie dipIn a small bowl, stir together the Kewpie mayonnaise, sriracha sauce, and lime juice until smooth and evenly combined. Adjust the heat level by adding more or less sriracha to taste.Look for The dip should be creamy and pale orange, with a balanced spicy-tangy flavor.Tip For a thinner dip, add a teaspoon of water or extra lime juice.
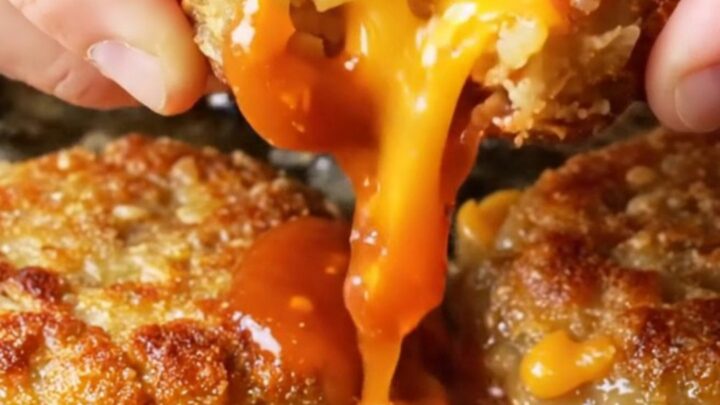
- Serve and enjoyArrange the crispy potato veggie patties on a serving plate with the spicy Kewpie dip on the side. Serve immediately while the patties are hot and crunchy. Dip each bite into the sauce and enjoy the contrast of crispy exterior and tender, cheesy interior.Look for The patties should crackle when broken, revealing steaming cheddar and tender potato ribbons.Tip These are best eaten fresh out of the skillet.
The patties should be resting on paper towels, with a final texture that’s crunchy on the outside and tender inside. The spicy Kewpie dip should be smooth and creamy, with a balanced heat. When you break a patty open, you should see steam rising and strands of melted cheddar stretching. Serve immediately for the best crunch.
Common mistakes
Soggy patties happen when the mixture is too wet. Be sure to squeeze excess moisture from the shredded vegetables after parboiling—a clean kitchen towel works well.
Another common mistake is overcrowding the skillet, which drops the oil temperature and steams the patties instead of frying them. Fry in batches if needed. Finally, don’t flip too early; wait until the first side is deeply browned and releases easily from the pan.
How to tell it’s done
The patties are done when they are deeply golden brown on both sides and feel firm and crisp when pressed with a spatula.
The internal temperature should be at least 165°F (74°C) if you want to be precise, but the visual cues are reliable: the edges will be lacy and browned, and the cheese will be visibly melted and bubbling. Let them rest for 2 minutes before serving to allow the crust to set.
Up next · Part 3 of 3
4 variations · storage & make-ahead · 5 answers · printable card
Tips, FAQ & printable recipe (Part 3)← Back to the ingredients (Part 1)