Appetizers · Part 1 of 3: Ingredients
Crispy Potato Taleggio Focaccia
- Prep
- Cook
- Total
- Serves
- 8
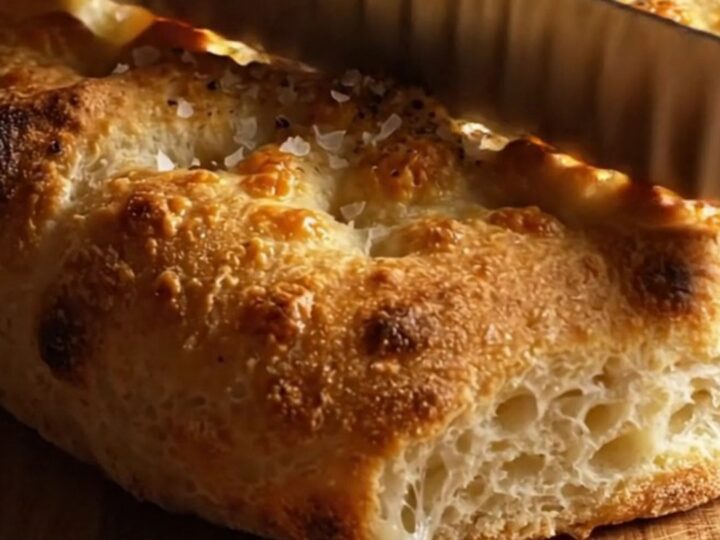
Imagine a focaccia so crispy on top that you hear the crackle as you slice through it, with paper-thin potato slices that turn golden and shatter, and pockets of melted taleggio cheese that stretch with every pull. This is that bread. It starts with a simple, airy dough, dimpled and drizzled with olive oil, then topped with a shingle of Yukon Gold potato slices and creamy, pungent taleggio.
This focaccia is a celebration of texture and flavor. The base is a classic Italian flatbread, soft and airy inside with a golden, blistered crust. The topping is where it gets exciting: paper-thin Yukon Gold potatoes, sliced so fine they almost melt into the dough, and cubes of taleggio, a washed-rind cow's milk cheese known for its creamy texture and earthy, tangy flavor.
As the focaccia bakes, the potatoes crisp up at the edges, the cheese melts into the dimples, and the whole thing becomes a study in contrasts—crispy and soft, savory and rich. This recipe is straightforward, requiring just a bit of patience for the dough to rise, but the payoff is a bread that will make any meal feel special.
Ingredients
- 3 1/2 cups all-purpose flour
- 2 1/4 tsp active dry yeast
- 1 1/2 cups warm water
- 1 tbsp kosher salt
- 1/4 cup olive oil, plus more for the pan
- 2 lb Yukon Gold potatoes, thinly sliced
- 8 oz taleggio cheese, cubed
- cracked black pepper, for serving
- flaky sea salt, for serving
Why this recipe works
The magic of this focaccia lies in the high-heat baking. At 460°F (238°C), the dough puffs up quickly, creating a light, airy crumb, while the top crisps and browns in a way that lower temperatures can't achieve. The heat also causes the taleggio to melt and blister, forming golden spots that add depth of flavor.
The potato slices, cut paper-thin, shrink and crisp at the edges, turning into delicate, potato-chip-like shards that contrast beautifully with the soft bread beneath. Every bite delivers a satisfying crunch followed by a creamy, cheesy pull.
The dimpling technique is crucial. Pressing your fingertips into the dough creates little wells that catch the olive oil and hold the toppings in place.
This allows the oil to pool and fry the dough's surface, contributing to the crispy crust, while the dimples also trap the cheese and potato juices, infusing the bread with flavor. The result is a focaccia that's not just topped but integrated, with every bite containing a bit of everything.
Notes and substitutions
Taleggio is the star here. This Italian cheese is known for its strong aroma but mild, fruity flavor, and it melts beautifully. If you can't find taleggio, look for other washed-rind cheeses like fontina or even brie, which will give a similar creamy, melty texture.
Yukon Gold potatoes are ideal because they hold their shape and have a buttery flavor, but waxy potatoes like red or fingerling also work. Avoid russets, which are too starchy and may fall apart.
A mandoline is essential for getting the potatoes paper-thin. This ensures they cook through and crisp up in the short baking time. If you don't have a mandoline, use a sharp knife and slice as thinly as possible, but be aware that thicker slices may not crisp as well. The dough is simple, but it needs time to rise. Plan for at least an hour of rising time, or make the dough ahead and let it rise slowly in the refrigerator overnight.
- taleggio cheese: Fontina or Brie cheese can replace taleggio for a similar creamy, melty texture.
- Yukon Gold potatoes: Russet potatoes work, but Yukon Golds hold their shape better and have a buttery flavor.
- active dry yeast: Instant yeast can be used; reduce the amount to 2 teaspoons and mix directly into the flour.
- all-purpose flour: Bread flour will give a chewier crust, but all-purpose is fine for this recipe.
Equipment
- 9x13-inch baking pan
- Mandoline slicer
- Stand mixer with dough hook
- Plastic wrap
- Bench scraper
- Pastry brush
Up next · Part 2 of 3
5 steps · 20 min of cooking · what to look for at each stage
Step-by-step instructions (Part 2)