Dinner · Part 2 of 3: Instructions
Crispy Pork Belly Bao Buns with Hoisin Glaze & Pickled Cucumbers Step-by-step instructions
- Prep
- Cook
- Total
- Serves
- 4
Before you start
Before cooking, remove the pork belly from the refrigerator and let it sit at room temperature for 30 minutes. Pat the skin thoroughly dry with paper towels.
Prepare the pickling liquid by combining rice vinegar, sugar, and water. Have all ingredients measured and ready. Preheat the oven to 425°F (220°C).
Ingredients at a glance (14)
- 1 1/3 lb pork belly slab, skin on
- 2 tsp five-spice powder
- 2 tbsp soy sauce
- 1 tbsp kosher salt
- 3 tbsp hoisin sauce
- 1 tbsp honey
- 1 tbsp soy sauce
- 8 frozen or fresh bao buns
- 1 English cucumber, thinly sliced
- 1/4 cup rice vinegar
- 1 tbsp sugar
- 1/4 cup water
- 1/2 cup roasted peanuts, crushed
- 4 scallions, thinly sliced
Instructions
Roast the Pork Belly
- Score and Season the Pork BellyScore the pork belly skin in a crosshatch pattern, cutting through the skin but not into the meat. Rub the five-spice powder and soy sauce all over the meat, then rub the salt into the skin. Let the pork sit at room temperature for 30 minutes, then pat the skin dry with paper towels.Look for The skin is dry and the meat is seasoned with a visible spice rub.Tip Scoring helps the fat render and the skin crisp up evenly.
- Roast the Pork BellyPreheat the oven to 425°F (220°C). Place the pork belly skin-side up on a rack in a roasting pan. Roast for 45–60 minutes, until the skin is deeply blistered and crackling. If the skin is not crisping, broil for the last 2–3 minutes, watching closely. Let it rest for 3 minutes before slicing.Look for The skin is puffed with crispy blisters and the meat is tender.Safe temperature 145°F (63°C) internal temperature (steaks, chops and roasts)Tip Do not skip the broiler step if needed; it makes the crackling perfect.
- Rest the Pork BellyRemove the pork belly from the oven and let it rest on a cutting board for at least 10 minutes. The internal temperature should read 145°F (63°C) for food safety. After resting, slice the pork into thick slabs, about 1/2-inch thick.Look for The pork rests, and the juices redistribute.Safe temperature 145°F (63°C) internal temperature (steaks, chops and roasts)Tip Resting ensures a moist, tender slice.
The pork belly will be sizzling and fragrant, with the skin puffed into golden blisters. The meat should be tender and juicy.
Let it rest before slicing to keep it moist. The kitchen will smell of warm spice and roasting pork.
Make the Glaze and Steam the Buns
- Make the GlazeIn a small saucepan, combine the hoisin sauce, honey, and soy sauce. Simmer over medium heat for 2–3 minutes, stirring, until the glaze is glossy and slightly thickened. Remove from heat and set aside.Look for The glaze bubbles gently and coats the back of a spoon.Tip Keep the glaze warm so it spreads easily.
- Glaze the Pork Belly SlicesBrush the warm glaze generously over both sides of each pork belly slice. Set the glazed slices aside while you prepare the buns.Look for The pork slices are coated in a shiny, dark glaze.Tip Reapply glaze just before serving for maximum flavor.
- Steam the Bao BunsPlace the bao buns in a steamer basket lined with parchment paper. Steam over simmering water for 8 minutes, until they are puffed, soft, and springy to the touch. Keep them warm while you assemble.Look for The buns are soft, pillowy, and slightly translucent.Tip Do not over-steam; they will become soggy.
The glaze will be glossy and thick, coating the back of a spoon. The bao buns will be soft, pillowy, and slightly translucent when steamed. They should be warm and springy to the touch. The pickles will be bright and tangy.
Assemble the Bao Buns
- Pickle the CucumbersIn a bowl, whisk together the rice vinegar, sugar, and water until the sugar dissolves. Add the cucumber slices and toss to coat. Let them sit for at least 10 minutes while you prepare the other toppings.Look for The cucumbers are slightly translucent and pickled.Tip For extra crunch, use a mandoline for even slices.
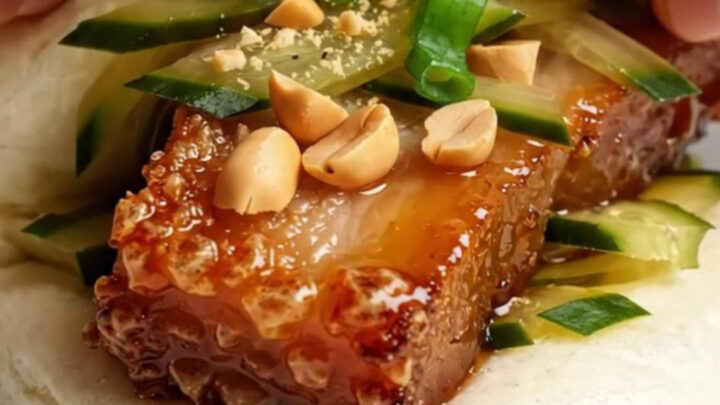
- Assemble the Bao BunsOpen each steamed bao bun and tuck in a slice of glazed pork belly, a few pickled cucumber ribbons, a sprinkle of crushed peanuts, and a scattering of scallions. Squeeze gently to close and serve immediately.Look for The buns are filled with glossy pork, crunchy peanuts, and bright pickles.Tip Serve right away so the buns stay fluffy and the pork stays crisp.
Each bun should be filled with a generous slice of glazed pork, pickled cucumbers, crushed peanuts, and scallions. The buns should be warm and fluffy, with the glaze glistening. Serve immediately for the best texture.
Common mistakes
If the skin doesn't crisp, it may be because it wasn't dry enough or the oven wasn't hot enough. Make sure to pat the skin dry thoroughly and use high heat.
If the crackling is tough, it may be undercooked; broil for a few minutes more. Avoid over-steaming the buns, as they can become soggy.
How to tell it’s done
The pork belly is done when the skin is deeply blistered and crackling, and an instant-read thermometer inserted into the meat reads at least 145°F (63°C).
The meat should be tender and easily pierced with a fork. The bao buns are done when they are puffed, soft, and spring back when gently pressed.
- Steaks, chops and roasts: 145°F (63°C) in the thickest part, then a 3-minute rest
Up next · Part 3 of 3
4 variations · storage & make-ahead · 5 answers · printable card
Tips, FAQ & printable recipe (Part 3)← Back to the ingredients (Part 1)