Dinner · Part 2 of 3: Instructions
Crispy Pepperoni Pizza Quesadillas Step-by-step instructions
- Prep
- Cook
- Total
- Serves
- 3
Before you start
Before starting, ensure all ingredients are measured and ready, as the cooking process happens quickly once the pan is hot. Have your cutting board, a sharp knife, and a reliable non-stick skillet positioned near your stovetop.
If you are using pre-shredded cheese, ensure it is fresh to guarantee the best melt. Keeping your workspace organized will allow you to focus on the heat management of the skillet, which is the key to achieving that perfect golden crust.
Ingredients at a glance (4)
- 3 flour tortillas
- 1 1/2 cups shredded mozzarella cheese
- 15 slices pepperoni
- fresh herbs for garnish, for serving
Instructions
Assembly of ingredients
- Prepare the fillingPlace the flour tortillas on a clean surface. Evenly distribute the shredded mozzarella cheese and pepperoni slices over one half of each tortilla, ensuring the edges are clear for folding.Look for Cheese and pepperoni are spread evenly.Tip Do not overfill the tortillas to ensure they fold easily without spilling.
At the end of this phase, the tortillas should be neatly folded with the cheese and pepperoni tucked inside. The edges should be aligned so that the filling is secure and does not leak out during the cooking process.
Ensure the cheese is distributed evenly to provide a balanced taste in every bite, and check that the pepperoni slices are layered flat to keep the quesadilla profile slim and manageable.
Cooking to perfection
- Cook the quesadillasFold the tortillas over to create a half-moon shape. Heat a non-stick skillet over medium heat. Place the folded quesadillas into the hot pan and cook until the underside is crispy and golden brown, then carefully flip to cook the other side.Look for Tortilla is golden brown and crispy.Tip Press down gently with a spatula to help the cheese melt faster.
The quesadillas should be sizzling gently in the pan, emitting a pleasant aroma of toasted flour and savory pepperoni. The exterior of the tortilla will be turning a beautiful golden brown, indicating a crispy texture.
Use your tongs to check the underside; it should be firm and toasted. The quesadilla should feel slightly lighter as the cheese melts and the moisture evaporates, signaling it is ready to be turned.
Final slicing and presentation
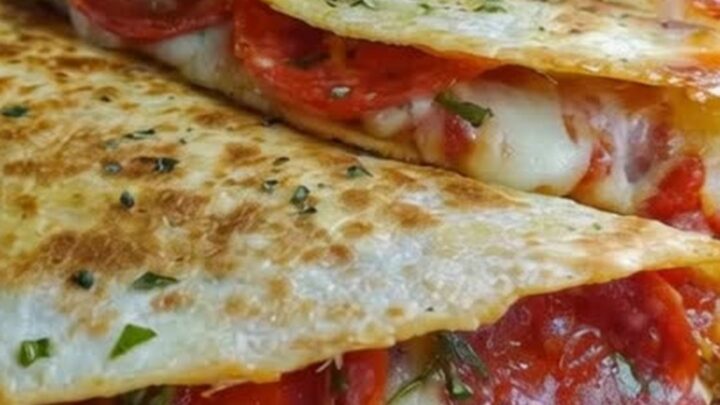
- Slice and serveRemove the quesadillas from the skillet once the cheese is completely melted and the crust is perfectly crispy. Place them on a cutting board, slice cleanly with a sharp knife, garnish with fresh herbs, and serve immediately while hot.Look for Cheese is melted and pulling apart.Tip Use a serrated knife for the cleanest slices without crushing the crispy crust.
The finished quesadillas should be firm, crispy, and hold their shape when lifted. When sliced, the interior should reveal a warm, molten core of cheese and pepperoni. The steam rising from the cut edges is a sign that the quesadilla is at the perfect temperature for serving. The garnish of fresh herbs should look vibrant against the golden-brown crust, making the dish look as inviting as it smells.
Common mistakes
Avoid using a heat that is too high, as this will burn the tortilla before the cheese has a chance to melt through. Another common mistake is overstuffing the quesadillas, which makes them difficult to flip and can lead to uneven cooking.
Always ensure the pan is not overcrowded; if necessary, cook the quesadillas in batches to maintain the proper temperature in the skillet for consistent results across all servings.
How to tell it’s done
The quesadilla is done when the tortilla has achieved a deep golden-brown color on both sides and is firm to the touch. The most important indicator is the state of the cheese; it should be fully melted, bubbling, and oozing from the edges when pressed. If you see the cheese stretching as you slice, it is perfectly cooked and ready to be served while warm and crisp.
Up next · Part 3 of 3
2 variations · storage & make-ahead · 3 answers · printable card
Tips, FAQ & printable recipe (Part 3)← Back to the ingredients (Part 1)