Dinner · Part 2 of 3: Instructions
Crispy Pepperoni Pizza Quesadillas Step-by-step instructions
- Prep
- Cook
- Total
- Serves
- 4
Before you start
Ensure all ingredients are ready before starting the cooking process, as the cooking time is quite short. Have the cheese measured and the pepperoni slices separated if they are sticking together.
Pre-heating the pan properly is vital; wait until the butter is fully melted and begins to sizzle slightly before adding the tortillas to ensure the exterior starts to crisp immediately upon contact.
Ingredients at a glance (5)
- 4 large flour tortillas
- 2 cups shredded mozzarella cheese
- 1 cup pepperoni slices
- 1 tbsp unsalted butter
- dried Italian herbs, for serving
Instructions
Preparation phase
- Prepare the fillingLay the flour tortillas flat on a clean surface. Evenly distribute the shredded mozzarella cheese and pepperoni slices across one half of each tortilla, ensuring you keep the ingredients within the boundary to allow for a clean fold.Look for ensure cheese is evenly distributed for a consistent melt throughout the quesadillaTip avoid overstuffing the tortillas to prevent the cheese from leaking excessively into the pan during the cooking process
The tortillas are laid out and evenly filled with the cheese and pepperoni. Everything is measured and ready to go so that the cooking process can move quickly and efficiently once the pan reaches the correct temperature.
Cooking phase
- Cook the quesadillasPlace a large non-stick skillet over medium heat and add the butter. Once the butter is melted and sizzling, place the folded tortillas into the pan. Cook each side until the exterior is golden brown and the cheese is completely melted and gooey.Look for the tortilla should be crisp and golden brown on both sides with the cheese fully meltedTip use a spatula to press down gently on the quesadilla to ensure even contact with the pan surface
The tortillas sizzle in the buttered pan, turning a beautiful golden brown. The cheese begins to soften and melt, signaling that the quesadillas are nearing completion and ready to be flipped to ensure the other side is equally crisp.
Finishing phase
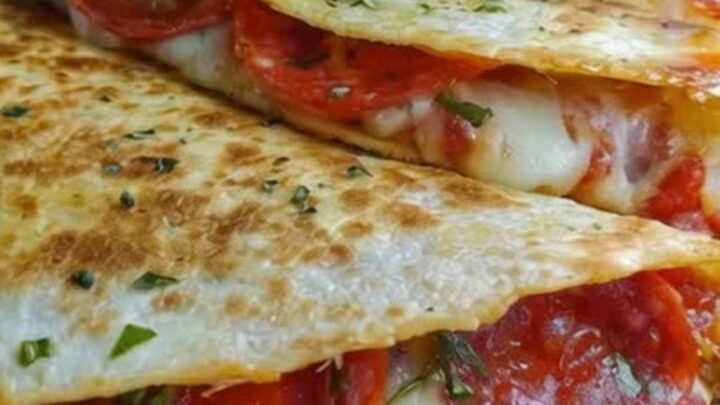
- Slice and serveRemove the quesadillas from the skillet and transfer them to a cutting board. Allow them to sit for a moment, then use a sharp knife to slice them diagonally. Garnish with a sprinkle of dried Italian herbs before serving immediately while hot.Look for the quesadilla should hold its shape when sliced with a sharp knifeTip slicing diagonally provides a professional look and makes the wedges easier to handle for serving
The quesadillas are removed from the pan and sliced into triangles. They should look crisp and golden, with the cheese visibly melted and the pepperoni providing a savory aroma. They are ready to be garnished and served immediately.
Common mistakes
Avoid using too much butter, which can make the tortillas greasy rather than crispy.
Also, refrain from turning the heat too high, as this will burn the exterior of the tortilla before the cheese has a chance to melt through to the center.
Finally, do not overcrowd the pan, as this prevents moisture from escaping and leads to a soft, chewy tortilla instead of a crispy one.
How to tell it’s done
The quesadillas are done when the tortillas are toasted to a deep golden brown on both sides and the cheese is fully melted and bubbling.
You can check doneness by lifting a corner with a spatula to see if the cheese has reached a gooey, stretchable consistency. The pepperoni should be warm and slightly glistening from the released oils.
Up next · Part 3 of 3
2 variations · storage & make-ahead · 3 answers · printable card
Tips, FAQ & printable recipe (Part 3)← Back to the ingredients (Part 1)