Dinner · Part 1 of 3: Ingredients
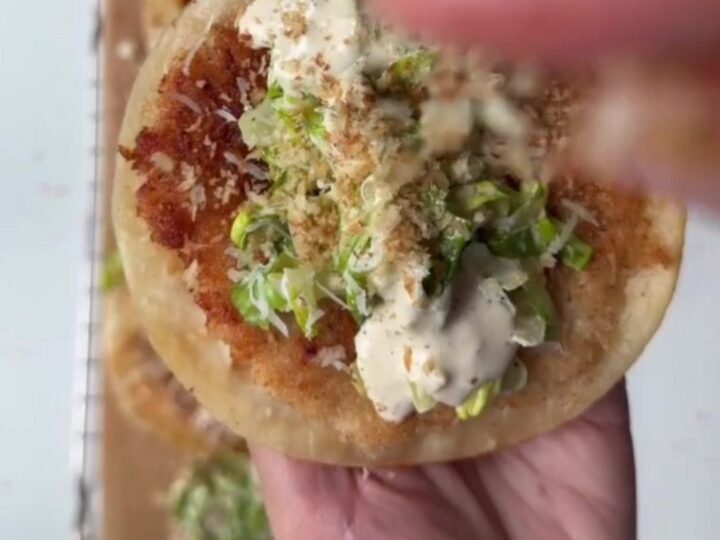
Crispy Panko Chicken Caesar Smash Tacos
- Prep
- Cook
- Total
- Serves
- 4
These crispy panko chicken Caesar smash tacos bring together the best of two worlds: the golden, shattering crunch of panko-crusted chicken and the cool, creamy tang of a classic Caesar salad. Ground chicken is pressed onto mini tortillas, coated in panko, and smashed onto a hot buttered griddle until deeply crisp.
Piled high with romaine, parmesan, and Caesar dressing, each bite delivers a satisfying crackle followed by juicy chicken and a refreshing salad finish. Perfect for a quick weeknight dinner or a fun twist on taco night.
This recipe turns the humble taco into a textural showstopper. Ground chicken is seasoned, pressed onto mini tortillas, and crusted with panko before being smashed onto a hot buttered griddle. The result is a shatteringly crisp exterior that gives way to tender, juicy chicken.
A simple Caesar salad—crisp romaine, creamy dressing, and shaved parmesan—is piled on top, adding brightness and richness. The contrast between the hot, crunchy shell and the cold, creamy salad is irresistible. Serve these immediately for the full effect, and watch them disappear.
Ingredients
- 1 lb ground chicken
Chicken Seasoning
- 1 tsp kosher salt
- 1/2 tsp black pepper
- 1/2 tsp garlic powder
- 8 mini flour tortillas (6-inch)
- 1 cup panko breadcrumbs
- 2 tbsp butter, softened
Caesar Salad
- 4 cups shredded romaine lettuce
- 1/2 cup Caesar dressing
- 1/2 cup shaved parmesan cheese
Why this recipe works
Smashing the chicken onto the tortilla creates maximum surface contact with the hot griddle, which means more browning and more crunch. The panko breadcrumbs add a light, airy crispness that clings to the chicken, while the butter on the griddle helps the crust turn golden and savory. This method ensures every bite is crunchy without being greasy.
The Caesar salad is the perfect counterpoint to the hot, crispy chicken. The cold, crisp romaine provides a refreshing crunch, while the creamy dressing and salty parmesan add richness and umami.
Tossing the salad just before serving keeps it cold and crisp, so it contrasts beautifully with the warm tacos. The combination of textures and temperatures makes each bite exciting.
Notes and substitutions
Use ground chicken that is not too lean, as a little fat helps keep the patties moist. If using ground turkey, the same method works, but adjust cooking time to ensure it reaches 165°F (74°C). For the tortillas, mini flour tortillas are ideal, but you can also use corn tortillas if you prefer gluten-free; just make sure they are pliable enough to fold.
Panko breadcrumbs are essential for the light, crunchy crust. Regular breadcrumbs will be denser and less crispy. Caesar dressing can be store-bought or homemade—just make sure it's thick enough to cling to the lettuce.
Shaved parmesan adds a nice texture, but grated parmesan also works. If you want a little heat, add a pinch of cayenne to the chicken seasoning.
- ground chicken: ground turkey or lean ground beef (adjust cook time to reach safe internal temperature)
- Caesar dressing: Homemade Caesar dressing or a creamy anchovy-free dressing
- mini flour tortillas: Corn tortillas (use gluten-free if needed)
- panko breadcrumbs: Crushed cornflakes or gluten-free panko
Equipment
- Large skillet or griddle
- Spatula
- Mixing bowl
- Cutting board
- Chef's knife
- Measuring cups and spoons
Up next · Part 2 of 3
5 steps · 12 min of cooking · what to look for at each stage
Step-by-step instructions (Part 2)