Dinner · Part 2 of 3: Instructions
Crispy Pan-Seared Gnocchi with Brown Butter and Sage Step-by-step instructions
- Prep
- Cook
- Total
- Serves
- 4
Before you start
Before beginning, organize all ingredients near the stove. Ensure the gnocchi are removed from their packaging and any excess moisture is patted dry with paper towels. Have the butter cubed for even melting and the sage leaves washed and dried thoroughly.
Grate the Parmigiano-Reggiano into a small bowl so it is ready for immediate application once the cooking is complete.
Having a high-quality, large non-stick skillet ready will ensure that the gnocchi can be seared in a single layer without crowding, which is essential for achieving the best golden-brown crust.
Ingredients at a glance (6)
- 500 g shelf-stable potato gnocchi
- 30 ml olive oil
- 75 g unsalted butter, cubed
- 20 fresh sage leaves
- 15 ml lemon juice
- 1/4 cup freshly grated Parmigiano-Reggiano
Instructions
Searing the Gnocchi
- Sear the gnocchiHeat a large non-stick skillet over medium-high heat. Add the olive oil and the potato gnocchi in a single layer. Sear the gnocchi undisturbed for 4 minutes until a deep, golden-brown crust forms on the bottom side.Look for The gnocchi should appear golden and crispy on the underside.Tip Ensure the pan is hot before adding the gnocchi to prevent sticking.
At the end of this phase, the gnocchi should be visibly golden on one side. The pan should remain dry enough to encourage browning, and the gnocchi should be holding their shape well without breaking. Ensure the skillet is not overcrowded to allow for even heat distribution.
Browning the Butter
- Brown the butter and sageAdd the cubed butter and fresh sage leaves to the skillet with the seared gnocchi. Let the butter melt and begin to foam, turning a deep nutty brown color, while the sage leaves become translucent and crisp.Look for The butter smells nutty and has turned golden brown.Tip Watch the butter closely so it does not burn once it starts browning.
The butter should be foaming and turning a rich golden-brown color, releasing a distinct nutty aroma. The sage leaves should have wilted and then crisped up in the hot fat. If the butter looks too dark or smells acrid, it has burned and will need to be discarded.
Final Basting
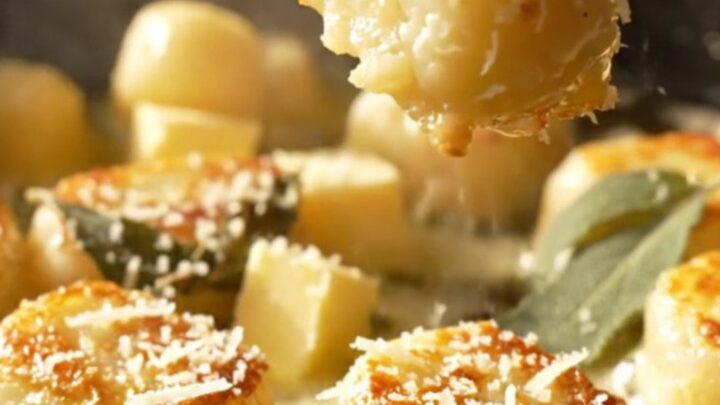
- Baste and finishBaste the gnocchi with the foaming brown butter for 1 minute. Stir in the lemon juice to brighten the flavors. Remove from heat and serve immediately, topped with a generous shower of grated Parmigiano-Reggiano.Look for The gnocchi are coated in a glossy, fragrant butter sauce.Tip Adding the lemon juice at the end prevents the butter from breaking.
The gnocchi should be fully coated in the brown butter sauce, looking glossy and fragrant. The lemon juice should be fully incorporated, and the cheese should begin to melt upon contact. The final dish should be served immediately while the crust is at its peak crispness.
Common mistakes
A common mistake is crowding the skillet, which causes the gnocchi to steam rather than sear, resulting in a mushy texture instead of a crisp one. Another error is using too low a heat; the pan must be sufficiently hot to create the crust quickly without cooking the interior into a paste.
Additionally, failing to monitor the butter as it browns can lead to burning, which introduces a bitter flavor. Ensure the lemon juice is added at the very end to maintain the sauce's emulsion and freshness.
How to tell it’s done
The gnocchi are done when they exhibit a uniform, deep golden-brown crust on the seared side and are heated through to the center. The butter should be a rich, mahogany-brown color, and the sage leaves should be translucent and crisp to the touch.
The overall aroma should be distinctly nutty, indicating that the milk solids in the butter have properly browned. The gnocchi will feel slightly firm on the exterior while remaining soft and pillowy when pressed gently with a spatula, confirming they are ready to serve.
Up next · Part 3 of 3
2 variations · storage & make-ahead · 3 answers · printable card
Tips, FAQ & printable recipe (Part 3)← Back to the ingredients (Part 1)