Dinner · Part 2 of 3: Instructions
Crispy Pan-Fried Gnocchi with Brown Butter and Sage Step-by-step instructions
- Prep
- Cook
- Total
- Serves
- 2
Before you start
Before beginning, ensure all ingredients are measured and ready to go. Because the cooking process is extremely rapid, having your butter, sage, garlic, and cheese within arm's reach is essential.
Ensure your stainless steel skillet is clean and dry. If using a non-stick pan, monitor the heat carefully, as it can sometimes heat differently than stainless steel. Have your serving plates warmed if possible, as this dish is best enjoyed piping hot.
Ingredients at a glance (6)
- 500 g fresh potato gnocchi
- 60 g salted butter
- 12 fresh sage leaves
- 2 smashed garlic cloves
- 60 g freshly grated Parmigiano-Reggiano
- 1 splash of lemon juice
Instructions
Infusing the Butter
- Prepare the aromaticsPlace the wide stainless steel skillet over medium-high heat. Add the salted butter and allow it to melt completely until it begins to foam. Once the butter is foaming, add the smashed garlic cloves and the fresh sage leaves to the pan to infuse the fat with their essential oils.Look for The butter should be foaming and turning a light golden color.Tip Use a wide skillet to ensure the gnocchi have enough space to crisp up without steaming each other.
The butter should be foaming vigorously, creating a rich, nutty aroma. The sage leaves will begin to fry in the butter, turning slightly darker and becoming fragrant. This stage is complete once the garlic is lightly toasted and the butter has achieved a consistent, golden hue, ready to receive the gnocchi.
Searing the Gnocchi
- Pan-sear the gnocchiAdd the fresh potato gnocchi directly into the hot, foaming sage butter. Do not crowd the pan. Sauté the gnocchi for exactly six minutes, tossing them occasionally to ensure each piece puffs up and develops a deep, golden-brown crust on all sides.Look for The gnocchi are puffed, blistered, and golden-brown.Tip Keep the heat consistent so the butter browns but does not burn.
The gnocchi should look puffed and exhibit a deep, golden-brown crust on all sides. As they cook, they should sound like they are frying rather than boiling. Monitor the color carefully, ensuring that the butter does not burn. If the pan seems too dry, you can add a small knob of additional butter.
Finishing the Dish
- Finish and serveRemove the garlic cloves. Drizzle a splash of fresh lemon juice over the crispy gnocchi to balance the richness of the butter. Finish by tossing with a generous amount of freshly grated Parmigiano-Reggiano and serve immediately while the sage leaves are still crispy.Look for The cheese is melted and the gnocchi are coated in the lemony butter sauce.Tip The lemon juice is essential for cutting through the fat of the butter and cheese.
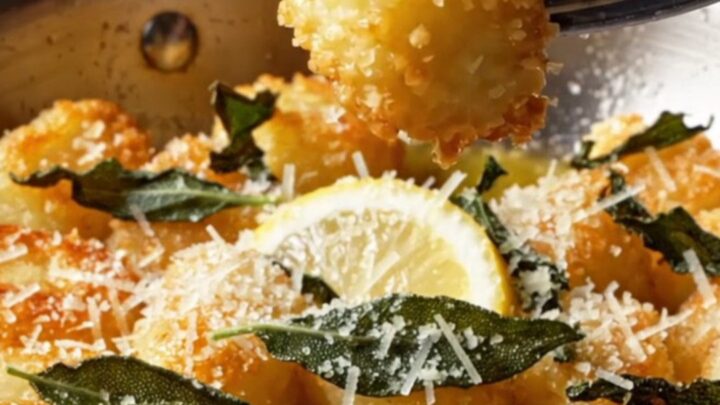
The final dish should look vibrant, with the bright green of the sage contrasting against the golden-brown gnocchi and the white snow of the Parmigiano-Reggiano.
The lemon juice should provide a light, citrusy lift, and the cheese should be slightly melted by the residual heat of the pan, coating every piece in a savory, cheesy emulsion.
Common mistakes
A common mistake is overcrowding the pan, which prevents the gnocchi from browning properly and results in a soft, soggy texture. Another frequent error is using a pan that is not hot enough before adding the butter; the butter should foam immediately.
Finally, do not leave the garlic in the pan for too long after it turns dark, as it can become bitter and overwhelm the delicate flavor of the sage.
How to tell it’s done
The gnocchi are done when they are deeply golden-brown and blistered on the outside. When pressed with a fork, they should feel firm and crisp on the exterior while remaining soft and yielding on the inside.
The sage leaves should be dark green and crispy, and the butter should have taken on a toasted, nutty brown color, indicating the milk solids have successfully browned.
Up next · Part 3 of 3
2 variations · storage & make-ahead · 3 answers · printable card
Tips, FAQ & printable recipe (Part 3)← Back to the ingredients (Part 1)