Desserts · Part 2 of 3: Instructions
Crispy Matcha Dubai Chocolate Bar Step-by-step instructions
- Prep
- Cook
- Total
- Serves
- 8
Before you start
Before starting, measure all ingredients and have the chocolate bar mold ready. Set up a double boiler or a heatproof bowl over a saucepan of simmering water.
If using whole kataifi pastry, toast it in a dry skillet until golden and crisp, then let it cool. Ensure the pistachio tahini is at room temperature for easy mixing. Have a digital thermometer on hand to monitor the chocolate temperature.
Ingredients at a glance (7)
- 12 oz white chocolate (cocoa butter based)
- 2 tbsp ceremonial grade matcha powder
- 2 cups toasted kataifi pastry
- 1 cup pistachio tahini paste
- 1/4 cup white sesame seeds
- Matcha powder for dusting, to taste
- Flaky salt for finishing, to taste
Instructions
Melt and Flavor
- Melt and Flavor the ChocolateSet up a double boiler by placing a heatproof bowl over a saucepan of barely simmering water. Add the white chocolate and melt gently, stirring often with a rubber spatula until completely smooth. Remove from heat and whisk in the matcha powder until fully incorporated and no streaks remain. Keep the mixture warm but not hot.Look for The chocolate is glossy and uniformly green, with no lumps of matcha.Tip Do not overheat the chocolate; it should not exceed 90°F (32°C) to avoid seizing.
- Toast the KataifiIn a dry skillet over medium heat, toast the kataifi pastry, stirring frequently, until golden and crisp, about 3 to 5 minutes. Remove from heat and let cool slightly. In a bowl, combine the toasted kataifi, pistachio tahini, and white sesame seeds. Mix until the tahini coats the kataifi evenly.Look for The kataifi is golden brown and smells nutty; the mixture holds together when pressed.Tip Keep the heat moderate to prevent burning; stir constantly for even toasting.
The white chocolate is fully melted and smooth, with matcha whisked in to create a uniform, vibrant green mixture.
The kataifi is toasted to a golden brown, releasing a nutty aroma. The filling is combined and clumps together when pressed, ready for the mold.
Temper and Fill
- Temper the Matcha ChocolateHeat the matcha chocolate to 84°F (29°C), stirring constantly. If it is warmer, cool it by stirring over an ice bath or letting it sit briefly. Once at temperature, immediately pour a thin layer into the chocolate bar mold, coating the bottom and sides. Tap the mold gently to release air bubbles.Look for The chocolate is thick, glossy, and coats the mold evenly.Tip Work quickly once tempered; if it thickens, rewarm gently to 84°F (29°C).
- Fill with Kataifi MixtureSpoon the kataifi filling into the chocolate-lined mold, pressing it down firmly to eliminate gaps. Make sure the filling reaches the edges but leaves a thin chocolate border. Spread it evenly so the bar will be level.Look for The filling is compact and level, with no bare spots in the chocolate shell.Tip Use the back of a spoon to pack the filling tightly for a clean slice.
- Seal and ChillPour the remaining matcha chocolate over the filling, spreading it to cover completely and seal the edges. Smooth the top with a spatula. Place the mold in the refrigerator and chill at 40°F (4°C) for 20 minutes, until the chocolate is fully set and firm.Look for The top is smooth and the chocolate is hard to the touch after chilling.Tip Chill on a flat surface to keep the bar even; do not freeze, as condensation may dull the shine.
The matcha chocolate is at 84°F (29°C) and coats the mold in a thin, even layer. The kataifi filling is packed in tightly, leaving a clean border. The top is sealed with remaining chocolate and the bar is chilling in the refrigerator, beginning to firm up.
Unmold and Finish
- Unmold and FinishRemove the mold from the refrigerator and invert it onto a clean cutting board. Gently release the chocolate bar. Dust the top with matcha powder and sprinkle with flaky salt. Use a sharp knife to break the bar into pieces, or tap it on the counter to snap along the scored lines.Look for The bar releases cleanly and snaps with a crisp sound when broken.Tip If the bar sticks, let it sit at room temperature for 1 minute, then tap again.
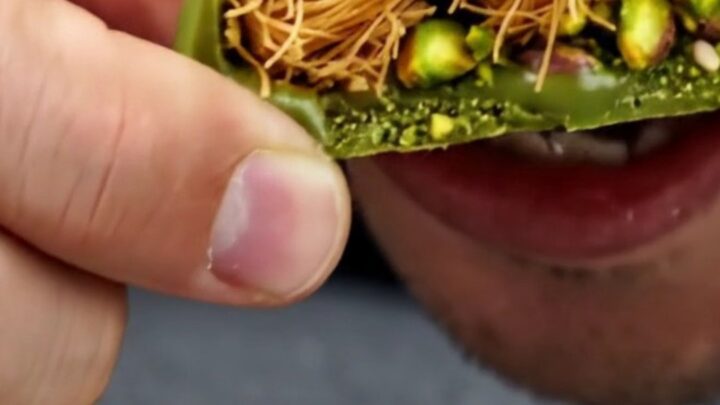
The chilled bar releases from the mold with a clean snap. The top is dusted with matcha and flaky salt, and the bar breaks into neat pieces with a crisp crackle. The texture is crunchy, the chocolate is glossy, and the aroma is earthy and nutty.
Common mistakes
One common mistake is overheating the white chocolate, which can cause it to seize or become grainy. Always melt gently and never exceed 90°F (32°C) before tempering.
Another pitfall is not packing the filling tightly enough, leading to air pockets that make the bar fragile. Also, be sure to chill the bar for the full 20 minutes; a shorter chill may result in a soft, messy bar.
How to tell it’s done
The chocolate bar is done when it is fully set and firm to the touch after chilling. The surface should be glossy, and when you break a piece, it should snap cleanly with a crisp sound.
The filling should be crunchy, not soggy, and the chocolate should melt slightly on the tongue. If the bar bends instead of snapping, it needs more chilling or the chocolate wasn’t tempered properly.
Up next · Part 3 of 3
4 variations · storage & make-ahead · 5 answers · printable card
Tips, FAQ & printable recipe (Part 3)← Back to the ingredients (Part 1)