Appetizers · Part 2 of 3: Instructions
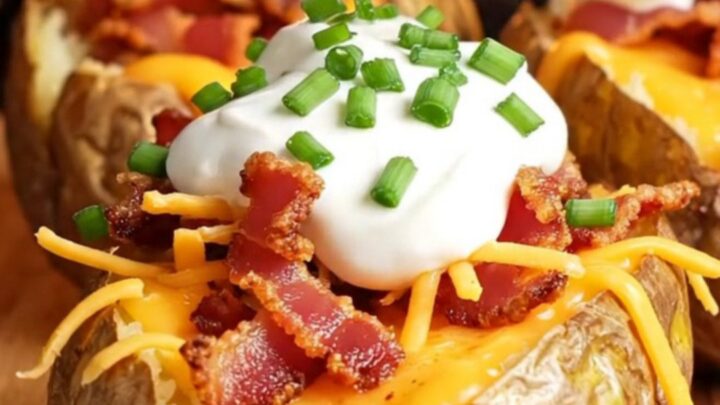
Crispy Loaded Potato Skins with Cheddar, Bacon, Sour Cream & Chives Step-by-step instructions
- Prep
- Cook
- Total
- Serves
- 8
Before you start
Before starting, gather all the ingredients and equipment. Scrub the potatoes clean and pat them dry; there is no need to peel them. Cook the bacon until very crisp, then crumble it and set aside.
Shred the cheddar cheese if not already shredded. Chop the fresh chives and measure the sour cream. Heat the oven to 400°F (200°C) for the first bake, and have the butter, garlic powder, and paprika ready for the seasoned brushing mixture.
Ingredients at a glance (9)
- 4 large russet potatoes
- 40 g melted butter
- 1/2 tsp garlic powder
- 1/2 tsp paprika
- 150 g sharp cheddar cheese, shredded
- 6 slices crispy bacon, crumbled
- 100 g sour cream
- 2 tbsp fresh chives, chopped
- flaky sea salt, to taste
Instructions
Phase 1: Bake and Prepare the Shells
- Bake the PotatoesHeat the oven to 400°F (200°C). Scrub the russet potatoes clean and pat them dry. Pierce each potato a few times with a fork to let steam escape. Place them directly on the oven rack and bake for 50 to 60 minutes, until the skins are crisp and a knife slides easily into the center. Transfer the potatoes to a cutting board and let them cool just until easy to handle, about 10 minutes.Look for The potatoes feel tender when squeezed and the skins look dry and slightly wrinkled.Tip Baking the potatoes directly on the rack allows air to circulate, giving a drier, crispier shell.
- Cut and Scoop the PotatoesWhen the potatoes are cool enough to handle, slice each one in half lengthwise. Using a spoon, scoop out the flesh, leaving a sturdy 1/4-inch rim of potato attached to the skin. Reserve the scooped potato flesh for another use, such as mashed potatoes or soup. Arrange the hollowed shells cut-side up on a baking sheet lined with parchment paper.Look for Each shell holds its shape with a rim about 1/4 inch thick, and the interior looks clean.Tip Scoop gently to avoid tearing the skin; a melon baller works well for even, neat hollows.
- Make the Seasoned ButterIn a small bowl, stir together the melted butter, garlic powder, and paprika until well combined. Use a pastry brush to coat the inside and outside of each potato shell with the seasoned butter. Make sure to brush every surface, including the edges and the bottom of the shells, so they crisp evenly.Look for The shells glisten with a golden-orange butter coating.Tip If the butter starts to solidify, warm it briefly in the microwave or over a pan of hot water.
After the first bake, the potatoes should be tender and the skins dry. Once scooped and brushed with butter, the shells look glossy and seasoned. They should hold their shape without tearing. The butter mixture should be evenly applied, and the shells should be arranged on the baking sheet ready for the crisping bake.
Phase 2: Crisp and Load the Skins
- Crisp the ShellsIncrease the oven temperature to 425°F (220°C). Place the baking sheet with the buttered potato shells cut-side down on the middle rack. Bake for 10 minutes, then flip the shells cut-side up and continue baking for 5 more minutes, until the skins are crackling crisp and lightly blistered.Look for The shells are golden, crisp to the touch, and make a slight crackle when pressed.Tip Keep an eye on the shells during the last few minutes to prevent burning; oven times vary.
- Fill the ShellsRemove the baking sheet from the oven. Turn the oven to broil. Fill each crispy shell with an even layer of shredded sharp cheddar cheese, packing it down gently. Sprinkle the crumbled bacon over the cheese, distributing it evenly among all the shells.Look for Each shell is generously filled with cheese and bacon, with some pieces mounding slightly.Tip Distribute the cheese and bacon evenly so each skin gets a balanced amount in every bite.
- Broil Until BubblyPlace the filled shells under the broiler, about 6 inches from the heat source. Broil for 2 to 3 minutes, until the cheese is fully melted, bubbly, and lightly browned in spots. Watch closely to prevent burning. Remove from the oven and let cool for 1 to 2 minutes.Look for The cheese is molten and bubbling, with golden-brown patches on top.Tip Broilers vary in intensity, so check at the 2-minute mark and rotate the pan if needed.
After the crisping bake, the shells are golden, crisp, and slightly blistered. They should feel sturdy and make a crackle when pressed.
The cheese and bacon are piled on generously, and the broiler has transformed the cheese into a molten, bubbly topping with browned edges. The kitchen smells of toasted potato, garlic, and bacon.
Phase 3: Garnish and Serve
- Garnish and ServeDollop the cold sour cream onto each loaded potato skin, dividing it evenly. Sprinkle the fresh chopped chives over the top and finish with a pinch of flaky sea salt. Serve immediately while the cheese is still hot and the shells are crisp.Look for The sour cream is cool and white against the bubbly cheese, with green chives scattered on top.Tip Add the sour cream just before serving to keep it cold and thick, not melted.
The finished skins are topped with cool, white sour cream, fresh green chives, and a sprinkle of flaky salt. The cheese is still hot and slightly runny, while the shells remain crisp. The contrast of temperatures and textures is visible, and the skins are ready to be served immediately.
Common mistakes
A common mistake is scooping out too much potato, leaving a fragile shell that collapses. Keep the rim at least 1/4 inch thick. Another issue is undercooking the potatoes initially, which makes the shells tough rather than crisp.
Bake the potatoes until they are completely tender. Also, do not skip the cut-side-down bake; it is essential for a crackling exterior. Finally, watch the broiler closely, as cheese can burn quickly.
How to tell it’s done
The potato skins are done when the shells are deeply golden, crisp, and make a crackling sound when pressed. The cheese should be fully melted, bubbly, and lightly browned in spots after broiling.
The sour cream should be cold and thick, and the chives bright green. If the shells are not crisp enough, return them to the oven for a few more minutes, but watch them closely to avoid burning.
Up next · Part 3 of 3
4 variations · storage & make-ahead · 5 answers · printable card
Tips, FAQ & printable recipe (Part 3)← Back to the ingredients (Part 1)