Appetizers · Part 2 of 3: Instructions
Crispy Cheese-Filled Focaccia di Recco Step-by-step instructions
- Prep
- Cook
- Total
- Serves
- 6
Before you start
Before starting, bring the stracchino cheese to room temperature so it's soft and easy to dollop. Measure all ingredients. Set up your work area with a large bowl, a rolling pin, and parchment paper.
If using a baking stone, place it in the oven on the middle rack and preheat to 500°F (260°C). If using a baking sheet, place it in the oven as well. Have a clean kitchen towel ready to cover the dough while it rests.
Ingredients at a glance (7)
- 2 cups all-purpose flour
- 3/4 cup water
- 3 tbsp olive oil
- 1 tsp salt
- 300 g stracchino cheese
- 2 tbsp olive oil, for drizzling
- flaky salt, for sprinkling, to taste
Instructions
Dough and Prep
- Make the DoughIn a large bowl, combine the flour, water, olive oil, and salt. Mix with a fork until a shaggy dough forms, then turn it out onto a lightly floured surface and knead for about 5 minutes until smooth and elastic. The dough should be soft but not sticky. Cover with a damp towel and let rest for 30 minutes.Look for The dough feels smooth and springs back when pressed.Tip If the dough is too sticky, add a little more flour; if too dry, add a teaspoon of water at a time.
- Divide and RestAfter resting, divide the dough into two equal portions. Shape each into a ball, cover again, and let rest for another 10 minutes. This relaxes the gluten, making the dough easier to stretch paper-thin.Look for The dough balls are smooth and hold their shape.Tip Keep the dough covered to prevent a skin from forming.
After mixing and kneading, the dough should be smooth, elastic, and slightly tacky but not sticky. It should hold a ball shape without slumping. After resting, it will be even more pliable. The kitchen will smell of fresh flour and olive oil. The dough is ready when it can be stretched without tearing easily.
Assembly and Baking
- Preheat the OvenPlace a baking sheet or pizza stone in the oven and preheat to 500°F (260°C). The pan needs to be screaming hot to get the focaccia crisp and blistered in just 8 minutes.Look for The oven reaches 500°F and the pan is hot to the touch.Tip Use an oven thermometer to ensure accuracy.
- Stretch the First LayerOn a large sheet of parchment paper, stretch or roll one dough ball into a very thin rectangle, about 1/16-inch thick. The dough should be translucent enough to see your hand through. If it shrinks back, let it rest a few minutes then continue stretching.Look for The dough is thin enough to see light through it.Tip Work from the center outward, using your fingertips to gently stretch.
- Add the StracchinoDollop the stracchino cheese evenly over the dough, leaving a 1-inch border. Use about 300 grams of cheese, spreading it in small clumps rather than a solid layer.Look for The cheese is evenly distributed in small mounds.Tip If the stracchino is very soft, it will spread during baking, so don't overdo it.
- Top with Second LayerStretch the second dough ball to the same size and carefully place it over the cheese. Press the edges to seal, then trim any excess dough. The top layer should be as thin as the bottom.Look for The edges are sealed and the top is taut.Tip Use a knife or pizza cutter to trim the edges cleanly.
- Pinch Air VentsUsing your fingertips, pinch small holes across the top of the dough. These vents allow steam to escape and prevent the focaccia from ballooning in the oven.Look for The surface is dotted with small indentations.Tip Make the holes about 1 inch apart for even venting.
The first layer should be so thin you can see your hand through it. The cheese dollops are evenly spaced, and the top layer is sealed at the edges. The pinched vents create a pattern across the surface.
As it bakes, the focaccia will puff up, the cheese will bubble, and the crust will turn golden with charred spots. The aroma of toasted bread and melted cheese fills the kitchen.
Final Touches
- Bake the FocacciaTransfer the parchment with the focaccia onto the hot baking sheet or stone. Bake at 500°F (260°C) for 8 minutes, until the crust is golden brown and blistered, and the cheese is bubbling and melted inside.Look for The crust puffs up and turns golden with dark blisters.Tip Rotate the pan halfway through for even browning.
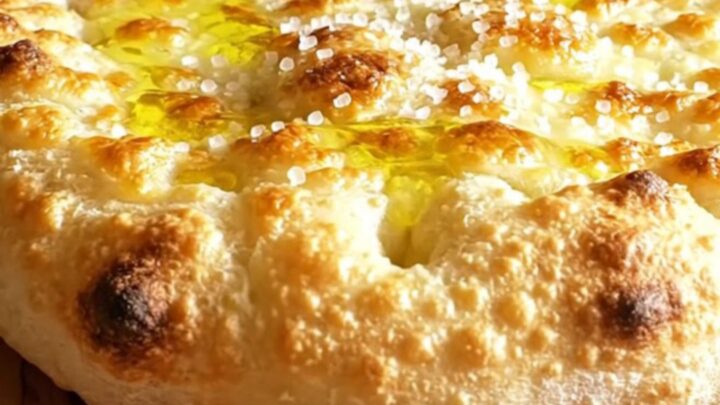
- Finish and ServeRemove the focaccia from the oven and immediately drizzle with olive oil and sprinkle with flaky salt. Let it cool for 2 minutes, then slice and serve hot, while the cheese is still molten.Look for The top glistens with oil and salt.Tip Use a pizza cutter for clean slices.
Out of the oven, the focaccia is blistered and golden, with a glossy sheen from the olive oil. The flaky salt adds a subtle crunch and sparkle. When torn, the cheese stretches in long ribbons, and the crust shatters with a satisfying crackle. The texture is crisp on the outside and creamy inside. Serve immediately for the best experience.
Common mistakes
One common mistake is stretching the dough too thick, which results in a doughy, bread-like texture instead of a crispy crust. Another is overloading with cheese, which can make the focaccia soggy or cause the filling to leak out.
Be sure to pinch the edges well to seal in the cheese. Also, don't open the oven door during baking, as the temperature drop can prevent the crust from crisping. Finally, let the dough rest adequately; if it keeps shrinking, cover it and wait a few more minutes.
How to tell it’s done
The focaccia is done when the crust is deep golden brown with darker blisters and the cheese is visibly bubbling at the edges. The top should feel firm and crisp to the touch, and the whole thing should sound hollow when tapped.
If you insert a knife through a vent, the cheese should be molten and creamy. Since there are no raw proteins, no temperature check is needed. Let it cool for 2 minutes before slicing to allow the cheese to set slightly.
Up next · Part 3 of 3
4 variations · storage & make-ahead · 5 answers · printable card
Tips, FAQ & printable recipe (Part 3)← Back to the ingredients (Part 1)