Breakfast · Part 2 of 3: Instructions
Crispy Layered Katmer with Buttery Flaky Crust Step-by-step instructions
- Prep
- Cook
- Total
- Serves
- 8
Before you start
Before starting, measure all ingredients and clear a large work surface for rolling. Have a damp towel ready to cover the dough balls and rolled sheets. Mix the melted butter and oil in a small bowl and set aside.
Prepare a large skillet and a spatula. If serving later, preheat the oven to 200°F to keep cooked katmer warm. Clear space on the counter for rolling—this recipe requires some elbow room.
Ingredients at a glance (5)
- 4 1/2 cups all-purpose flour (550g)
- 1 tsp salt
- 2 cups warm water (400ml)
- 200 g melted butter
- 1/2 cup vegetable oil
Instructions
Make the Dough
- Make the DoughIn a large bowl, combine the flour and salt. Gradually add the warm water, stirring with a wooden spoon until a shaggy dough forms. Turn the dough out onto a floured surface and knead for 8–10 minutes, until smooth and elastic. The dough should be soft and slightly tacky but not sticky. Cover with a damp towel and let rest for 20 minutes.Look for The dough is smooth, springs back when pressed, and feels supple.Tip If the dough sticks, dust with a little extra flour, but avoid adding too much—it should stay soft.
- Divide and RestAfter resting, divide the dough into 8 equal pieces. Roll each piece into a smooth ball. Place the balls on a lightly floured tray, cover with the damp towel, and let rest for another 10 minutes. This relaxes the gluten and makes rolling easier.Look for Each ball is smooth and holds its shape.Tip Keep the balls covered at all times to prevent drying.
After kneading and resting, the dough should be smooth, elastic, and slightly tacky. Press a finger into it—the indentation should spring back slowly. The dough balls should be uniform and covered with a damp towel. If the dough tears easily, let it rest a few more minutes. The kitchen should smell faintly of fresh flour, and the dough should feel supple and alive.
Roll and Butter
- Roll Paper-ThinOn a floured board, roll one dough ball into a very thin circle, about 12–14 inches in diameter. The dough should be translucent enough to see your hand through. Repeat with the remaining balls, stacking them with parchment paper between each to prevent sticking.Look for The dough is so thin that it is almost see-through, but still holds together without tearing.Tip Roll from the center outward, turning the dough frequently to keep it even.
- Brush with Butter MixtureMix the melted butter and vegetable oil in a small bowl. Using a pastry brush, generously brush the top of each thin dough circle with the butter mixture. Make sure to cover the entire surface, right to the edges.Look for The dough glistens with a thin, even layer of butter.Tip Brushing right to the edge ensures the layers separate during cooking.
- Stack and Roll into a WheelPlace one buttered dough circle on top of another, aligning the edges. Starting from one end, roll the stacked circles into a tight log. Then coil the log into a spiral, tucking the end underneath. Gently roll the spiral flat with a rolling pin to about 1/2-inch thickness, forming a round wheel. Repeat with the remaining dough circles to make 4 katmer wheels.Look for The spiral pattern is visible and the wheel is evenly flat.Tip If the dough tears, just patch it with a small piece—it will still cook beautifully.
Each rolled circle should be so thin you can see a hand through it, but still strong enough to lift without tearing. The butter mixture should coat every inch, leaving a glossy sheen. When you stack and roll, the spiral should be tight and even. The wheels should be flat and round, about 1/2-inch thick. If the dough tears, patch it gently—the layers will still form.
Cook and Crisp
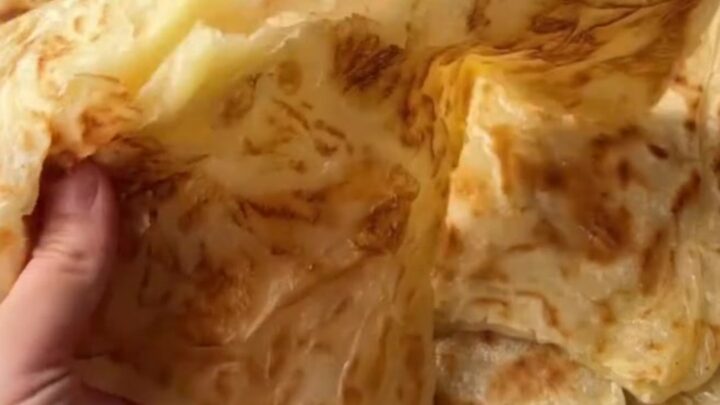
- Cook in a Hot SkilletHeat a large dry skillet over medium-high heat until a drop of water sizzles and evaporates immediately. Place one katmer wheel in the skillet. Cook for 2–3 minutes, until the bottom is golden brown and crispy. Brush the top with a little extra butter mixture, then flip and cook the other side for another 2–3 minutes, until deep golden brown and puffed with many layers.Look for The katmer puffs up and the layers begin to separate, showing golden brown spots.Tip Adjust the heat if the crust browns too quickly—medium is fine.
- Repeat with Remaining WheelsRemove the cooked katmer from the skillet and keep warm. Repeat the cooking process with the remaining katmer wheels, brushing each with more butter as needed. Serve warm, pulling apart the layers with your hands.Look for Each katmer is evenly browned and crisp.Tip Keep cooked katmer in a warm oven (200°F) while finishing the rest.
In the hot skillet, the katmer should sizzle immediately and begin to puff within a minute. The bottom should turn golden brown with darker spots, and the top should be brushed with butter for extra richness.
When flipped, the second side should brown evenly. The finished katmer should feel crisp and shattery, with visible layers pulling apart at the edges. The kitchen should smell of toasted butter.
Common mistakes
One common mistake is rolling the dough too thick—if it's not translucent, the layers won't separate properly. Another is using too little butter, which leads to dry, tough layers.
Overcooking can make the crust too hard, while undercooking leaves a doughy center. Also, don't skip the resting time; it's essential for easy rolling. Keep the dough covered to prevent drying, and adjust the heat if the crust browns too quickly.
How to tell it’s done
The katmer is done when both sides are deep golden brown with darker spots and the crust feels crisp and shattery. When you squeeze it, the layers should audibly crackle and separate.
The internal temperature is not a concern since there are no proteins, but the bread should be cooked through and puffed. If it feels doughy in the center, return it to the skillet for another minute per side.
Up next · Part 3 of 3
4 variations · storage & make-ahead · 5 answers · printable card
Tips, FAQ & printable recipe (Part 3)← Back to the ingredients (Part 1)