Dinner · Part 2 of 3: Instructions
Crispy Japanese Tonkatsu with Tangy Katsu Sauce Step-by-step instructions
- Prep
- Cook
- Total
- Serves
- 2
Before you start
Before you start, gather all your ingredients and set up your breading station. Make sure your pork chops are at room temperature for about 20 minutes before cooking. Prepare the steamed rice and shave the cabbage.
Heat the oil in a deep pot or skillet and set a wire rack over a baking sheet. Have your flour, egg, and panko ready in separate shallow dishes. This will make the breading process smooth and efficient.
Ingredients at a glance (10)
- 2 thick-cut boneless pork loin chops (about 7 oz each)
- Salt, to taste
- Freshly cracked black pepper, to taste
- 1/2 cup all-purpose flour
- 1 large egg, beaten
- 1 cup panko breadcrumbs
- Neutral oil for frying, to taste
- 2 cups steamed short-grain rice
- Shaved green cabbage, for serving
- Tonkatsu sauce, for drizzling, to taste
Instructions
Prep and Bread
- Prepare the PorkScore the fat cap of each pork chop in a crosshatch pattern to prevent curling. Place one chop between two sheets of plastic wrap and pound with a meat mallet to an even 1/2-inch thickness. Repeat with the second chop. Season both sides generously with salt and freshly cracked black pepper.Look for The pork is evenly thin and well seasoned.Tip Pounding not only tenderizes but ensures even cooking.
- Set Up Breading StationPlace the flour in one shallow dish, the beaten egg in another, and the panko breadcrumbs in a third. Dredge each pork chop in the flour, shaking off any excess. Dip into the egg, allowing any excess to drip off, then press firmly into the panko breadcrumbs, coating all sides. Pat gently to help the crumbs adhere.Look for The crust is thick and evenly coated with no bare spots.Tip Press the panko firmly so it adheres well during frying.
- Heat the OilPour neutral oil into a deep, heavy-bottomed pot or deep skillet to a depth of about 2 inches. Heat over medium-high heat until a deep-fry thermometer registers 340°F (170°C).Look for The oil shimmers and a breadcrumb dropped in sizzles immediately.Tip Maintain the oil temperature; adjust the heat as needed.
At the end of this phase, the pork chops are pounded to an even thickness, seasoned, and coated with flour, egg, and a thick layer of panko. The breading should be uniform and firmly attached. The oil is heating, and the breading station is organized. The pork is ready for the fryer.
Fry and Rest
- Fry the CutletsCarefully lower one breaded pork chop into the hot oil. Fry for about 5 minutes, turning occasionally, until golden amber and the pork is cooked through. Use tongs to transfer to a wire rack set over a baking sheet. Let rest for 3 minutes. Repeat with the second chop.Look for The crust is deeply golden and the pork is firm to the touch.Safe temperature 145°F (63°C) internal temperature (steaks, chops and roasts)Tip Frying in batches prevents the oil temperature from dropping too much.
- Rest and SliceAfter resting, transfer the cutlets to a cutting board. Use a sharp knife to slice each cutlet into 1-inch wide strips, cutting with a gentle rocking motion to keep the crust intact. The interior should be juicy and cooked through. Let it rest for 3 minutes before slicing.Look for The cutlets are crisp and the slices reveal moist, tender meat.Safe temperature 160°F (71°C) internal temperature (egg dishes)Tip Slicing against the grain makes each piece easier to bite.
The cutlets are fried to a deep golden amber, with a crisp crust that crackles when touched. The internal temperature has reached 145°F (63°C).
After resting on a wire rack for 3 minutes, the crust remains crisp and the meat is juicy. The kitchen smells of sizzling pork and toasted breadcrumbs.
Slice and Serve
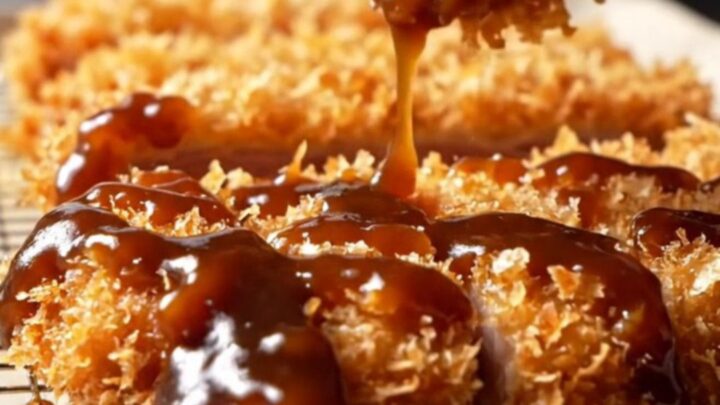
- Serve with SauceArrange the sliced tonkatsu on plates with steamed rice and a mound of shaved cabbage. Drizzle generously with tonkatsu sauce, or serve the sauce on the side for dipping.Look for The dish is plated with the sauce glistening over the crispy cutlets.Tip For a traditional touch, serve with a side of Japanese mustard.
The tonkatsu is sliced into thick strips, each showing a clean cut with a crisp crust and moist interior. The sauce is drizzled over the top, and the dish is plated with rice and cabbage. The final presentation is inviting, with a shiny glaze and vibrant colors.
Common mistakes
One common mistake is overcrowding the pan, which drops the oil temperature and results in greasy, soggy cutlets. Fry one at a time to maintain the perfect temperature.
Another pitfall is not pressing the panko firmly enough, causing the crust to fall off during frying. Also, avoid using a thermometer that touches the bottom of the pan, as it will read incorrectly. Keep the oil at a steady 340°F (170°C) for best results.
How to tell it’s done
The tonkatsu is done when the internal temperature of the pork reaches 145°F (63°C). The crust should be deeply golden amber and sound hollow when tapped.
After frying, rest the cutlets for at least 3 minutes before slicing; this allows the juices to redistribute, ensuring moist, tender meat. If you're unsure, cut into the thickest part of a slice to check that the meat is no longer pink.
- Steaks, chops and roasts: 145°F (63°C) in the thickest part, then a 3-minute rest
- Egg dishes: 160°F (71°C) in the thickest part
Up next · Part 3 of 3
4 variations · storage & make-ahead · 5 answers · printable card
Tips, FAQ & printable recipe (Part 3)← Back to the ingredients (Part 1)