Dinner · Part 2 of 3: Instructions
Crispy Japanese Chicken Katsu Curry with Steamed Rice Step-by-step instructions
- Prep
- Cook
- Total
- Serves
- 2
Before you start
Before you start, make sure you have all your ingredients ready. Pound the chicken cutlets to an even 1/2-inch thickness and set up your breading station with three shallow dishes: one with flour, one with beaten egg, and one with panko.
Dice the onion, chop the carrot, and dice the potato into small, even pieces. Measure out the broth and have the curry roux cubes ready. If you haven't steamed the rice yet, do that now so it's hot when the katsu is ready.
Ingredients at a glance (11)
- 2 chicken cutlets, pounded to 1/2-inch thick (about 350g total)
- 1/2 cup all-purpose flour
- 1 large egg, beaten
- 1 cup panko breadcrumbs
- 1 onion, diced
- 1 carrot, chopped
- 1 potato, diced
- 2 cups dashi or chicken broth
- 2 cubes Japanese curry roux (S&B or Golden Curry)
- 2 cups steamed short-grain rice
- Pickled fukujinzuke (red pickled radish), for serving
Instructions
Build the Curry Sauce
- Start the Curry SauceHeat a splash of oil in a large saucepan over medium heat. Add the diced onion, chopped carrot, and diced potato. Sauté, stirring occasionally, until the onion is translucent and the vegetables begin to soften, about 5 minutes.Look for The onion turns translucent and the vegetables start to soften.Tip Cut the potato into small, even dice so it cooks quickly and evenly.
- Simmer the BrothPour in the dashi or chicken broth. Bring to a boil, then reduce the heat to low. Simmer, partially covered, for 10 minutes, until the vegetables are tender.Look for The broth is bubbling gently and the vegetables are fork-tender.Tip Skim any foam that rises to the surface for a cleaner sauce.
- Finish the Curry SauceAdd the Japanese curry roux cubes to the simmering broth. Stir continuously until the roux is fully dissolved and the sauce is thick and glossy. Keep warm over low heat while preparing the chicken.Look for The sauce turns dark, glossy, and coats the back of a spoon.Tip Stir well to avoid any lumps from the roux.
At the end of this phase, the curry sauce should be thick, glossy, and deeply flavorful. The onion, carrot, and potato should be tender but not mushy. The sauce should coat the back of a spoon and have a rich, dark color. Keep it warm over low heat while you prepare the chicken.
Bread and Fry the Katsu
- Bread the ChickenSet up three shallow dishes: one with flour, one with beaten egg, and one with panko breadcrumbs. Dredge each chicken cutlet in flour, shaking off excess. Dip into the egg, letting any excess drip off. Press firmly into the panko, coating completely.Look for The cutlets are evenly coated with a thick, craggy layer of panko.Tip Press the panko gently but firmly so it adheres well.
- Heat the Frying OilPour about 1 inch of neutral oil into a deep skillet or Dutch oven. Heat over medium-high until it reaches 350°F (175°C).Look for A breadcrumb dropped in the oil sizzles immediately.Tip Use a thermometer to keep the oil at a steady temperature.
- Deep-Fry the KatsuCarefully lower the breaded chicken into the hot oil. Fry for 4 minutes, turning once, until the crust is puffed, golden amber, and the chicken is cooked through. Transfer to a wire rack to rest.Look for The katsu floats and is deep golden brown all over.Safe temperature 165°F (74°C) internal temperature (poultry)Tip Fry in batches if needed to avoid crowding the pan.
- Rest the KatsuLet the fried cutlets rest on a wire rack for 5 minutes. This allows the juices to redistribute and the crust to stay crisp.Look for The katsu is still warm and the crust remains crunchy.Tip Do not cover the katsu; it will steam and soften the crust.
The chicken cutlets should be evenly coated with a thick, craggy layer of panko. When fried, the crust should be puffed, golden amber, and shatteringly crisp.
The chicken should be cooked through, reaching 165°F (74°C) in the thickest part. Let the katsu rest on a wire rack to keep the crust crisp.
Slice and Serve
- Slice the KatsuUsing a sharp knife, slice each cutlet crosswise into 1-inch-wide strips. The crust should crunch loudly as you cut.Look for The knife cuts through with a crisp crunch.Tip A serrated knife or a very sharp chef's knife works best.
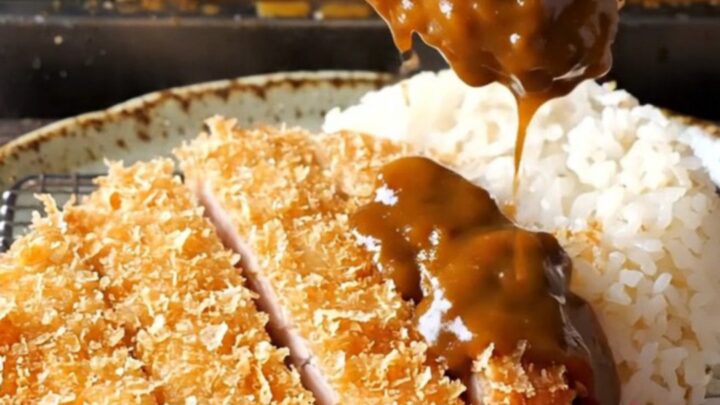
- Plate and ServeDivide the steamed rice between two plates. Fan the sliced katsu alongside the rice. Ladle the hot curry sauce over the katsu and rice. Garnish with pickled fukujinzuke on the side.Look for The curry sauce is glossy and the katsu is golden.Tip Serve immediately so the katsu stays crisp.
The sliced katsu should reveal a juicy, tender interior with a crisp, golden crust. The curry sauce should be hot and glossy. The rice should be steamed and fluffy. Garnish with pickled fukujinzuke for a bright, tangy contrast. Serve immediately so the katsu stays crisp.
Common mistakes
One common mistake is overcrowding the frying pan, which lowers the oil temperature and results in soggy, greasy katsu. Fry the cutlets in batches if necessary. Another mistake is not pressing the panko firmly enough onto the chicken, causing the crust to fall off during frying.
Be sure to press the breadcrumbs on firmly. Finally, don't skip the rest time after frying—this allows the juices to redistribute and keeps the crust crisp.
How to tell it’s done
The chicken katsu is done when it reaches an internal temperature of 165°F (74°C). The crust should be deeply golden brown and puffed, and the chicken should be juicy and tender.
The curry sauce is done when the vegetables are fork-tender and the sauce has thickened enough to coat the back of a spoon. The rice should be fluffy and each grain separate.
- Poultry: 165°F (74°C) in the thickest part
- Egg dishes: 160°F (71°C) in the thickest part
Up next · Part 3 of 3
4 variations · storage & make-ahead · 5 answers · printable card
Tips, FAQ & printable recipe (Part 3)← Back to the ingredients (Part 1)