Appetizers · Part 2 of 3: Instructions
Crispy Jalapeño Cheddar and Bacon Cast-Iron Focaccia Step-by-step instructions
- Prep
- Cook
- Total
- Serves
- 8
Before you start
Before you begin, ensure your cast-iron skillet is clean and lightly oiled to prevent sticking. Have all your toppings ready and pre-measured, as the assembly process should be quick to keep the dough at the right temperature for rising.
If you are using store-bought dough, bring it to room temperature for about thirty minutes before you start stretching, as cold dough will be difficult to work with and may snap back when you try to shape it.
Ingredients at a glance (6)
- 1 lb pizza dough, store-bought or made ahead
- 1/4 cup pickled jalapeño coins
- 1 cup sharp cheddar cheese, cubed
- 4 slices bacon, cooked and chopped
- 2 tbsp melted butter
- 1/2 tsp chili flakes
Instructions
Dough Preparation
- Prepare the DoughPlace the dough into a well-oiled 10-inch cast-iron skillet. Stretch the dough gently to cover the bottom of the pan evenly. Use your fingertips to dimple the surface of the dough deeply, creating the characteristic pockets for the toppings to settle into.Look for The dough should be dimpled all over with deep indentations.Tip Ensure the skillet is well-oiled to prevent sticking and encourage a crispy bottom crust.
The dough should be stretched to fit the skillet, with deep, distinct dimples pressed into the surface. The surface should look tacky and ready to receive the toppings. Check that the pan is adequately oiled to avoid any potential sticking points during the final baking phase.
Topping Assembly
- Add ToppingsDistribute the sharp cheddar cheese cubes, pickled jalapeño coins, and chopped bacon evenly across the dimpled dough. Press the ingredients slightly into the indentations so they stay in place during the baking process.Look for The toppings should be pressed firmly into the dough indentations.Tip Distribute the cheese near the edges of the pan to create that signature lacy, crispy crust.
The toppings should be nestled securely into the dimples. The cheddar cubes, jalapeño coins, and bacon should be distributed in a balanced pattern across the entire surface.
Ensure no toppings are clumped together, which allows for even heat distribution and consistent browning across the entire surface of the bread.
Final Bake
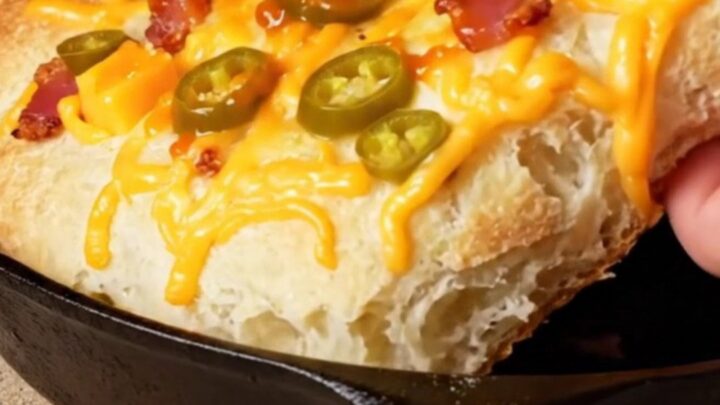
- Bake and FinishPreheat the oven to 450 degrees Fahrenheit. Bake the focaccia in the cast-iron skillet for twenty minutes until the cheese is blistered and the crust is golden brown. Remove from the oven and immediately brush the hot surface with the chili-infused melted butter.Look for The crust should be deep golden brown and the cheese bubbly and crispy.Tip Serve warm to ensure the best texture and flavor experience.
The bread is ready when the kitchen is filled with the aroma of toasted cheese and crispy bacon. The crust will be a beautiful golden-brown color, and the cheese will show dark, crispy, lacy edges. The bread should feel firm to the touch, and the butter-chili finish should give it a vibrant, appetizing sheen.
Common mistakes
A common mistake is using too little oil in the skillet, which leads to the dough sticking and losing that signature crispy bottom. Another error is over-crowding the dough with too many toppings, which can make the bread soggy in the center.
Ensure the cheese is distributed evenly and not piled too high in any single spot. Finally, be careful not to skip the dimpling step, as the texture of the focaccia depends entirely on these pockets.
How to tell it’s done
The focaccia is perfectly done when the crust is a deep, golden brown and the cheese on top is fully melted with crispy, lacy edges. The edges of the bread should pull away slightly from the sides of the skillet, indicating a crisp bottom.
When tapped, the crust should sound hollow and crisp. The total bake time is approximately twenty minutes, but keep an eye on the color to ensure it reaches your preferred level of crispness.
Up next · Part 3 of 3
2 variations · storage & make-ahead · 3 answers · printable card
Tips, FAQ & printable recipe (Part 3)← Back to the ingredients (Part 1)