Dinner · Part 2 of 3: Instructions
Crispy Honey Butter Chicken Biscuit Bake Step-by-step instructions
- Prep
- Cook
- Total
- Serves
- 6
Before you start
Before beginning, ensure your oven is preheated to the correct temperature of 375°F (190°C). Have all ingredients ready on the counter, with the biscuit dough cut into uniform quarters and the honey butter melted.
Clear your workspace and ensure your baking dish is clean and ready for assembly. Proper preparation ensures a smooth process from assembly to baking.
Ingredients at a glance (3)
- 2 cans refrigerated biscuit dough, cut into quarters
- 1/2 cup melted honey butter
- 2 cups cooked breaded chicken bites
Instructions
Assembly of the base
- Prepare the baking dishPreheat the oven to 375°F (190°C). Take the refrigerated biscuit dough and cut each piece into quarters. Arrange the dough quarters in an even layer across the bottom of a 9x13 inch ceramic baking dish, ensuring they are distributed well to allow for even rising during the baking process.Look for The dough pieces should be spread in a single, uniform layer.Tip Grease the baking dish lightly if you prefer easier cleanup later.
The biscuit pieces should be arranged in a single, even layer across the entire bottom of the baking dish. They should be close together but not smashed, allowing enough space for them to expand and puff up correctly as they bake in the oven. Verify that the dish is clean and the counter space is ready for the next steps.
Adding flavor and protein
- Add sauce and chickenPour the melted honey butter evenly over the arranged biscuit dough pieces. Once the butter is distributed, scatter the cooked breaded chicken bites over the top of the biscuits and butter. Ensure the chicken is spread out to cover the surface of the dish for maximum crispiness.Look for The honey butter should coat the biscuits and the chicken should be visible on top.Tip Use a small pitcher to achieve an even drizzle over all the pieces.
The honey butter should be drizzled evenly over every piece of biscuit dough. After adding the crispy chicken bites, they should be distributed across the top of the dish.
The chicken should be visible and ready to crisp up in the oven. Check that the butter has reached the bottom of the dish to ensure even cooking and flavor distribution.
Final bake and finish
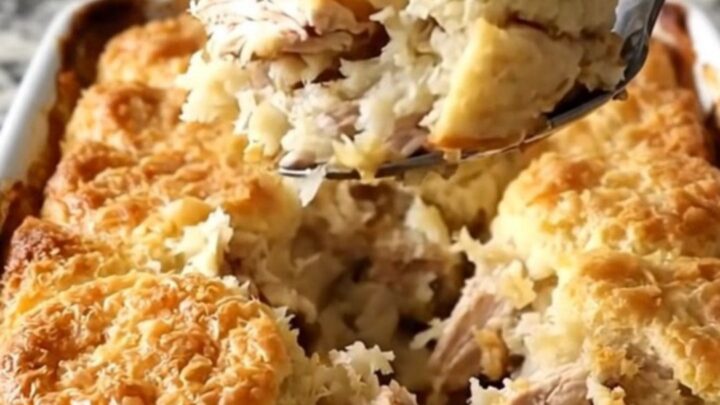
- Bake to golden perfectionPlace the baking dish into the preheated oven. Bake for 20 to 25 minutes until the biscuits have puffed up, turned golden brown, and the honey butter is bubbling around the edges. Check that the chicken bites reach an internal temperature of 165°F (74°C) before removing the dish from the oven. Let the dish rest for 5 minutes before serving.Look for The biscuits should be golden brown and the edges bubbling with the honey butter mixture.Safe temperature 165°F (74°C) internal temperature (poultry)Tip If the biscuits brown too quickly, cover the dish loosely with aluminum foil for the final few minutes.
The dish should look golden and smell buttery and savory. The edges must be bubbling with the honey butter sauce. When you check the chicken, it should be hot and crispy. The biscuits should feel firm and look well-risen. Once these visual cues are met, the dish is ready to be removed from the oven for the final resting period.
Common mistakes
Avoid overcrowding the baking dish, as this prevents the biscuits from puffing up and cooking evenly. Do not skip the resting period, as the dish needs time for the honey butter to absorb into the biscuits and for the heat to distribute.
Ensure the oven is fully preheated before placing the dish inside, otherwise, the biscuits may become tough or doughy instead of light and fluffy.
How to tell it’s done
The dish is done when the biscuits are puffed, golden brown, and cooked through in the center. The honey butter should be bubbling vigorously around the edges of the dish.
The chicken bites must reach a safe internal temperature of 165°F (74°C). Allow the dish to rest for 5 minutes after removing it from the oven to let the textures set.
- Poultry: 165°F (74°C) in the thickest part
Up next · Part 3 of 3
2 variations · storage & make-ahead · 3 answers · printable card
Tips, FAQ & printable recipe (Part 3)← Back to the ingredients (Part 1)