Dinner · Part 2 of 3: Instructions
Crispy Herb-Roasted Whole Chicken for a Simple Dinner Step-by-step instructions
- Prep
- Cook
- Total
- Serves
- 4
Before you start
Before beginning, ensure the chicken is completely thawed if frozen. Remove it from the refrigerator about 20 minutes before seasoning to take the chill off, which helps it cook more uniformly.
Have all your herbs chopped and your roasting pan ready to go. Keeping your workspace clean and organized before handling raw poultry is essential for a smooth cooking process.
Ingredients at a glance (2)
- 1 whole chicken (about 4 lbs), patted dry
- 2 tbsp fresh mixed herbs, finely chopped
Instructions
Seasoning the bird
- Prepare the chickenPreheat your oven to 400°F (200°C). Pat the whole chicken thoroughly dry with paper towels to ensure crispy skin. Rub the fresh herbs evenly all over the chicken, including under the skin if possible.Look for The chicken should be evenly coated with the herb mixture.Tip Trussing the legs with kitchen twine helps the chicken cook more evenly.
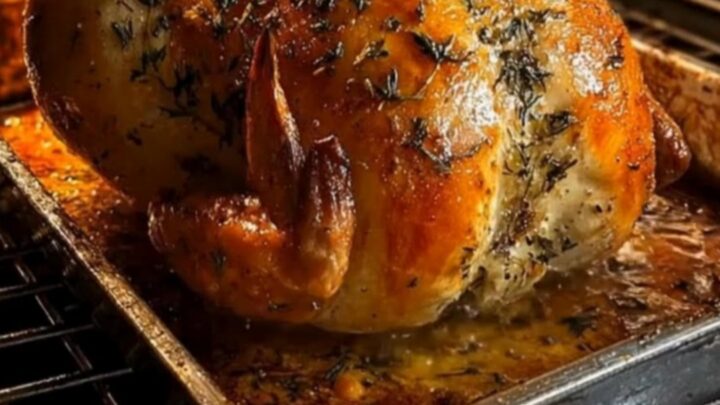
The chicken should be thoroughly dried and coated in a fragrant, uniform layer of herbs. Ensure the cavity is empty and the wings are tucked under for a neat shape. The skin should look glossy and well-seasoned, ready for the oven.
Roasting to perfection
- Roast the chickenPlace the chicken breast-side up in a roasting pan. Roast for approximately 75 minutes, or until the juices run clear and the skin is golden brown and crispy. Use a meat thermometer to ensure the thickest part of the thigh reaches 165°F (74°C).Look for The skin should be deep golden brown and crispy to the touch.Safe temperature 165°F (74°C) internal temperature (poultry)Tip Baste the chicken with pan juices halfway through for extra flavor.
The kitchen should be filled with the savory aroma of roasting herbs and chicken. The skin should be browning evenly across the breast and legs.
The chicken should look plump and the skin should be tightening, indicating the fat is rendering and the meat is cooking through.
Resting and carving
- Rest and carveRemove the pan from the oven and carefully transfer the chicken to a cutting board. Let it rest for at least 15 minutes before carving to allow the juices to redistribute throughout the meat. Carve into slices and serve immediately while hot.Look for The meat should be tender and easy to carve without falling apart.Tip Use sharp carving tools for clean, beautiful slices.
The chicken should rest on a cutting board, allowing the exterior to settle. The juices will have stabilized, and the meat will be firm enough to slice cleanly. After 15 minutes, the chicken is ready to be carved into beautiful, juicy portions for serving.
Common mistakes
Avoid overcrowding the roasting pan, as this can trap steam and prevent the skin from becoming crispy. Do not rush the resting period; carving too early causes the flavorful juices to escape, resulting in drier meat.
Also, ensure the oven is fully preheated before putting the chicken in, as starting in a cold oven will lead to uneven cooking and soggy skin.
How to tell it’s done
The chicken is perfectly done when the skin is deep golden brown and crisp. The most accurate way to check for doneness is by inserting an instant-read thermometer into the thickest part of the thigh, making sure not to touch the bone.
The internal temperature must reach 165°F (74°C). The juices should run clear when the meat is pierced.
- Poultry: 165°F (74°C) in the thickest part
Up next · Part 3 of 3
2 variations · storage & make-ahead · 3 answers · printable card
Tips, FAQ & printable recipe (Part 3)← Back to the ingredients (Part 1)