Dinner · Part 2 of 3: Instructions
Crispy Herb Roasted Baby Potatoes and Onions Step-by-step instructions
- Prep
- Cook
- Total
- Serves
- 4
Before you start
Before beginning, ensure your oven is fully preheated to 400°F (200°C). Having a clean, dry baking sheet ready is vital for the roasting process.
Wash the baby potatoes thoroughly to remove any dirt, and pat them completely dry with a kitchen towel; excess moisture on the surface of the potatoes will prevent them from becoming crispy and may cause them to become mushy during the initial stages of cooking. Organize your herbs on the counter to streamline the assembly.
Ingredients at a glance (3)
- 1.5 lb baby potatoes, halved
- 2 medium yellow onions, cut into wedges
- 2 tbsp fresh herbs, chopped
Instructions
Preparation and Sizing
- Prepare the vegetablesPreheat the oven to 400°F (200°C). Wash the baby potatoes and cut them in half. Peel the yellow onions and cut them into even wedges to ensure they roast at a similar rate to the potatoes. Ensure all pieces are uniform in size for consistent cooking results.Look for vegetables are cut into uniform piecesTip Keep the potato skins on to maintain texture and crispiness during the roasting process.
At this stage, the potatoes and onions should be cut into uniform, bite-sized pieces. This consistency is the foundation for even cooking. The vegetables should be clean and completely dry to the touch, ensuring they are ready to receive the heat that will facilitate the browning process during the high-heat roasting phase.
Arrangement and Roasting
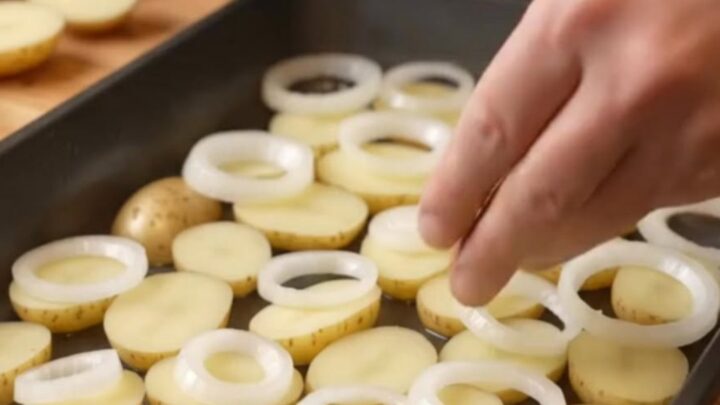
- Arrange and roastSpread the potato halves and onion wedges in a single layer across a dark baking pan. The dark surface of the pan helps absorb more heat, contributing to a better crust. Place the pan in the preheated oven and roast for 35 to 40 minutes, or until the potatoes are fork-tender and golden brown.Look for vegetables are golden and fork-tenderTip Do not crowd the baking pan, as this causes the vegetables to steam instead of roast.
The vegetables should be arranged on the baking pan with clear space between the pieces. If the vegetables are touching or piled on top of one another, rearrange them. A proper layout allows the heat to reach every surface, which is the key to creating the desired texture and golden color.
Finishing and Serving
- Finish and serveRemove from the oven, sprinkle immediately with fresh chopped herbs while the steam is still releasing, and toss gently with a metal spatula before serving. Use the metal spatula to scrape the crispy bits from the bottom of the pan to ensure all the flavor is incorporated.Look for potatoes are fork-tender and edges are golden and crispTip Use a metal spatula to scrape the crispy bits from the bottom of the pan.
The dish is finished when the kitchen is filled with the aroma of roasted vegetables and herbs. The potatoes will appear golden and crisp, while the onions will be shrunken and deeply caramelized.
A final toss with fresh herbs should release a burst of fragrance. The vegetables should be easily pierced with a fork, signaling they are ready for serving.
Common mistakes
A common mistake is failing to dry the potatoes after washing them, which results in steaming rather than roasting. Another frequent error is overcrowding the baking sheet, which limits heat circulation and prevents crisping.
Additionally, do not be tempted to stir the potatoes too early; allowing them to sit undisturbed for the majority of the roasting time is what creates that signature crust. Finally, adding fresh herbs too early can lead to them burning and becoming bitter.
How to tell it’s done
The potatoes are done when they are golden brown and show a deep, crispy crust on all sides. When pierced with a fork, the center should offer no resistance, indicating they are tender and fully cooked.
The onions should be soft, translucent, and have dark, caramelized edges. If the potatoes are still firm in the center, continue roasting for an additional 5 minutes, checking frequently to prevent burning.
Up next · Part 3 of 3
2 variations · storage & make-ahead · 3 answers · printable card
Tips, FAQ & printable recipe (Part 3)← Back to the ingredients (Part 1)