Appetizers · Part 2 of 3: Instructions
Crispy Ham and Gruyère Puff Pastry Bites Step-by-step instructions
- Prep
- Cook
- Total
- Serves
- 6
Before you start
Before you begin, ensure your puff pastry has been thawed according to the package instructions, though it should still be cool to the touch. Prepare your baking sheet by lining it with parchment paper to ensure easy cleanup and even browning.
Have your ham and cheese ready to go, and ensure your oven is fully preheated to the required temperature. Organizing your workspace with all ingredients within reach allows you to assemble the pastries quickly, keeping the dough at the optimal temperature for the best possible results.
Ingredients at a glance (3)
- 1 sheet store-bought or made ahead puff pastry, thawed
- 6 slices deli ham
- 1 cup Gruyère cheese, shredded
Instructions
Assembling the Pockets
- Prep and FillPreheat the oven to 400°F (200°C). Lay the puff pastry sheet flat on a clean surface and cut it into six equal rectangles. Layer a slice of ham onto each rectangle and top with a generous portion of shredded Gruyère cheese.Look for The pastry should be cold but pliable.Tip Keep the pastry chilled until the very last second to ensure maximum puffing.
At this stage, the pastry rectangles are neatly filled with ham and cheese. Check that every piece of ham is fully enclosed within the dough and that the edges are pressed firmly together. The dough should still feel cool and firm, ensuring that the butter layers are intact before they enter the oven. If the dough feels too soft or sticky, place the assembly back in the refrigerator for a few minutes to firm up the fat before proceeding to the baking phase.
Baking to Perfection
- BakeFold the pastry edges over the filling to create a sealed pocket. Transfer the pastries to a parchment-lined baking sheet. Bake in the preheated oven for 18 to 20 minutes until the pastry is deeply golden brown and the cheese is bubbling out from the sides.Look for The pastry should be puffed and golden brown.Tip Avoid opening the oven door frequently, as this can cause the pastry to collapse.
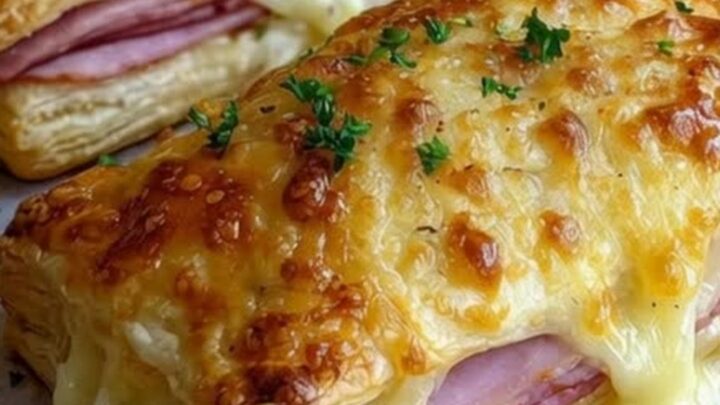
The pastries are now transforming in the oven. Look for the pastry to rise significantly and turn a rich, golden brown. You will see the cheese bubbling at the seals, which is a sign of a perfectly cooked interior.
The kitchen should smell like toasted butter and savory melted cheese. If the edges begin to brown too quickly, you may slightly reduce the heat, but generally, the 20-minute window is ideal for achieving the perfect balance of color and crispness throughout the pastry layers.
Final Resting
- Rest and ServeRemove the baking sheet from the oven and allow the pastries to rest on the sheet for 5 minutes. This allows the cheese to set slightly so it stays inside the pastry when you take that first bite.Look for The cheese should be melted and slightly firm.Tip Use a spatula to lift the delicate pastries gently to avoid tearing the flaky crust.
The pastries have been removed from the oven and are now resting on the baking sheet. This cooling period is vital; it allows the internal steam to dissipate and the melted cheese to firm up slightly. The texture should remain incredibly flaky to the touch.
Before serving, ensure the bottom of each pastry is crisp and not soggy. Once the five-minute rest is complete, the pastries are ready to be plated and served while still warm for the best sensory experience.
Common mistakes
A common mistake is using pastry that has become too warm, which prevents it from puffing properly and results in a dense, greasy texture. Another error is overfilling the pockets, which can cause the cheese to leak out onto the baking sheet and burn. Ensure that the edges are sealed tightly by pressing down with your fingers or the tines of a fork. Finally, failing to preheat the oven sufficiently will lead to uneven baking and a lack of the desired crispness.
How to tell it’s done
The pastries are done when they have reached a deep, golden-brown color across the entire surface. The puff pastry should look light, airy, and crisp. When you lift one with a spatula, the bottom should be firm and golden.
The cheese should be visibly melted and bubbling, having created a rich, savory aroma that fills the kitchen. Because there are no raw proteins involved, the visual indicators of browning and texture are the primary guides for determining when the baking process is complete.
Up next · Part 3 of 3
2 variations · storage & make-ahead · 3 answers · printable card
Tips, FAQ & printable recipe (Part 3)← Back to the ingredients (Part 1)