Breakfast · Part 1 of 3: Ingredients
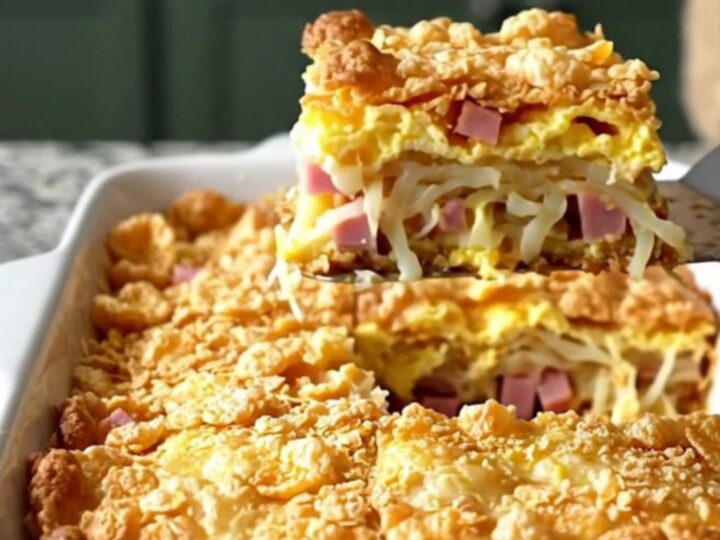
Crispy Ham and Egg Funeral Potato Breakfast Casserole
- Prep
- Cook
- Total
- Serves
- 8
This breakfast casserole is the ultimate crowd-pleaser for busy mornings, combining the comforting texture of shredded hash browns with savory ham and a rich, creamy egg base.
Topped with a buttery, crispy cornflake crust, this dish offers a delightful contrast of textures that makes every serving feel special. It is a reliable, hearty meal that comes together quickly, allowing you to spend more time enjoying the morning with family or guests rather than laboring over the stove.
Funeral potatoes are a staple of comfort cooking, and this breakfast version elevates the classic concept by incorporating eggs and ham for a complete meal. By using pre-shredded hash browns and a simple whisked egg mixture, the preparation becomes streamlined and efficient.
The key to this dish is the cornflake topping, which, when dotted with butter and baked, creates a golden, crunchy layer that perfectly complements the soft, savory interior of the casserole. It is an ideal solution for weekend brunches or holiday mornings when you need a dish that is both impressive and easy to prepare.
Ingredients
Base
- 30 oz frozen shredded hash browns
- 2 cups diced cooked ham
Egg Mixture
- 8 large eggs
- 1 cup sour cream
Topping
- 2 cups crushed cornflakes
- 4 tbsp butter, sliced
Why this recipe works
The method relies on the contrast between the tender, creamy egg and potato base and the crisp, buttery cornflake topping. By layering the ingredients directly into the baking dish, you allow the egg mixture to seep through the hash browns and ham, ensuring that every bite is well-seasoned and cohesive. This technique also minimizes cleanup, as you only need a single bowl for the egg mixture.
Using frozen hash browns provides a consistent texture and saves significant preparation time compared to grating raw potatoes. The sour cream in the egg base adds a subtle tang and ensures that the casserole stays moist during the baking process. By dotting the butter over the cornflakes rather than melting it, you create localized pockets of richness that help toast the flakes to a deep, golden brown, providing that essential crunch.
Notes and substitutions
When choosing ingredients, opt for full-fat sour cream to ensure the best texture for the egg mixture. The ham can be any variety of cooked, diced ham, such as smoked or honey-glazed, depending on the flavor profile you prefer.
If you are using pre-cooked, cubed ham, ensure it is cut into uniform pieces so it disperses evenly throughout the dish. Frozen hash browns should be used while still mostly frozen or slightly thawed; there is no need to fully defrost them before assembling.
A 9x13 inch ceramic or glass baking dish is recommended for this recipe, as it provides enough surface area for the cornflake crust to crisp up properly.
If you find that the cornflakes are browning too quickly before the center is set, you can loosely tent the dish with aluminum foil for the last ten minutes of baking. Ensure that the oven is fully preheated before placing the dish inside to promote an even rise and proper setting of the eggs.
- cooked ham: cooked bacon or breakfast sausage crumbles
- sour cream: plain Greek yogurt
Equipment
- 9x13 inch baking dish
- large mixing bowl
- whisk
- measuring cups
Up next · Part 2 of 3
3 steps · 45 min of cooking · what to look for at each stage
Step-by-step instructions (Part 2)