Dinner · Part 2 of 3: Instructions
Crispy Golden Potato Bake for a Satisfying Side Step-by-step instructions
- Prep
- Cook
- Total
- Serves
- 4
Before you start
Ensure the oven is preheated fully to 400°F (200°C) before you begin the assembly. Have your baking dish clean and ready.
It is helpful to organize your workspace to allow for quick slicing and layering, keeping the potatoes in water until the very last second if you are worried about them oxidizing before they hit the oven.
Ingredients at a glance (3)
- 2 lb potatoes, thinly sliced
- 1 large onion, thinly sliced
- fresh parsley, chopped, for serving
Instructions
Vegetable Prep
- Prepare the vegetablesUsing a sharp knife or a mandoline, slice the potatoes into uniform rounds about 1/8-inch thick to ensure even cooking. Thinly slice the onion into half-moons. Place the sliced potatoes and onions into a large mixing bowl and toss them together until thoroughly combined.Look for The vegetables are evenly distributed.Tip Uniform thickness is key to achieving that consistent crispy texture across all slices.
The potatoes and onions should be sliced into consistent, thin rounds. They should look uniform, which is the most important factor in ensuring they cook at the same rate. Check that the bowl is large enough to toss them thoroughly without spilling ingredients over the side.
Baking Phase
- Arrange and bakePreheat your oven to 400°F (200°C). Transfer the potato and onion mixture into a clear glass baking dish, spreading them out to create a layered effect. Place the dish in the oven and bake until the edges are deep golden brown and the centers are tender, approximately 45 minutes.Look for The edges look golden and crispy.Tip Do not overcrowd the dish too much, as this allows the heat to circulate and crisp the rounds properly.
During this phase, the kitchen will fill with the savory aroma of roasting onions and potatoes. The edges of the dish will begin to brown first.
Check the potatoes after 35 minutes; if the top is browning too quickly, you can loosely tent the dish with foil to ensure the centers finish cooking.
Finishing Touch
- Finish and serveRemove the baking dish from the oven and allow it to rest for 5 minutes. Sprinkle the freshly chopped parsley over the top of the hot potatoes just before serving to add a bright, herbaceous finish to the dish.Look for The parsley is vibrant and aromatic.Tip Adding the parsley at the very end keeps it fresh and prevents it from wilting too quickly.
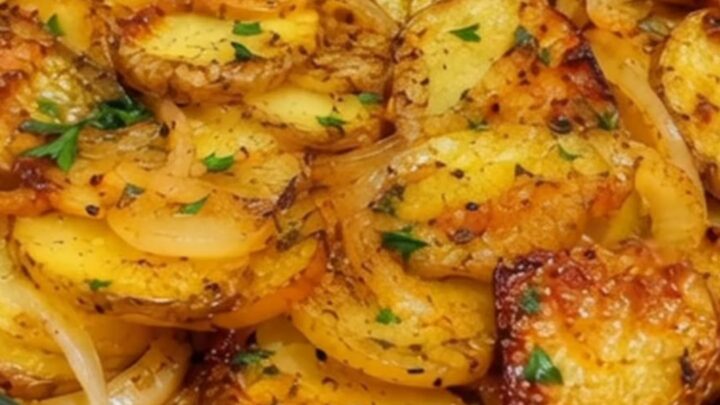
Once removed from the oven, the potatoes should look glistening and golden. The parsley should be added only when the dish is ready to be brought to the table to ensure it remains bright green and provides a fresh contrast to the rich, roasted flavors of the baked potatoes.
Common mistakes
Avoid slicing the potatoes too thick, as they will take much longer to cook and may result in a mushy texture rather than a crispy one.
Also, ensure the oven is at the correct temperature; if it is too low, the potatoes will steam rather than brown, leading to a soggy final dish that lacks the desired crunch.
How to tell it’s done
The dish is done when the potatoes are fork-tender throughout and the top layer has developed a deep, dark golden-brown color. The edges should appear slightly charred and very crispy.
A fork should easily pierce through the center of the dish without any resistance, indicating the potatoes are cooked perfectly.
Up next · Part 3 of 3
2 variations · storage & make-ahead · 3 answers · printable card
Tips, FAQ & printable recipe (Part 3)← Back to the ingredients (Part 1)