Dinner · Part 2 of 3: Instructions
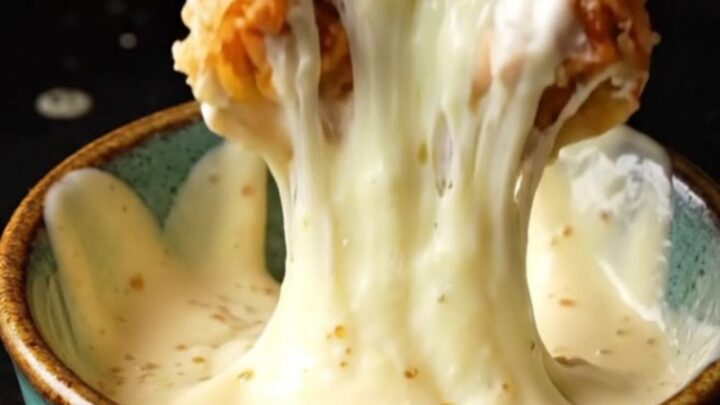
Crispy Garlic Parmesan Chicken Wrap with Mozzarella Pull Step-by-step instructions
- Prep
- Cook
- Total
- Serves
- 4
Before you start
Before starting, cut the chicken into 1-inch cubes and pat dry with paper towels. Mince the garlic, chop the parsley, and grate the parmesan cheese if not already grated. Measure out all the spices and have the tortillas and mozzarella ready.
Set a large skillet over medium-high heat and gather your spatula and pastry brush. If you plan to make a garlic sauce for dipping, prepare it now and refrigerate until serving.
Ingredients at a glance (13)
- 2 lb boneless skinless chicken breast, cut into 1-inch cubes
- 2 tbsp olive oil
- 2 tsp smoked paprika
- 1/2 tsp chili flakes
- 1 tsp garlic powder
- 1 tsp salt
- 1/2 tsp black pepper
- 4 tbsp unsalted butter
- 4 cloves garlic, minced
- 2 tbsp fresh parsley, chopped
- 1/2 cup grated parmesan cheese
- 4 large flour tortillas (10-inch)
- 2 cups shredded mozzarella cheese
Instructions
Sear and Flavor
- Sear the ChickenIn a large skillet, heat the olive oil over medium-high heat. Add the chicken cubes in a single layer. Sprinkle with smoked paprika, chili flakes, garlic powder, salt, and black pepper. Cook, stirring occasionally, until the chicken is deeply browned and cooked through, about 6-8 minutes. Transfer the chicken to a bowl and set aside.Look for The chicken should be golden brown on the outside and reach 165°F (74°C) inside.Safe temperature 165°F (74°C) internal temperature (poultry)Tip Do not overcrowd the pan; cook in batches if needed to get a good sear.
- Make Garlic ButterReduce the heat to low. Add the unsalted butter to the same skillet. Once melted, add the minced garlic and cook for 1 minute until fragrant. Stir in the chopped parsley and grated parmesan cheese. Remove from heat.Look for The butter should be bubbly and the garlic fragrant but not browned.Tip If the garlic browns too quickly, remove the skillet from the heat.
The chicken cubes should be deeply browned on all sides, with a smoky, spicy aroma filling the kitchen. The butter and garlic should be fragrant but not browned.
The parmesan should be melted into the butter, creating a thick, savory sauce. The chicken should be cooked through, reaching 165°F (74°C). Before moving on, taste a piece of chicken and adjust seasoning if needed.
Assemble and Toast
- Assemble the WrapsLay the tortillas on a clean work surface. Brush each tortilla with the garlic butter mixture, leaving a border. Divide the cooked chicken among the tortillas, placing it in the center. Top each with a generous amount of shredded mozzarella. Fold in the sides and roll tightly into a burrito shape.Look for The wraps should be snug and secure, with no filling falling out.Tip Warm the tortillas briefly in a dry skillet or microwave to make them more pliable.
- Toast the WrapsWipe out the skillet and place it over medium heat. Add the wraps seam-side down. Cook for 2 minutes per side, pressing gently with a spatula, until golden brown and crispy on all sides and the cheese is melted. Work in batches if needed.Look for The tortillas should be deep golden brown and crisp, with cheese oozing out.Tip If the skillet gets too hot, reduce the heat to avoid burning.
The wraps should be tightly rolled and secure, with no filling spilling out. As they toast, the tortillas will turn golden brown and crisp, and you'll hear a satisfying sizzle. The cheese should be visibly melting and starting to ooze from the ends. The wraps should feel firm and crunchy when pressed with a spatula. Work in batches to avoid overcrowding the skillet.
Serve and Enjoy
- Serve with Garlic SauceSlice the wraps in half diagonally. Serve immediately with extra garlic sauce on the side for dipping, if desired.Look for The wraps should be crispy and the cheese pull visible when sliced.Tip For extra flavor, brush the outside with garlic butter before toasting.
The wraps should be deeply golden and crisp, with a shiny, buttery sheen. When you slice them diagonally, the cheese should pull into long, gooey strings. The filling should be hot and juicy. Serve immediately with garlic sauce on the side for dipping, and watch them disappear.
Common mistakes
One common mistake is overcrowding the skillet when searing the chicken, which steams it instead of browning it. Cook in batches if necessary. Another is overfilling the wraps, which makes them difficult to roll and can cause them to burst during toasting.
Stick to about 1/2 cup of filling per wrap. Also, be careful not to over-toast the wraps—2 minutes per side is usually enough; if they brown too quickly, reduce the heat. Finally, don't skip the garlic butter on the tortillas; it's key to the flavor and crispiness.
How to tell it’s done
The chicken is done when it reaches an internal temperature of 165°F (74°C) and is golden brown on the outside. The wraps are done when the tortillas are deep golden brown and crispy on both sides, and the cheese is fully melted and oozing out slightly.
To check, insert a knife into the center of a wrap; it should come out hot and the cheese should be molten. Let the wraps rest for 1 minute before slicing to allow the cheese to set slightly, making them easier to handle.
- Poultry: 165°F (74°C) in the thickest part
Up next · Part 3 of 3
4 variations · storage & make-ahead · 5 answers · printable card
Tips, FAQ & printable recipe (Part 3)← Back to the ingredients (Part 1)