Dinner · Part 2 of 3: Instructions
Crispy Garlic Parmesan Chicken Tenders with Sweet Chili Dip Step-by-step instructions
- Prep
- Cook
- Total
- Serves
- 4
Before you start
Before you start, set up your dredging station: one bowl with the beaten eggs, one shallow dish with the flour-cornstarch-parmesan mixture, and a wire rack for the coated tenders. Pat the chicken dry and season lightly with salt and pepper if desired.
Heat the oil in a large skillet or Dutch oven over medium-high heat while you coat the chicken. Have a thermometer ready to monitor the oil temperature, and line a baking sheet with a wire rack for draining the fried tenders.
Ingredients at a glance (13)
- 2 lb chicken breast, sliced into strips
- 1 tbsp garlic powder
- 1 tsp black pepper
- 1 tsp salt
- 2 large eggs, beaten
- 2 cups all-purpose flour
- 1/2 cup cornstarch
- 1/2 cup grated parmesan cheese
- 1/2 cup mayonnaise
- 3 tbsp sweet chili sauce
- 1 tsp sriracha
- 1 tbsp lime juice
- vegetable oil, for frying, to taste
Instructions
Phase 1: Prep and Coat
- Season and Coat the ChickenIn a shallow dish, combine the flour, cornstarch, garlic powder, black pepper, salt, and grated parmesan. In a separate bowl, beat the eggs. Pat the chicken strips dry with paper towels. Working one at a time, dip each strip into the egg wash, letting any excess drip off, then dredge thoroughly in the flour mixture, pressing gently to adhere. Shake off any excess and place on a wire rack.Look for The coating should be thick and evenly covering each strip, with no bare spots.Tip For an extra craggy crust, let the coated strips rest for 5 minutes before frying.
- Heat the OilPour about 1 inch of vegetable oil into a large heavy skillet or Dutch oven. Heat over medium-high until the oil reaches 350°F (175°C). If you don't have a thermometer, test by dropping a pinch of flour into the oil; it should sizzle immediately.Look for The oil should shimmer and a small piece of coating sizzles vigorously when added.Tip Maintain the oil temperature between 325°F and 350°F for even cooking.
At the end of this phase, you should have a neat dredging station with seasoned flour mixture, beaten eggs, and chicken strips ready to go. The coated tenders should have a thick, even layer of flour mixture clinging to them, with no bare spots. If the coating seems thin, press more flour mixture onto the chicken. The oil should be heating up, and you should have your thermometer and wire rack ready.
Phase 2: Fry to Golden Perfection
- Fry the TendersCarefully place a few chicken strips into the hot oil in a single layer, without overcrowding. Fry for 3-4 minutes per side, turning once, until the coating is deep golden brown and crispy. The internal temperature of the chicken should reach 165°F (74°C) when measured with an instant-read thermometer.Look for The crust is golden brown and the chicken is cooked through, with no pink in the center.Safe temperature 165°F (74°C) internal temperature (poultry)Tip Fry in batches to keep the oil temperature steady and ensure even browning.
- Drain and RestTransfer the fried tenders to a wire rack set over a baking sheet to drain any excess oil. Sprinkle with a little extra salt while they're still hot, if desired. Let them rest for a couple of minutes before serving to allow the juices to settle.Look for The tenders are crispy and sizzling, with no excess oil pooling on the rack.Tip Keeping them on a wire rack instead of paper towels preserves the crunch.
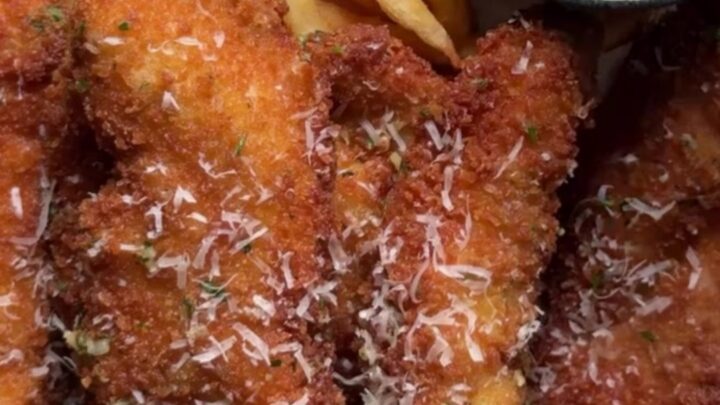
The kitchen should be filled with the inviting aroma of frying chicken and parmesan. The tenders should be a deep golden brown, with a shatteringly crisp exterior that crackles when tapped.
The internal temperature of the chicken should read 165°F (74°C) on an instant-read thermometer. The tenders should feel firm and springy, and there should be no pinkness in the center. Drain them on a wire rack to keep them crispy.
Phase 3: Whisk the Dip and Serve
- Make the DipIn a small bowl, whisk together the mayonnaise, sweet chili sauce, sriracha, and lime juice until smooth and creamy. Taste and adjust the heat or acidity if desired. Set aside.Look for The dip is smooth, pale pink, and has a balanced sweet-spicy-tangy flavor.Tip Chill the dip while you fry the chicken to let the flavors meld.
- Serve and EnjoyArrange the crispy chicken tenders on a platter and serve immediately with the sweet chili dip on the side. Dunk generously and enjoy the crunch.Look for The tenders are golden, crunchy, and piping hot, with the dip ready alongside.Tip Serve with extra lime wedges for a fresh squeeze over the top.
The dip should be smooth and creamy, with a beautiful pale pink color from the sweet chili sauce and sriracha. It should taste balanced — sweet, spicy, tangy, and rich all at once. The tenders should still be warm and crispy when you serve them. Have the dip in a small bowl on the side, ready for dunking. The final dish should look irresistible, with golden tenders and a vibrant dip.
Common mistakes
One common mistake is overcrowding the pan, which lowers the oil temperature and results in greasy, soggy tenders. Fry in batches, leaving space between each piece. Another pitfall is not pressing the coating firmly enough, causing it to fall off during frying.
Make sure to coat each strip thoroughly and let them rest before frying. Finally, avoid using a high heat that burns the outside before the inside cooks; keep the oil at a steady 350°F (175°C).
How to tell it’s done
The chicken is done when the internal temperature reaches 165°F (74°C) on an instant-read thermometer inserted into the thickest part of the strip. The coating should be deep golden brown and very crispy, and the chicken should feel firm to the touch.
If you don't have a thermometer, cut into the thickest tender to check that the meat is opaque and the juices run clear. The total frying time is typically 6-8 minutes, depending on thickness.
- Poultry: 165°F (74°C) in the thickest part
- Egg dishes: 160°F (71°C) in the thickest part
Up next · Part 3 of 3
4 variations · storage & make-ahead · 5 answers · printable card
Tips, FAQ & printable recipe (Part 3)← Back to the ingredients (Part 1)