Appetizers · Part 2 of 3: Instructions
Crispy Garlic Paprika Onion Rings with Herb Aioli Dip Step-by-step instructions
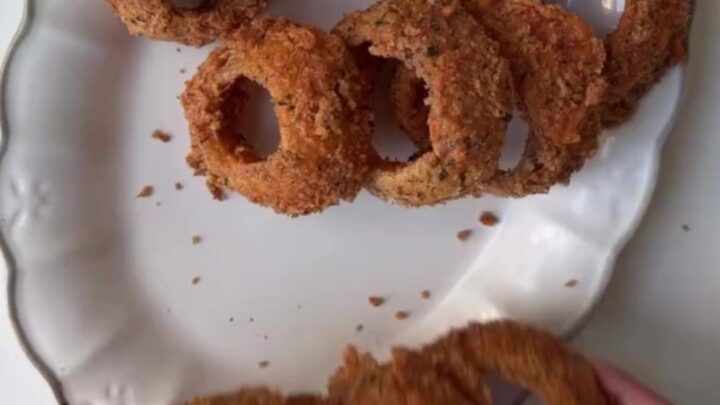
- Prep
- Cook
- Total
- Serves
- 4
Before you start
Before you start, set up your frying station: a large skillet or deep fryer with at least 2 inches of oil, a slotted spoon or tongs, and a paper towel-lined plate for draining. Slice the onions into thick rings and let them soak in cold water while you mix the batter.
Measure all the dry ingredients into a bowl and have the cold water ready. The oil should be heating while you prep the batter so it's at the right temperature when you're ready to fry.
Ingredients at a glance (11)
- 3 medium sweet onions
- 1 cup all-purpose flour
- 2 tbsp cornstarch
- 1 tsp baking powder
- 1 tbsp garlic powder
- 1 tbsp smoked paprika
- black pepper to taste
- salt to taste
- 2/3 cup cold water
- vegetable oil, for frying, to taste
- garlic herb aioli, for serving
Instructions
Prep and Batter
- Prep the Onions and BatterSlice the sweet onions into thick rings, about 1/2 inch wide. Separate the rings and place them in a bowl of cold water; let soak for 5 minutes, then drain and pat dry with paper towels. In a separate bowl, whisk together the flour, cornstarch, baking powder, garlic powder, smoked paprika, black pepper, and salt. Add the cold water and whisk until smooth and free of lumps. The batter should be thick enough to coat the back of a spoon.Look for The batter is smooth and coats the rings evenly.Tip Pat the onions very dry—moisture will make the batter slide off.
- Heat the OilPour about 2 inches of vegetable oil into a large, heavy skillet or deep fryer. Heat over medium-high until a deep-fry thermometer registers 375°F (190°C). If you don't have a thermometer, drop a tiny bit of batter into the oil; it should sizzle and float to the surface immediately.Look for The oil shimmers and a test drop of batter sizzles instantly.Tip Maintain the temperature between batches—let it come back up to 375°F (190°C) before adding more rings.
At the end of this phase, you have thick onion rings soaking in cold water and a smooth, well-seasoned batter ready to go.
The batter should be thick enough to coat the back of a spoon and free of lumps. The onions are out of the water, patted dry, and ready to dip. The oil is heating up to 375°F (190°C).
Fry to Golden
- Coat the Onion RingsDip each onion ring into the batter, letting the excess drip off. Use tongs to lower a few rings gently into the hot oil. Do not overcrowd the pan—work in batches of 4 to 5 rings depending on the size of your skillet.Look for Each ring is fully coated with batter, with no bare spots.Tip Let the excess batter drip off for a few seconds to avoid heavy, doughy rings.
- Fry Until GoldenFry the onion rings for about 3 minutes, turning once halfway, until they are deep golden brown and blistered. Use tongs to transfer them to a paper towel-lined plate to drain. Repeat with the remaining rings, allowing the oil to return to 375°F (190°C) between batches.Look for The rings are golden brown, crisp, and blistered in spots.Tip Don't move them too soon—let the batter set before turning.
The onion rings are frying in batches, turning a deep golden brown and developing blistered spots. The kitchen smells of smoked paprika and fried onions. Each batch is drained on paper towels, and the oil returns to 375°F (190°C) before the next batch goes in. The rings are crisp, not greasy.
Drain and Serve
- Drain and ServeDrain the fried onion rings on fresh paper towels and season with a little extra salt while still hot. Pile them on a serving platter and serve immediately with garlic herb aioli for dipping.Look for The rings are crisp and sizzling, with a light, airy crust.Tip Serve right away—onion rings lose their crunch as they sit.
All the onion rings are piled high on a platter, still warm and crisp. A quick sprinkle of salt enhances the flavor. The garlic herb aioli is in a small bowl for dipping. The rings break with a satisfying snap, revealing tender onion inside. Serve immediately to enjoy the full crunch.
Common mistakes
The most common mistake is overcrowding the pan, which drops the oil temperature and results in soggy rings. Fry in small batches and let the oil come back up to temperature between batches.
Another issue is a batter that's too thick or too thin—it should coat the onion ring evenly and drip off slowly. If it's too thick, add a little more water; if too thin, whisk in a bit more flour. Finally, make sure the onions are completely dry before dipping, or the batter won't stick.
How to tell it’s done
The onion rings are done when they are deep golden brown and blistered in spots, usually after about 3 minutes of frying. The crust should be crisp to the touch and the onion inside tender but not mushy.
If you're unsure, break one open—the onion should be translucent and soft, not raw and crunchy. The oil temperature should stay at 375°F (190°C) throughout; if it drops too low, the rings will absorb oil and become greasy.
Up next · Part 3 of 3
4 variations · storage & make-ahead · 5 answers · printable card
Tips, FAQ & printable recipe (Part 3)← Back to the ingredients (Part 1)