Appetizers · Part 2 of 3: Instructions
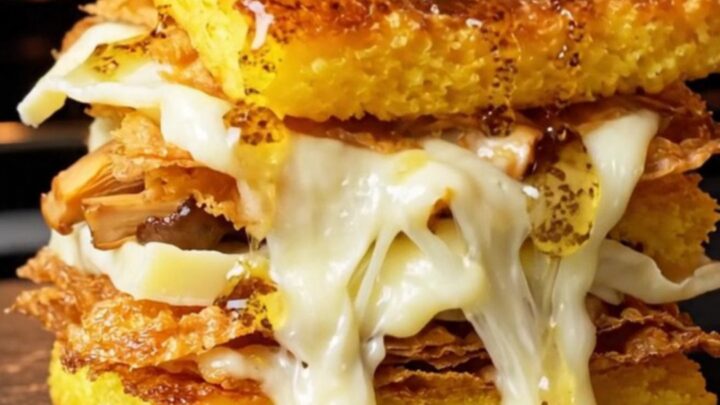
Crispy Fried Polenta and Taleggio Mushroom Mille-Feuille Step-by-step instructions
- Prep
- Cook
- Total
- Serves
- 4
Before you start
Before beginning, ensure your parmesan polenta is prepared and spread into the sheet pan so it has ample time to chill. Clean the chanterelle mushrooms thoroughly with a soft brush to remove any forest debris, keeping them as dry as possible.
Have your taleggio sliced into uniform pieces that fit within the footprint of your polenta squares to prevent excessive mess during baking.
Ingredients at a glance (7)
- 2 cups parmesan polenta, cooked and hot
- 120 g chanterelle mushrooms, cleaned
- 2 tbsp butter
- 100 g taleggio cheese, sliced
- 3 tbsp clarified butter
- 4 sage leaves, fresh
- 1 tsp truffle oil
Instructions
Setting the Foundation
- Prepare Polenta SquaresPour the hot parmesan polenta into a thin 8mm sheet pan, spreading it evenly. Chill in the refrigerator for at least one hour until firm. Once set, cut the polenta into 6cm squares using a sharp knife to ensure clean, professional edges for your stacks.Look for Polenta is firm and holds its shapeTip Ensure the polenta is completely cold before cutting to prevent it from breaking during assembly.
The polenta should be completely cold and set into a firm, sliceable sheet. Check that the texture is consistent throughout the pan, as any soft spots will cause the squares to break when you attempt to lift them out for assembly. The squares should be uniform in size to ensure they stack straight and tall.
Layering the Flavors
- Sauté Filling and AssembleSauté the chanterelle mushrooms in butter until golden and fragrant. To assemble the mille-feuille, place a polenta square on a tray, top with the sautéed mushrooms and a slice of taleggio cheese, then repeat the layering process with a second and third polenta square to create the stack.Look for Mushrooms are tender and brownedTip Keep the layers centered to ensure the stack stands tall and stable during the searing process.
The chanterelles should be cooked down until they are tender and have released their excess moisture, which prevents the stack from becoming soggy.
Ensure the taleggio slices are positioned centrally on the polenta squares, leaving a small border so the cheese does not spill over the sides excessively during the final baking stage.
Crisping and Finishing
- Sear and BakeHeat clarified butter in a skillet over medium-high heat. Sear the polenta stacks for 3 minutes on each side until golden and crispy. Transfer to a baking sheet and flash in a 425°F (218°C) oven for 5 minutes until the taleggio is melted and fused. Top with a fried sage leaf and drizzle with truffle oil before serving.Look for Cheese is bubbling and polenta is crispyTip Watch the oven closely to ensure the taleggio melts without burning the edges of the polenta.
The stacks must sound hollow and crisp when tapped gently with a spatula. The final result should be a beautiful, golden-brown structure with a fragrant aroma of truffle and melted cheese. The sage leaves should be lightly fried until they are crisp and have released their oils into the clarified butter.
Common mistakes
Avoid overcrowding the skillet during the searing phase, as this will lower the temperature and lead to soggy polenta rather than a crispy exterior.
Do not skip the chilling time for the polenta, as it will be impossible to cut into neat, stable squares if the starch has not fully set. Finally, ensure the oven is fully preheated to 425°F to ensure the cheese melts quickly without drying out the polenta.
How to tell it’s done
The polenta stacks are finished when they show a deep, uniform golden-brown crust on all seared sides. The taleggio cheese should be visibly softened and oozing slightly from the layers, indicating it has reached the ideal melting point.
The entire stack should hold its shape when lifted with a spatula, feeling firm yet delicate to the touch.
Up next · Part 3 of 3
2 variations · storage & make-ahead · 3 answers · printable card
Tips, FAQ & printable recipe (Part 3)← Back to the ingredients (Part 1)